The Retirement Systems of Alabama (RSA) Member Online Services (MOS) website allows Members convenient 24 hours a day, 7 days a week access to their account information. Member Online Services is a secure site enabling members to view their account information such as service and contributions, update their contact information, or request benefit and service purchase estimates. Members can also register for seminars, view a list of member correspondence items, and access their annual account statements. In addition, members can also perform transactions such as requesting an estimate of the cost to purchase service credit, make payments, and apply for retirement benefits online. The MOS website reduces the amount of data entry activities for the RSA staff since Members can update their retirement account information online.
1.1 What You Will Be Able To Do
At the end of this training, you will be able to:
· Register as a new user
· Maintain user ID, password, and secret question credentials for logging in
· Download available forms
· Maintain address and contact information
· View account summary information
· View service and contribution history
· View and print annual statements
· Request a letter containing account information such as total service, contribution, and interest
· View and upload member correspondence
· View and change beneficiary information
· Navigate the secure message center and submit a question
· Request a benefit estimate
· Request a service purchase calculation
· Check the status of an online service purchase request and view the history of prior and pending payments
· Apply for retirement or disability
· Request a refund
· Report
a death
The instructions in this guide assume you know the basics of navigating within a browser-based system. All “member” information shown within the screen shots in this document is fictitious and does not contain any Personally Identifiable Information (PII) or Protected Health Information (PHI).
The Login screen is the starting point to access the MOS website, but before a member logs in for the first time, he or she must register. To register for a MOS account, the member needs to follow the steps outlined here and enter all required information on each screen. If the member does not enter the required information, he or she will not be able to successfully register on the MOS website. If the member incorrectly enters information 10 consecutive times, such as PID, last 5 digits of Social Security Number, Last Name, or DOB, the registration process will be locked. If a member’s account is locked, he or she will need to contact the RSA to unlock it.
2.1 Registering for Member Online Services (MOS)
Step 1 -- From the RSA website (http://www.rsa-al.gov), click the MOS Login link to access MOS (Member Online Services).
Step 2 -- Click on the link called Need to register?.

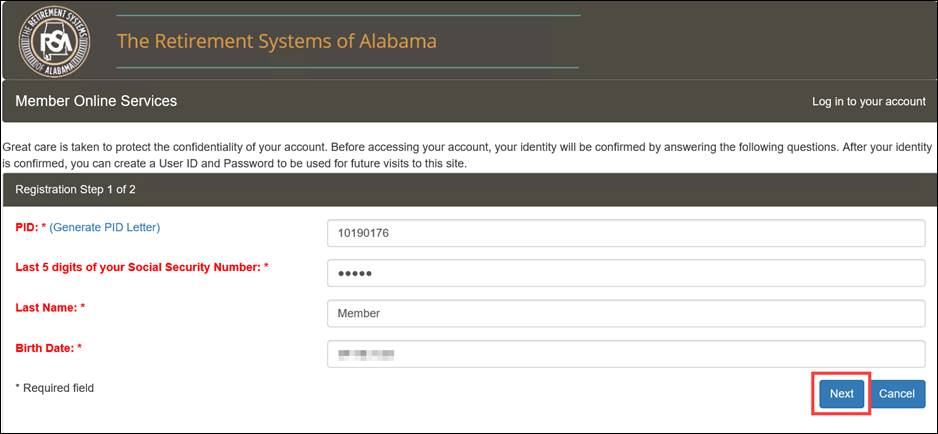
Step 3 -- Enter PID, Last 5 digits of your Social Security Number, Last Name, and Birth Date on the registration page.

Step 4
-- Click
![]() .
.
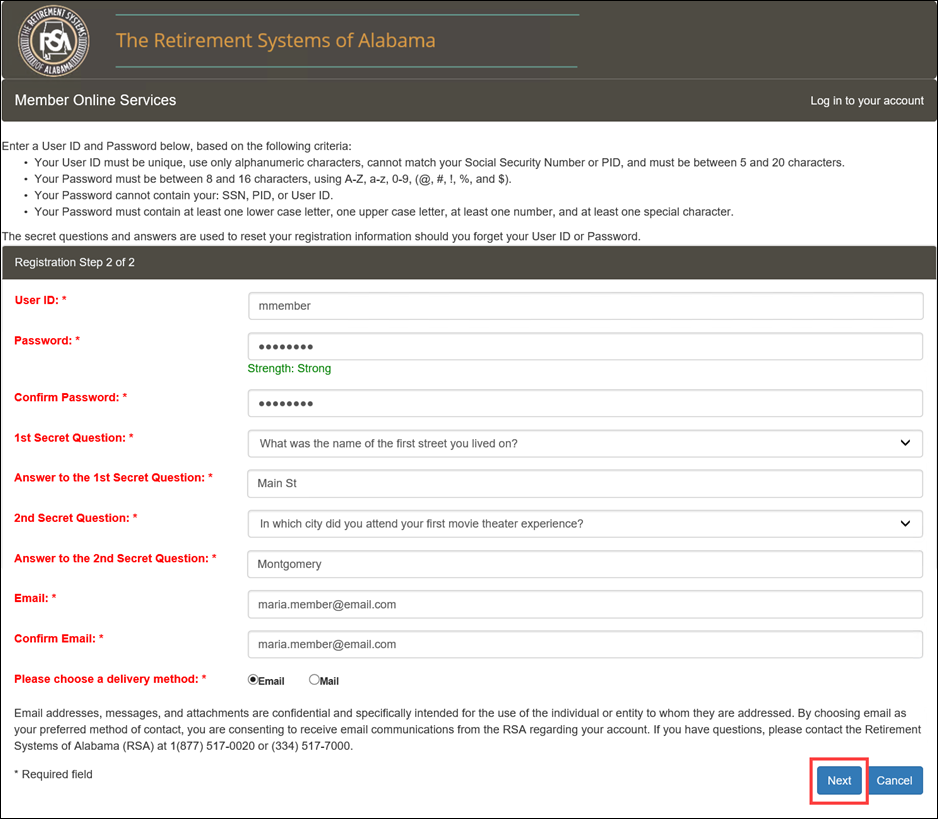
Step 5 -- Enter a User ID, Password, Confirm Password, select a 1st Secret Question and an Answer, select a 2nd Secret Question and an Answer, enter an Email address, Confirm Email, and choose a delivery method.
Note: Your User ID must be unique, use only alphanumeric characters, cannot match your Social Security Number or PID, and must be between 5 and 20 characters.
Note: Your Password must be between 8 to 16 characters using characters A-Z, a-z, 0-9, @, #, !, %, and $.
Note: Your Password cannot contain your Social Security Number, PID, or User ID.
Note: Your Password must contain at least one lower case letter, one upper case letter, one number, and one special character.

Step 6
-- Click
![]() .
.
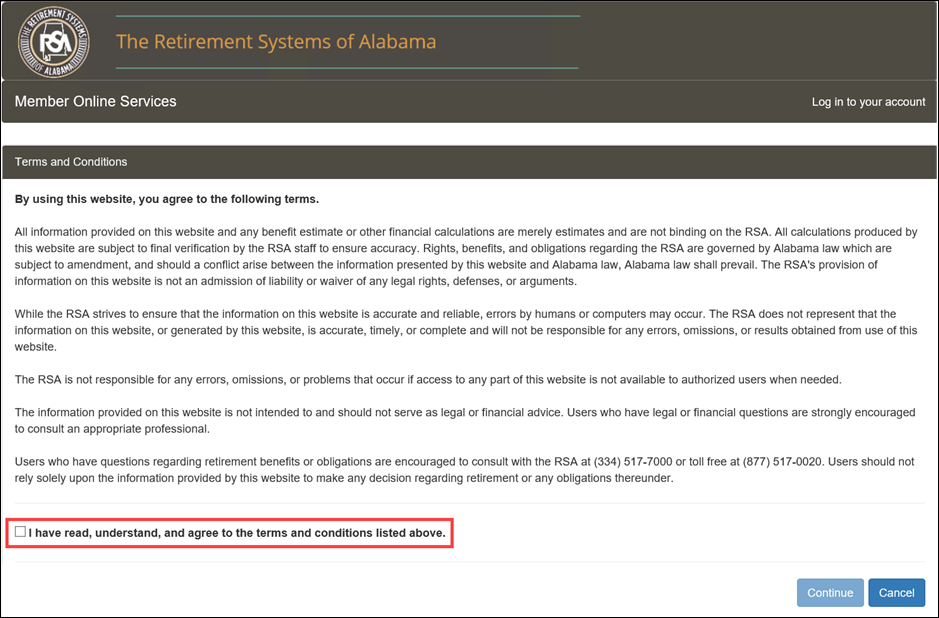
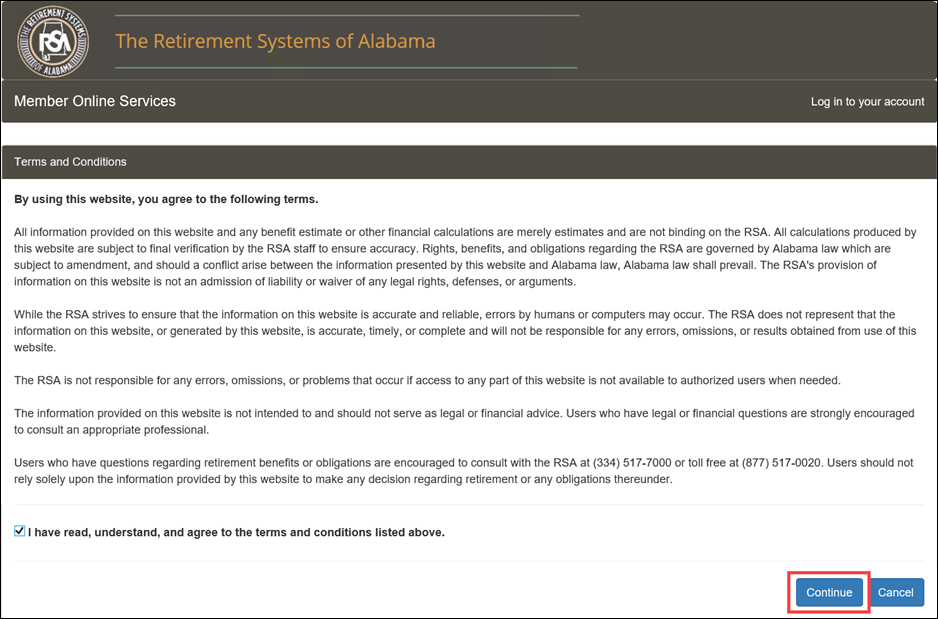
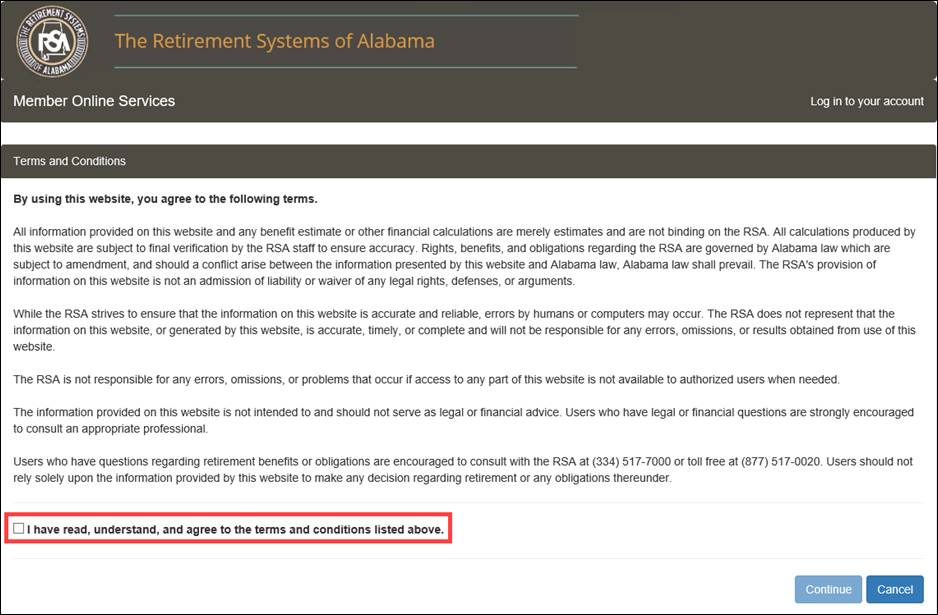
Step 7 -- Read the Terms and Conditions section. Select the checkbox to confirm that you have read, understand, and agree.
Step 8
-- Click
![]() .
.
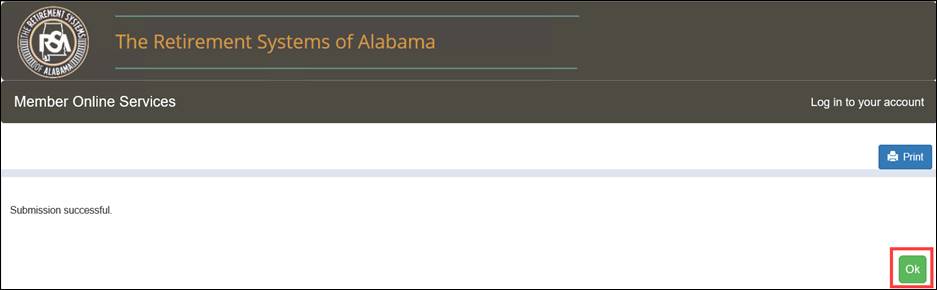
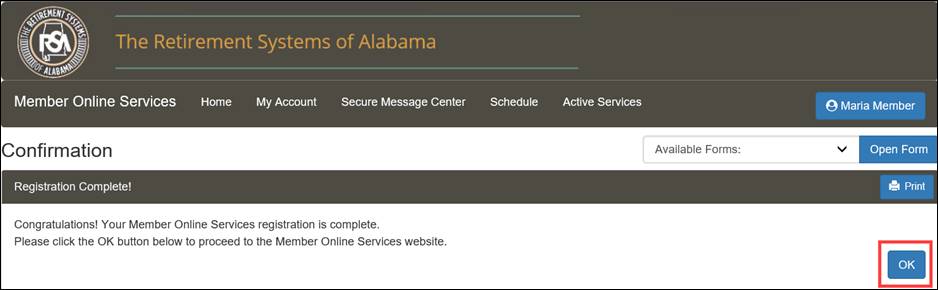
Step 9
-- A
confirmation message is displayed on the screen. Click ![]() .
.
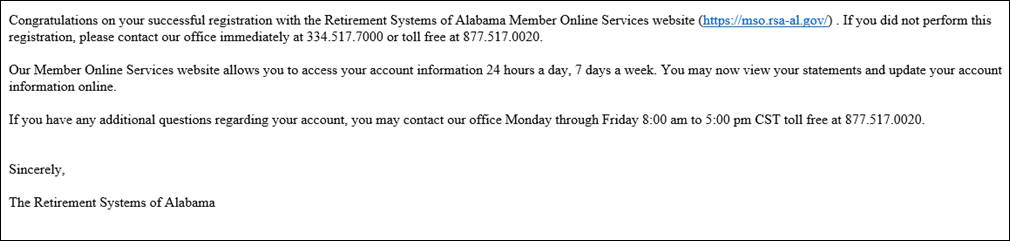
Step 10 -- A MOS Registration email is sent to the member.
Note: A registration confirmation letter (RSA-586) will be mailed upon the member’s initial registration only.
Step 11 -- A
pop-up window displays asking you to verify your contact information.
If you need to make changes, click ![]() and
you will be taken to the Contact Information screen (described
later in this guide). If the information is accurate and no changes are
needed, click
and
you will be taken to the Contact Information screen (described
later in this guide). If the information is accurate and no changes are
needed, click ![]() .
.
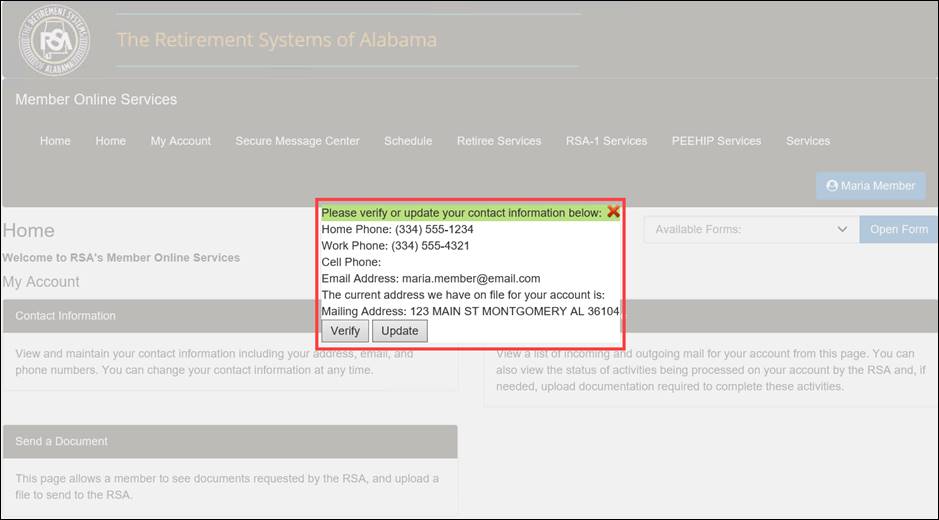
You are then logged into the system. The Home page displays.
After you register for a MOS account, you can use your User ID and Password to log into the MOS website 24 hours a day, 7 days a week to access your account information. The following steps describe how to log into the MOS website.
Note: If you try to log in 10 consecutive times with the incorrect User ID, Password, or security question your account will be locked. If your account is locked, you will need to contact the RSA to unlock it. The RSA will reset your account access and you will have to re-register on MOS.
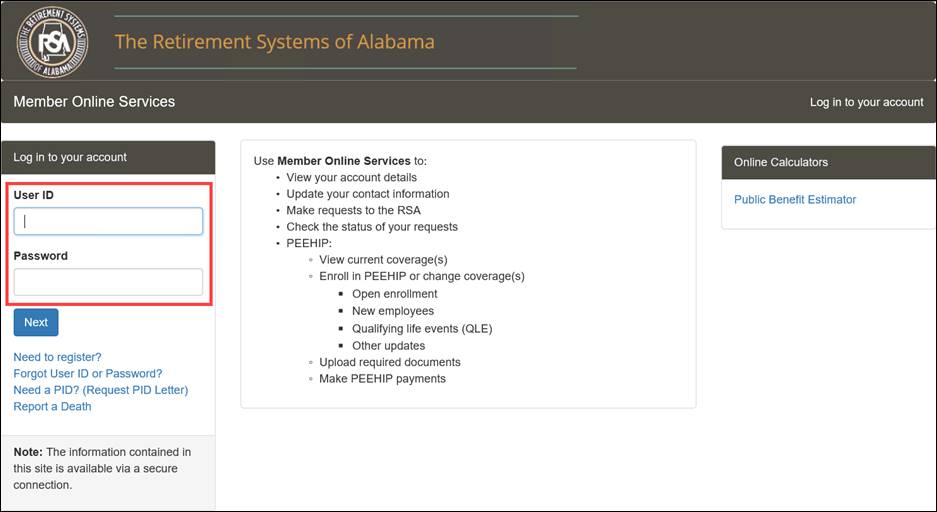
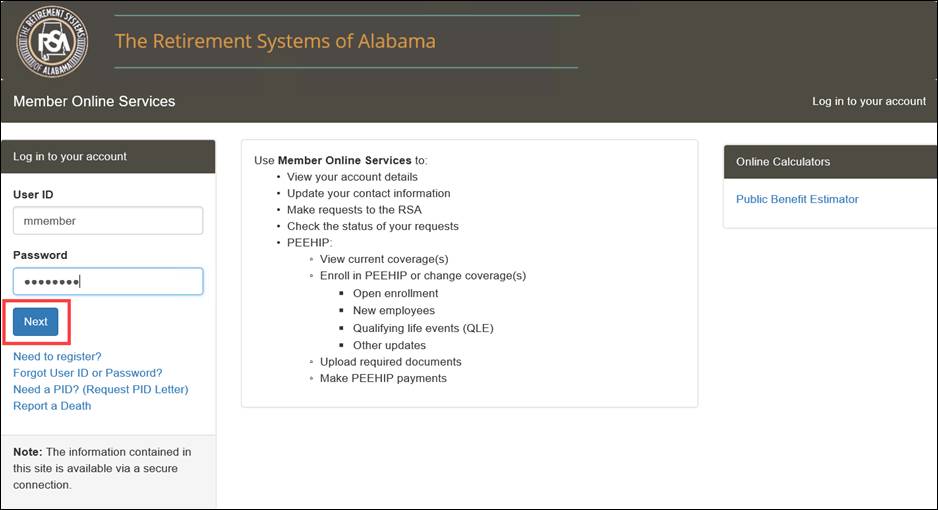
Step 1 -- In the Log in to your account section, enter your User ID and Password into the fields.
Step 2
-- Then
click ![]() .
.
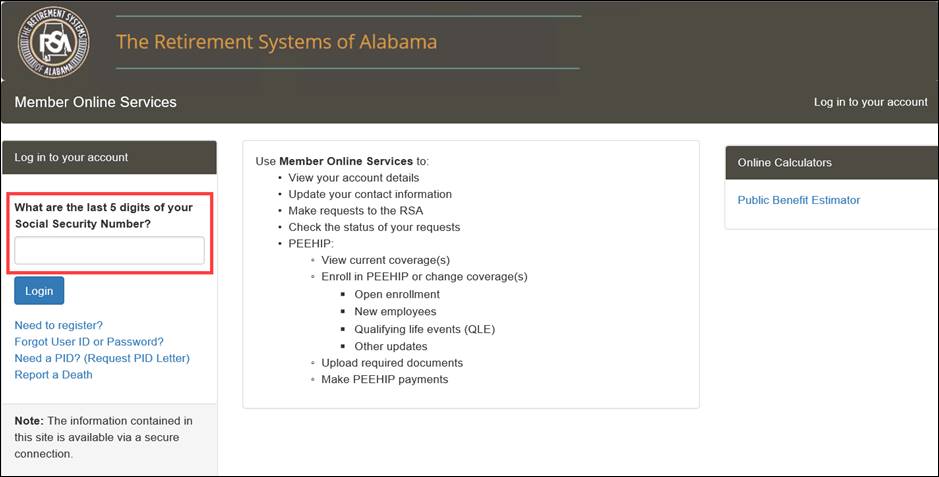
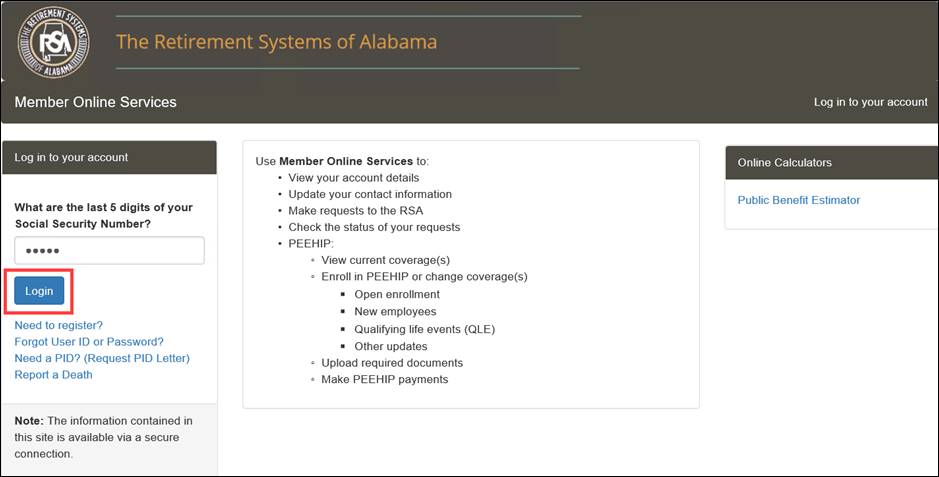
Step 3 -- Answer the security question.
The security questions display randomly and can be one of the following: The Last 5 digits of the SSN (99999), Birth Date (MMDD), Birth Date (YYYY), or Zip Code (99999).
Step 4
-- Click
![]() .
.
Step 5 -- Read the Terms and Conditions section. Select the checkbox to confirm that you have read, understand, and agree.
Step 6
-- Click
![]() .
.

The system verifies that the credentials entered are valid. You are redirected to the Home tab if the credentials are valid.
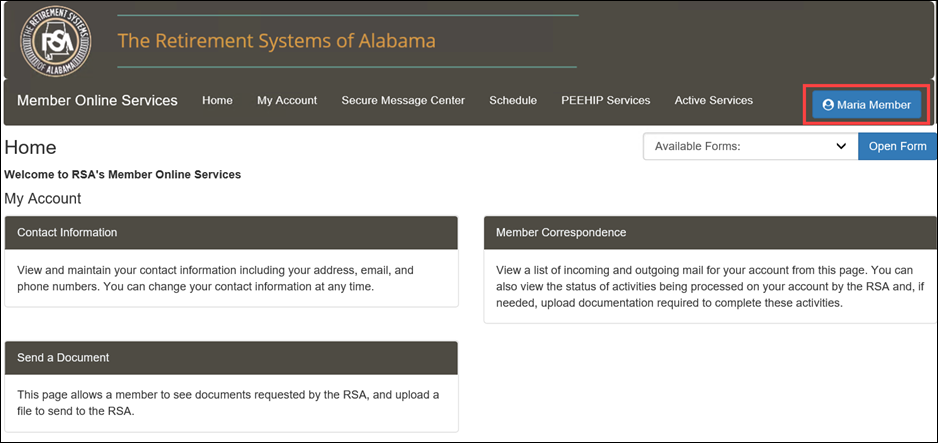
The logout feature allows you to leave the MOS website securely. When you are logged out, you cannot access any of the screens within the MOS website. The Log Out option appears when you click on your name in the top right-hand corner of every screen on the MOS website.
Step 1 -- Click on the blue box with your name in it, in the upper right corner of the screen.
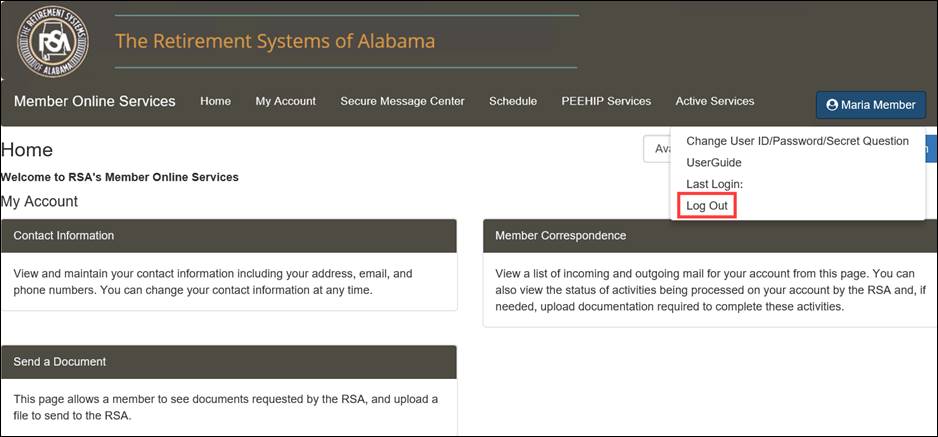
Step 2 -- Select the option to Log Out.
As a security measure, the MOS website contains a timeout feature. If there is no activity (i.e., not taking actions such as saving, navigating to different pages, or confirming information) performed on the website for 15 minutes, or if you close your browser window, you will automatically be logged out of the website and returned to the Login screen. A pop-up appears after two minutes of inactivity that asks if you want to continue or logout. To log back into the MOS website, re-enter your User ID and Password and answer one of the security questions.
2.5 Recovering a Lost User ID or Password
If you forget your User ID or Password, you can obtain a new one by clicking on the Forgot User ID or Password link on the Login screen and follow the steps below. You must enter all required information on each screen. If you do not enter required information, you will not be able to successfully recover your lost User ID or Password.
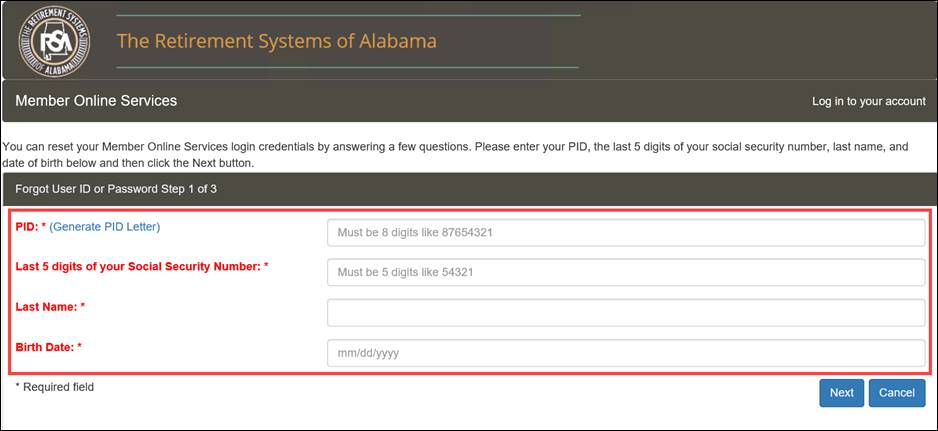
Step 1 -- Navigate to the Login screen of the MOS website. Click on the link called, Forgot User ID or Password?.

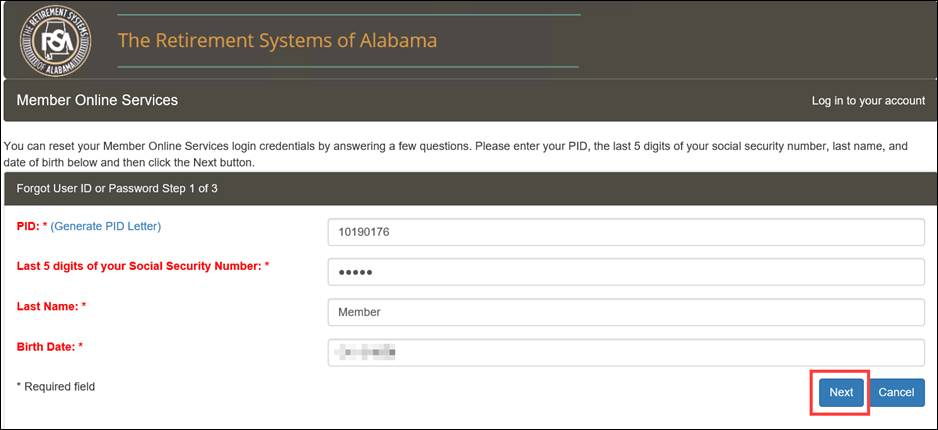
Step 2 -- Enter your PID, Last 5 digits of your Social Security Number, Last Name, and Birth Date.
Step 3
-- Click
![]() .
.
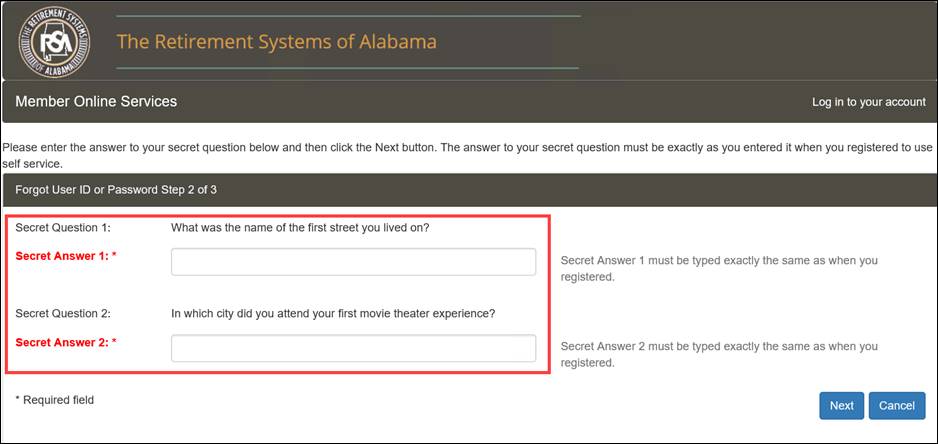
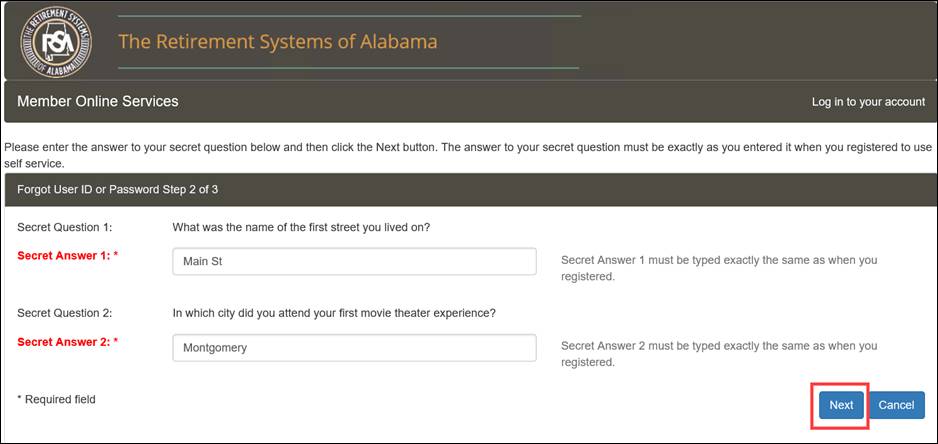
Step 4 -- Enter the answers to Secret Question 1 and Secret Question 2.
Step 5
-- Click
![]() .
.
Step 6 -- The system populates the User ID in the User ID field. Enter a new password in the Password field, if needed. Re-enter the password in the Confirm Password field to confirm the password was entered correctly.
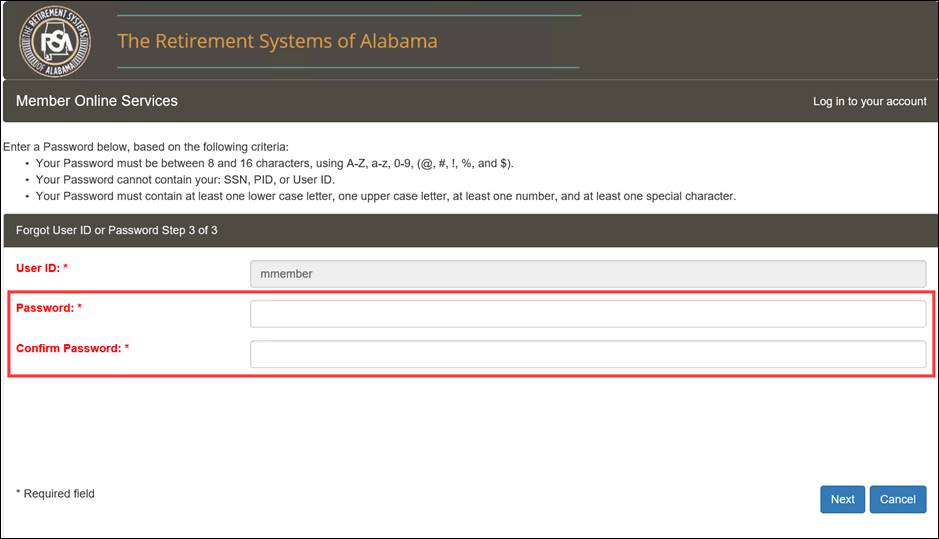
Step 7
-- Click
![]() .
.

Step 8 -- Read the Terms and Conditions section. Click the checkbox to confirm that you have read, understand, and agree.
Step 9
-- Click
![]() .
.
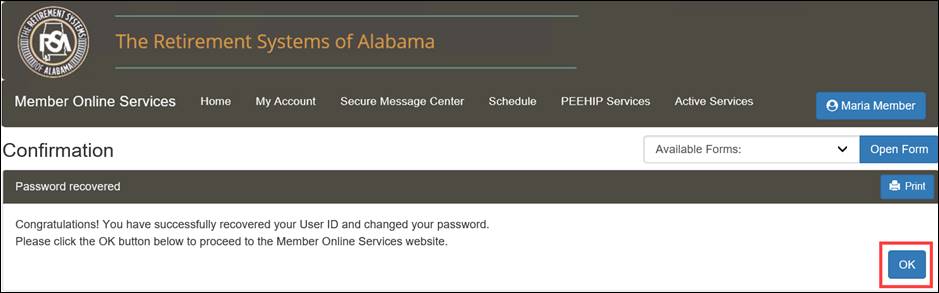
Step 10
-- A
confirmation message appears. Click ![]() .
.
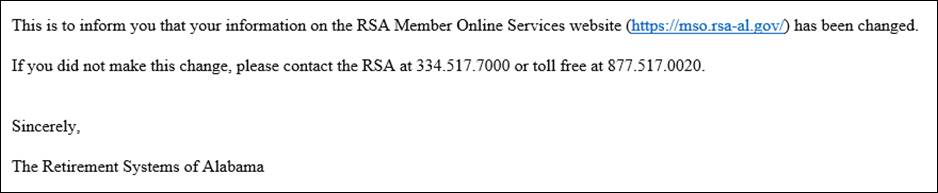
Note: A correspondence (RSA-N847) User ID / Password Change email is generated.
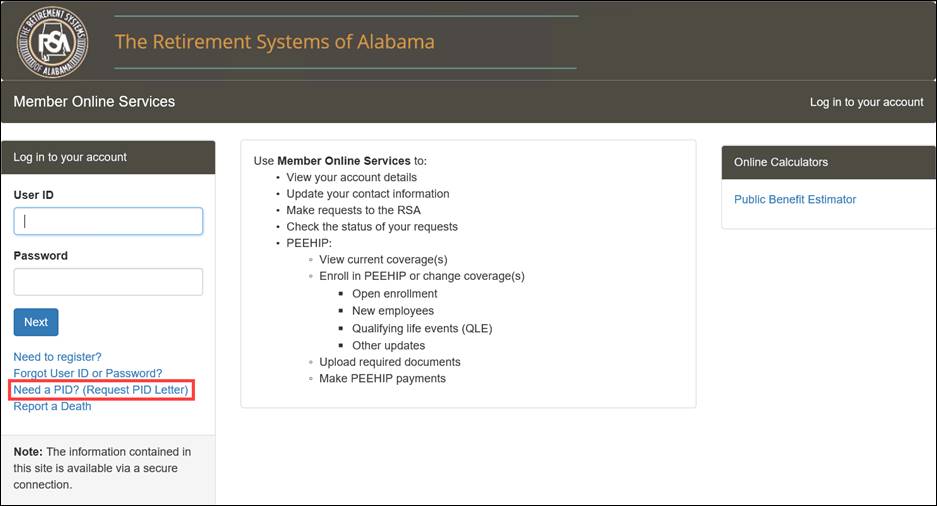
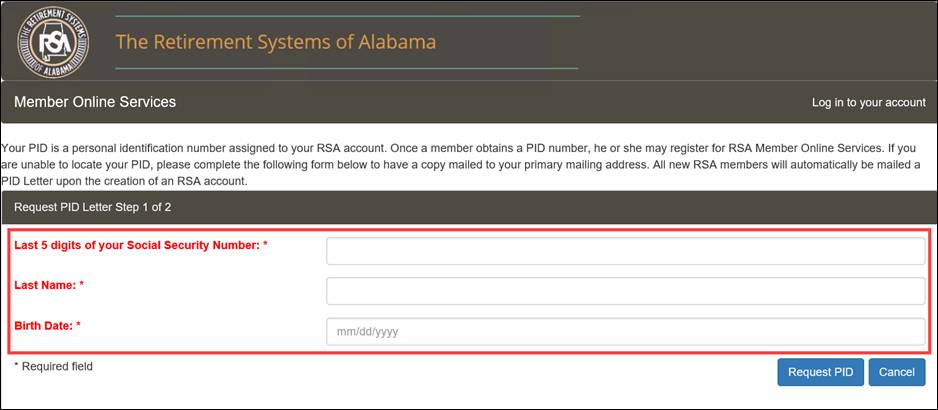
Members can request a PID letter from the RSA if they do not already know their PID. This can be done from either the Login screen or during registration. You will need to verify the Last 5 digits of your SSN, Last Name, and Date of Birth. If all the entered information is correct, a letter with your PID will be mailed to your address on record with the RSA within one business day.
To request a letter with your PID information follow the steps below:
Step 1 -- Navigate to the Login page of the MOS website. Then, click on the link called Need a PID? (Request PID Letter).
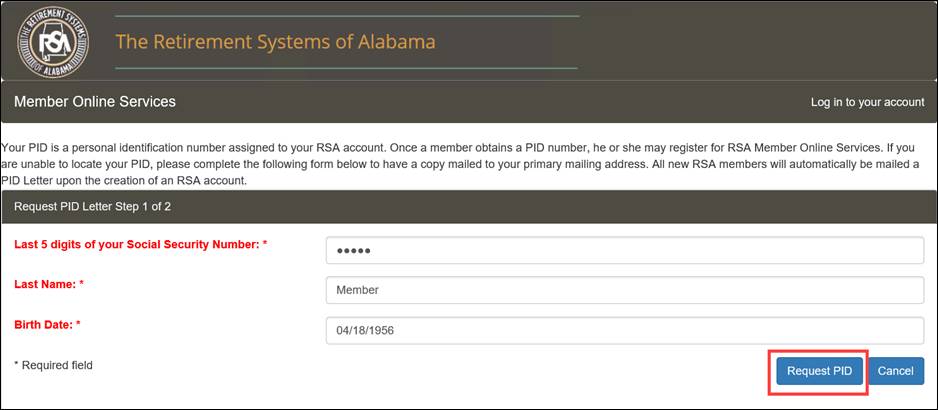
Step 2 -- Enter information in the required fields (Last 5 digits of your Social Security Number, Last Name, and Birth Date).
Step 3
-- Click
![]() .
.
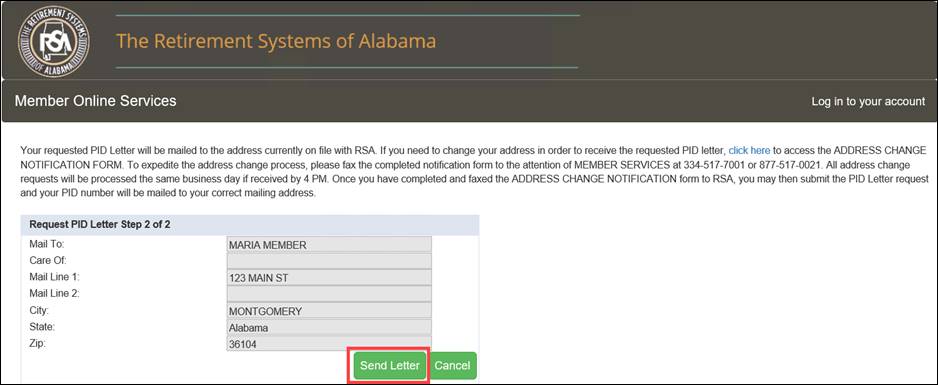
Step 4
-- The
screen displays your address of record with the RSA. Click ![]() .
.
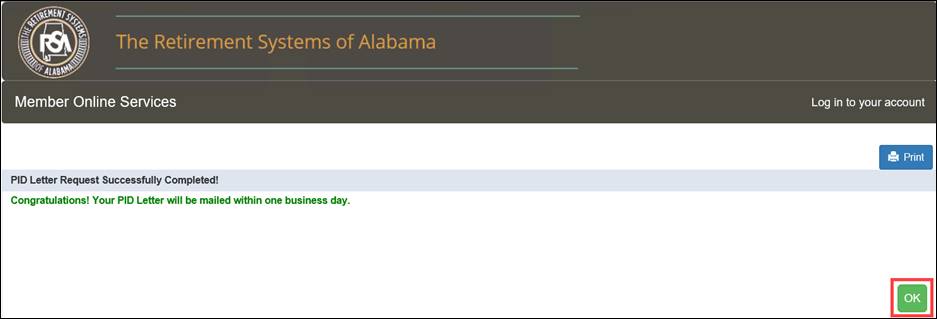
Step 5
-- A
confirmation message appears indicating your PID Letter Request was sent.
Click ![]() .
.
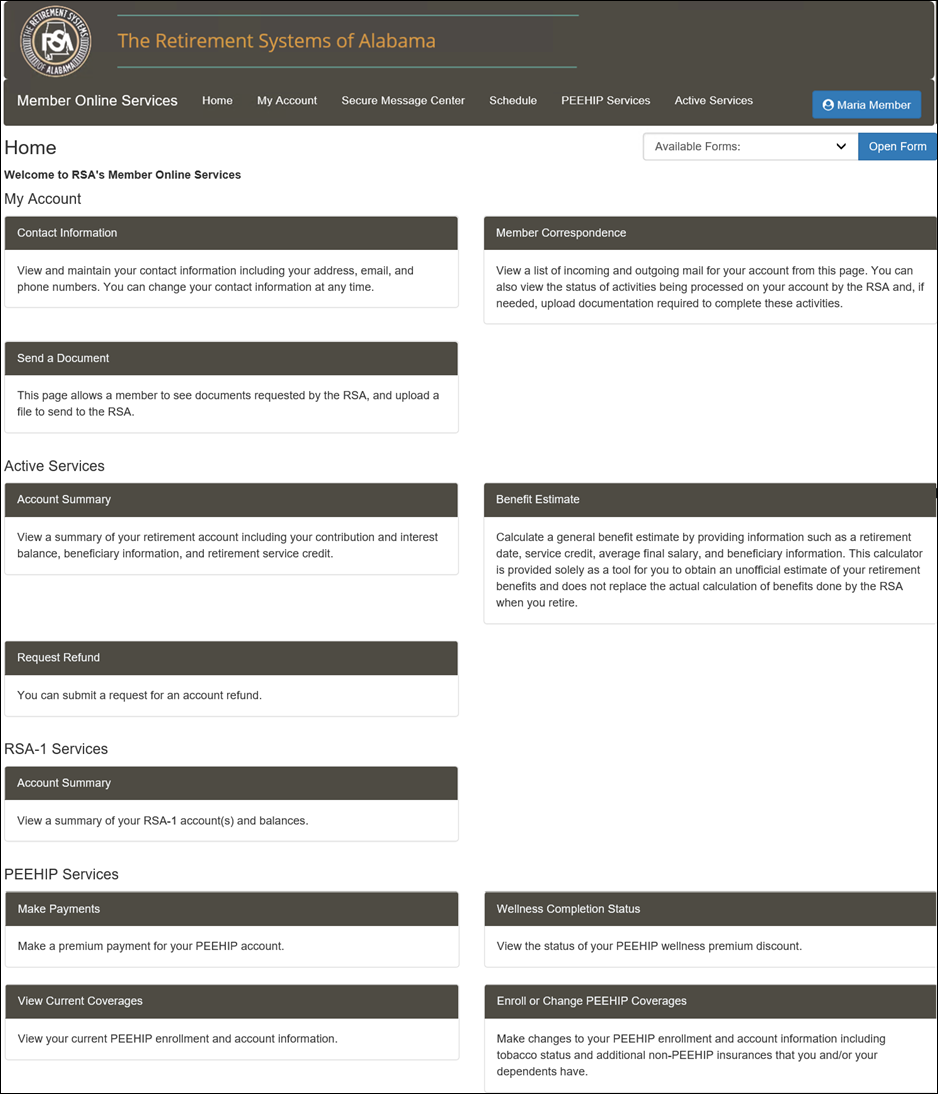
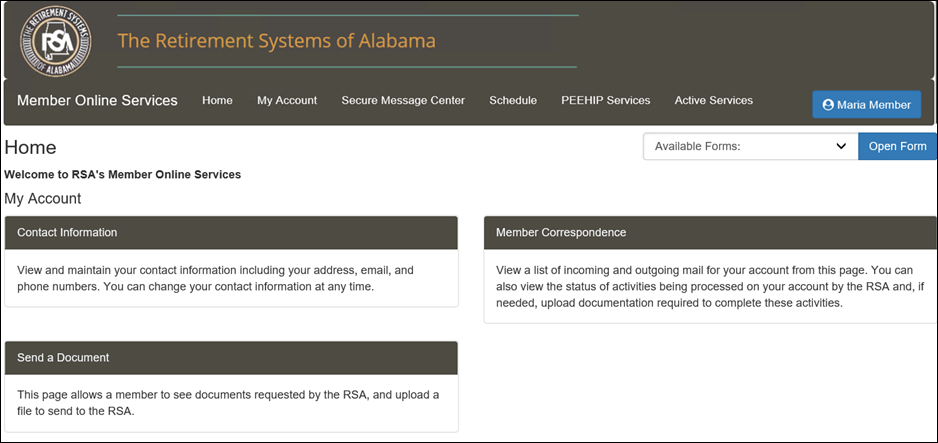
After logging into the MOS website, the Home screen displays.

From the Home screen, you can navigate to different sections of the website by clicking on the links in the lower portion of the screen. The contents on the Home screen are dynamic based on the user that is logged in.
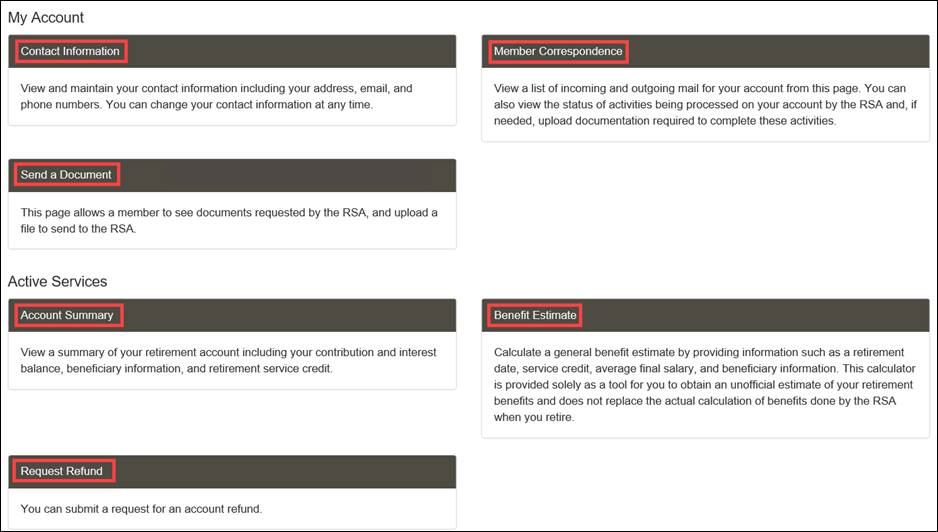
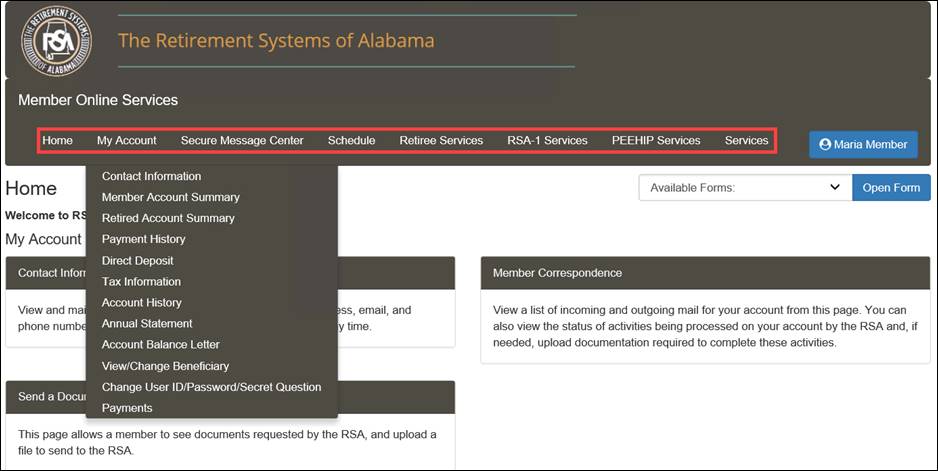
You are also able to access these screens from the drop-down menus at the top of the Home screen. These menus are available on every screen within the MOS website.
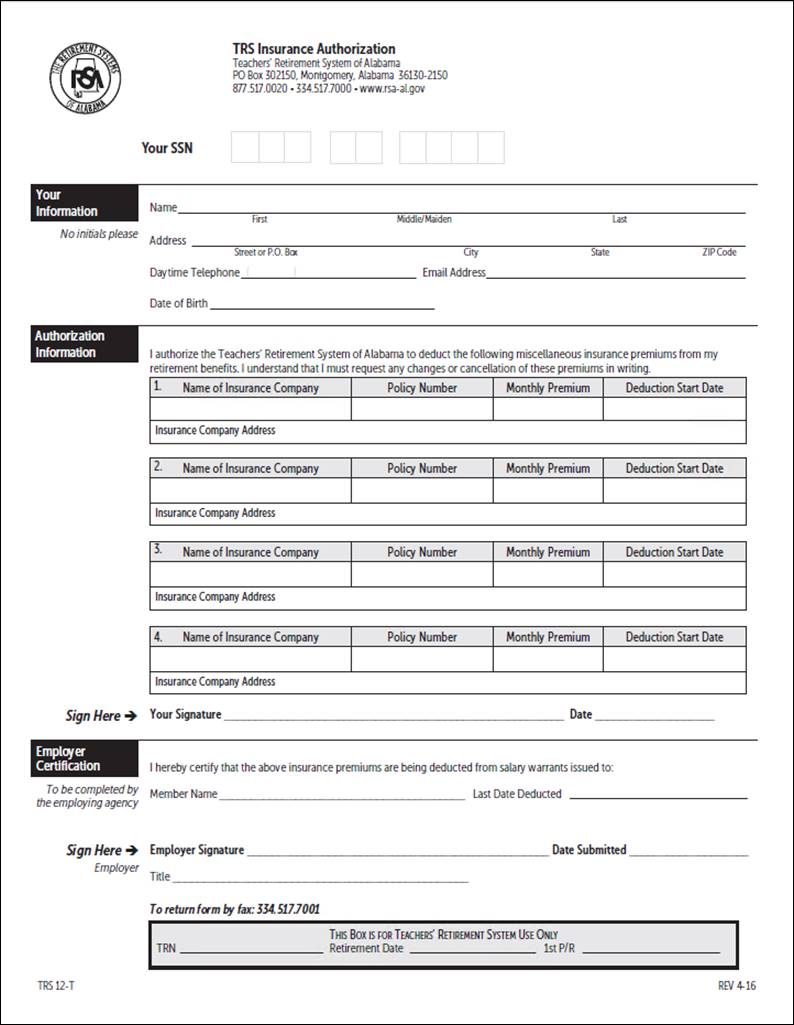
Using the MOS website, you can view and print electronic versions of forms. After printing and entering information into the form, you must mail the form to the RSA for staff to process it.
Step 1 -- The Available Forms drop-down menu is available on the right side of the screen.
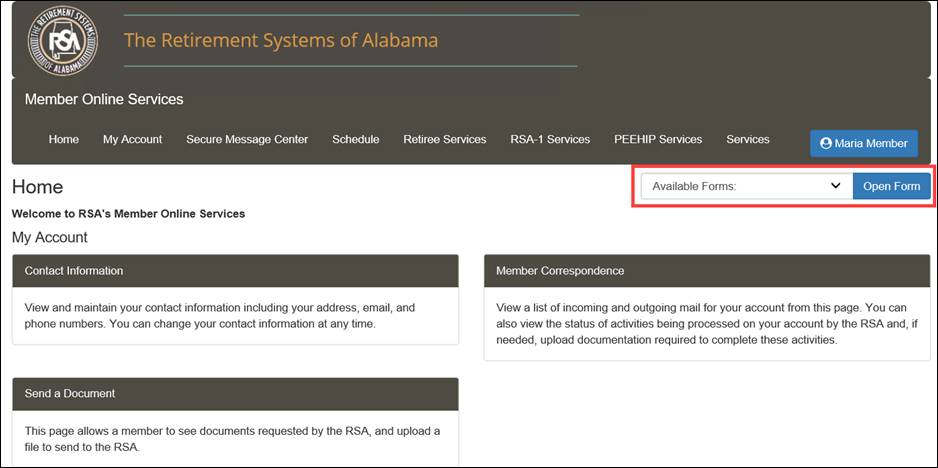
Step 2 -- Select the form you want to view from the Available Forms drop-down menu.

Step 3
-- Click
![]() .
.
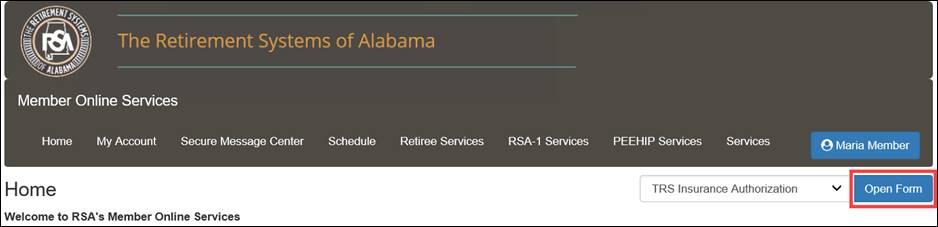
Step 4 -- An electronic version of the selected form displays and is pre-populated with your information and a bar code that will allow the RSA to process it in a more efficient manner. This form must be printed and mailed to the RSA.
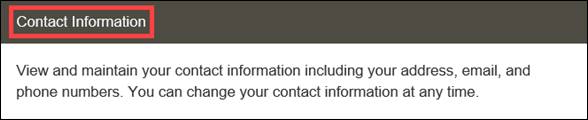
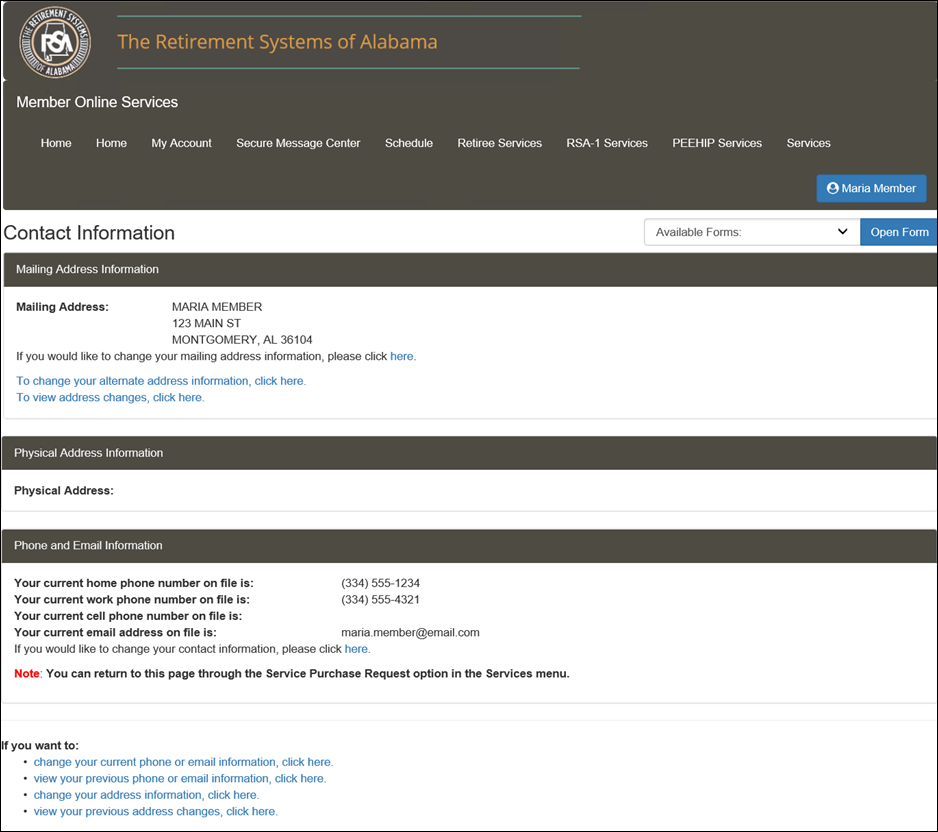
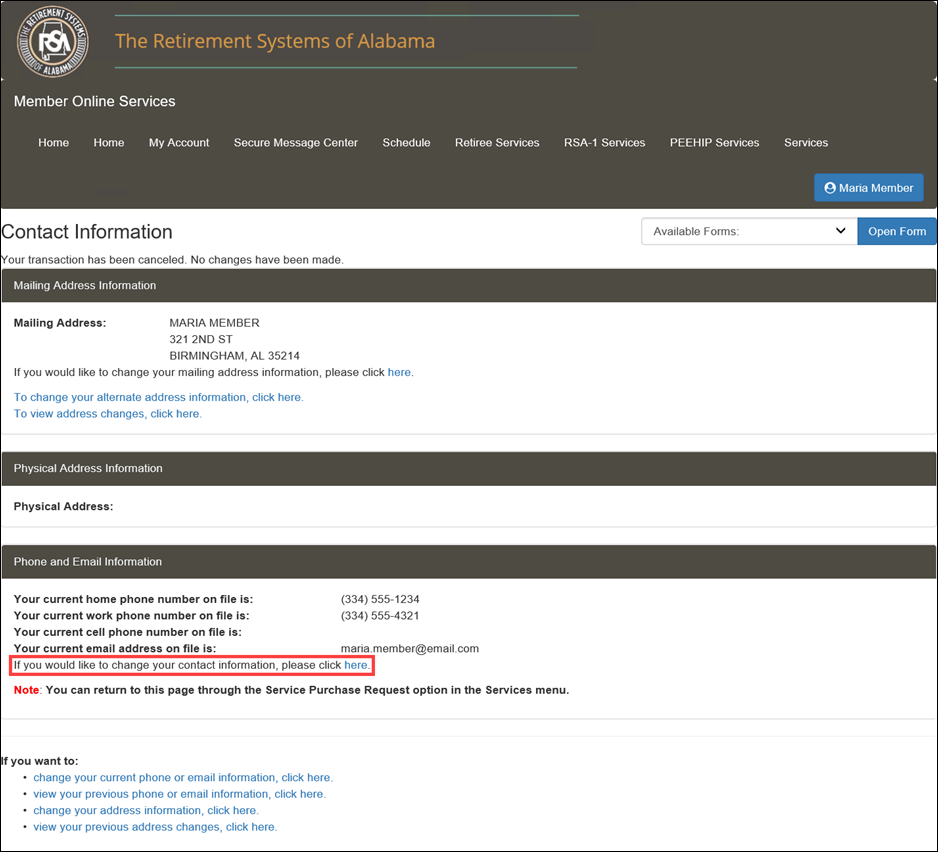
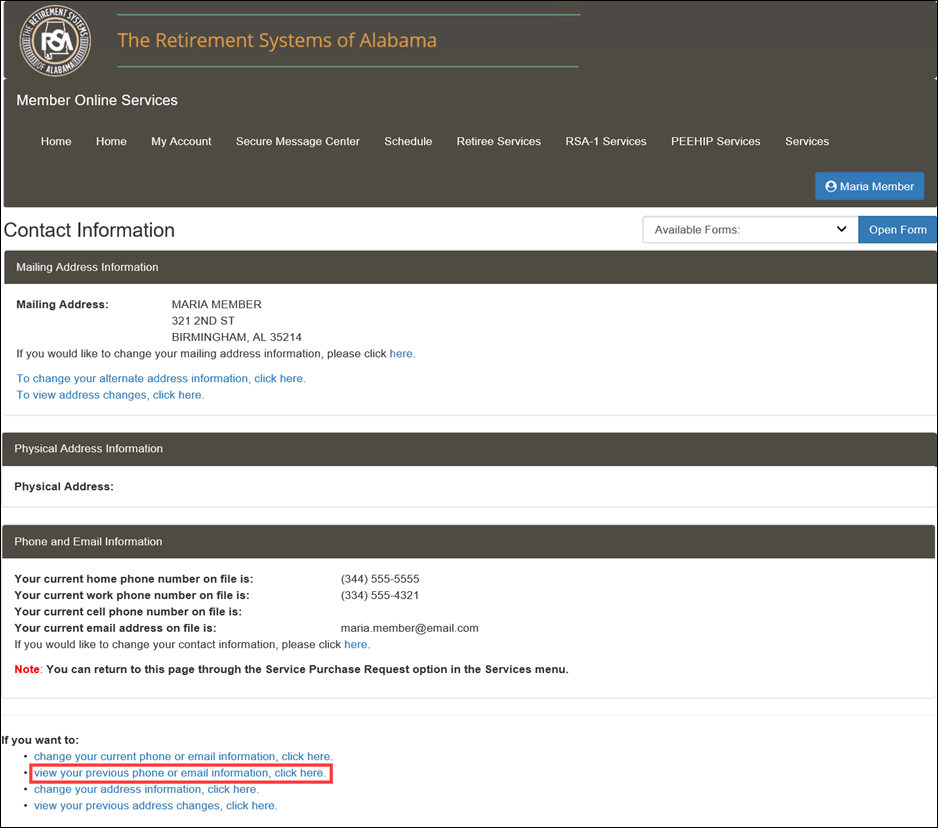
The Contact Information screen displays the contact information, such as address, phone number, or email address that is on record with the RSA.
5.1.1 Navigating to the Contact Information Screen
The following steps describe how to navigate to the Contact Information screen. You must be logged into the MOS website to follow the steps in the sections that follow.
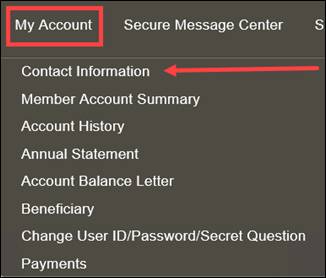
Step 1
-- Navigate
to the Contact Information screen by clicking either ![]() or the following
menu option from the menu bar:
or the following
menu option from the menu bar:
My Account > Contact Information
|
|
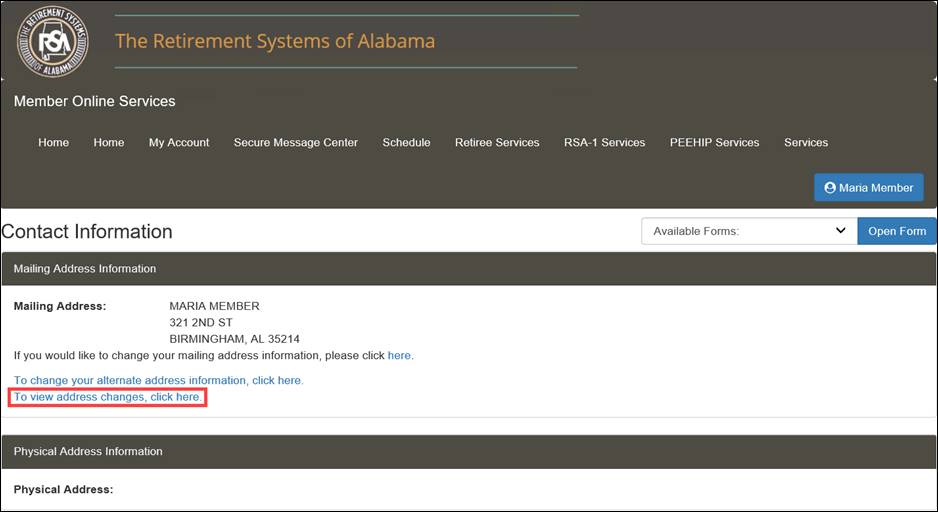
The Contact Information screen displays.
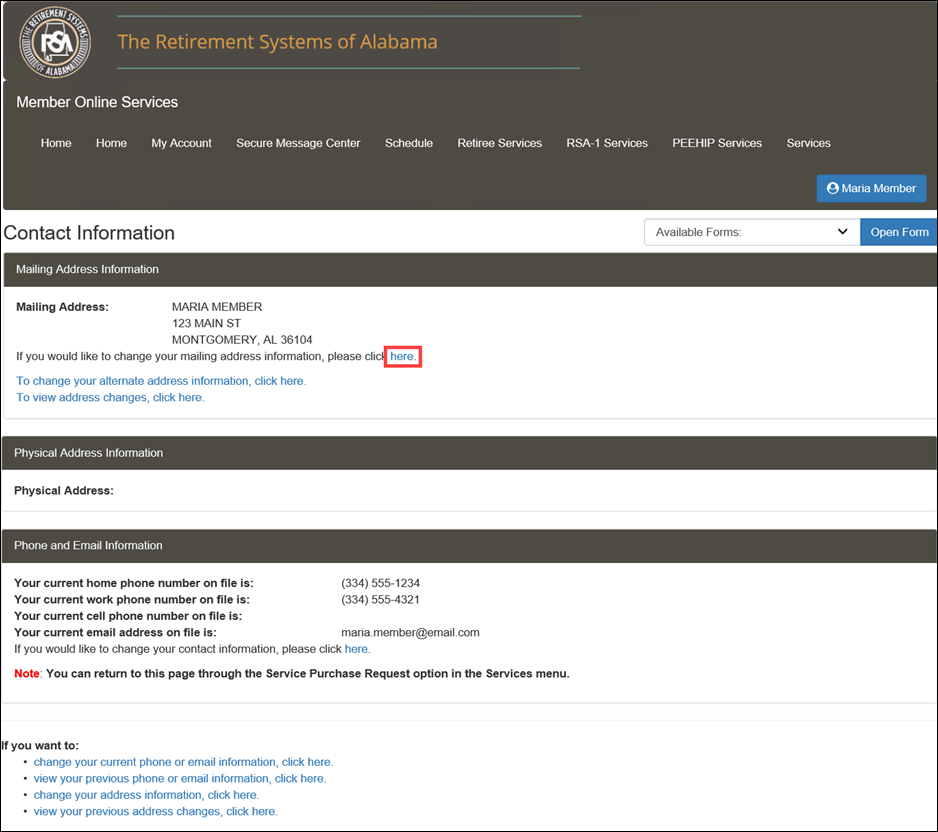
5.1.2 Changing Your Mailing Address
Follow the directions in the section called Navigating to the Contact Information Screen, then follow the steps below to change your mailing address information. You must enter all required information on each screen. If you do not enter required information, you will not be able to successfully change your mailing address information.
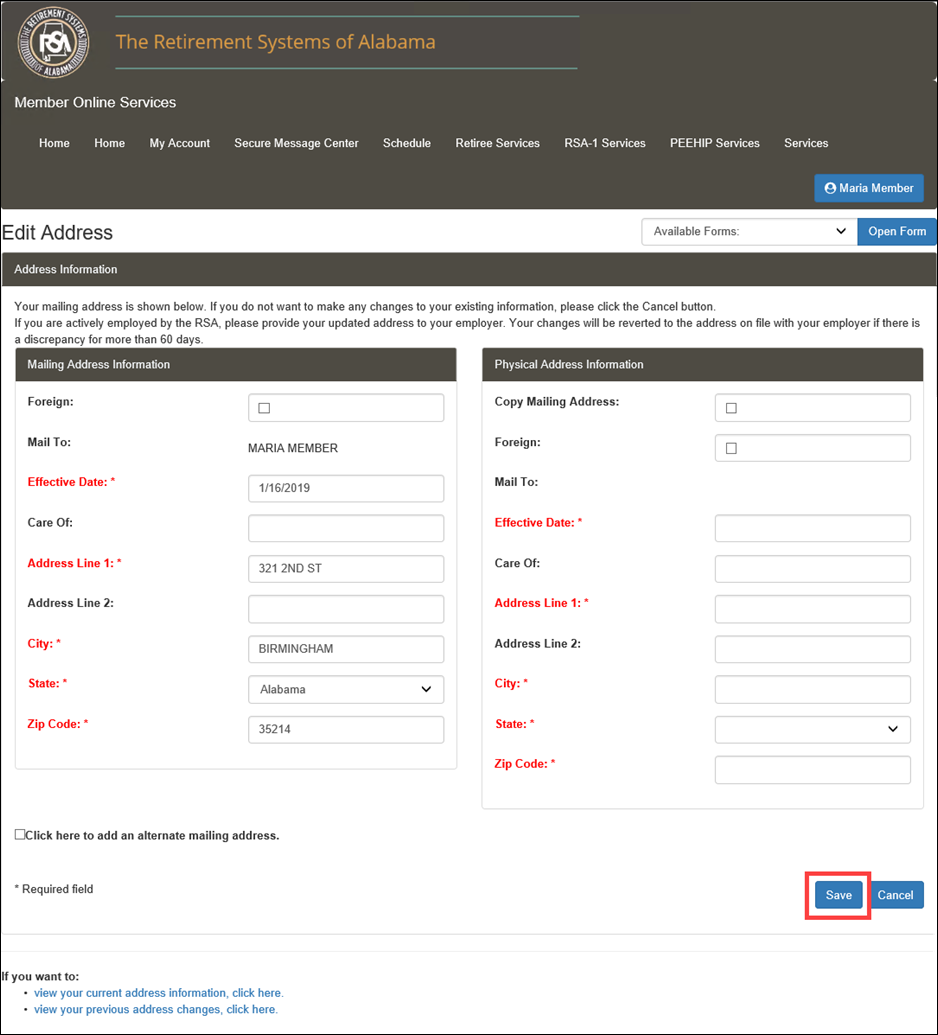
Step 1 -- In the Mailing Address Information section, click the blue link at the end of the sentence that reads: If you would like to change your mailing address information please click here.
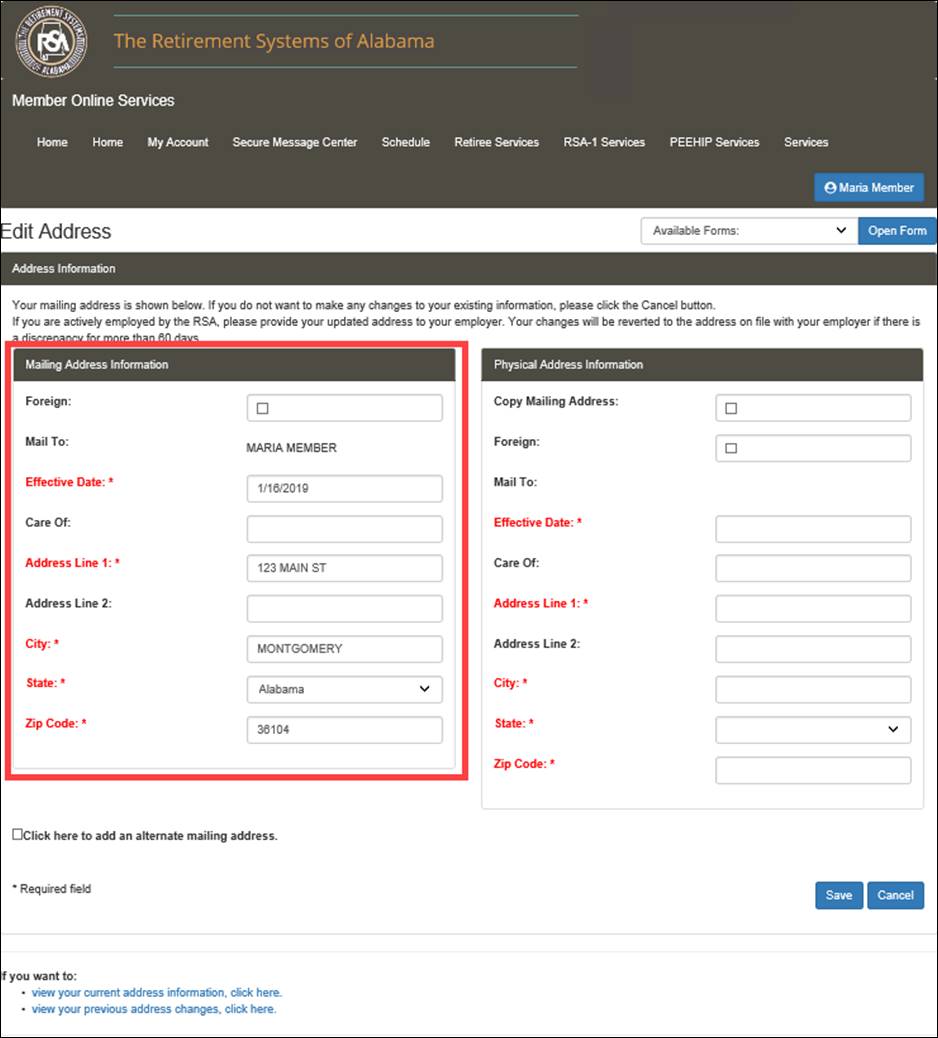
Step 2 -- In the Edit Address screen that displays, enter your new address in the Mailing Address Information section.
Note: If your physical address is different from your mailing address, you may update that information in the Physical Address Information section to the right of the Mailing Address Information section.
Step 3
-- Click
![]() .
.
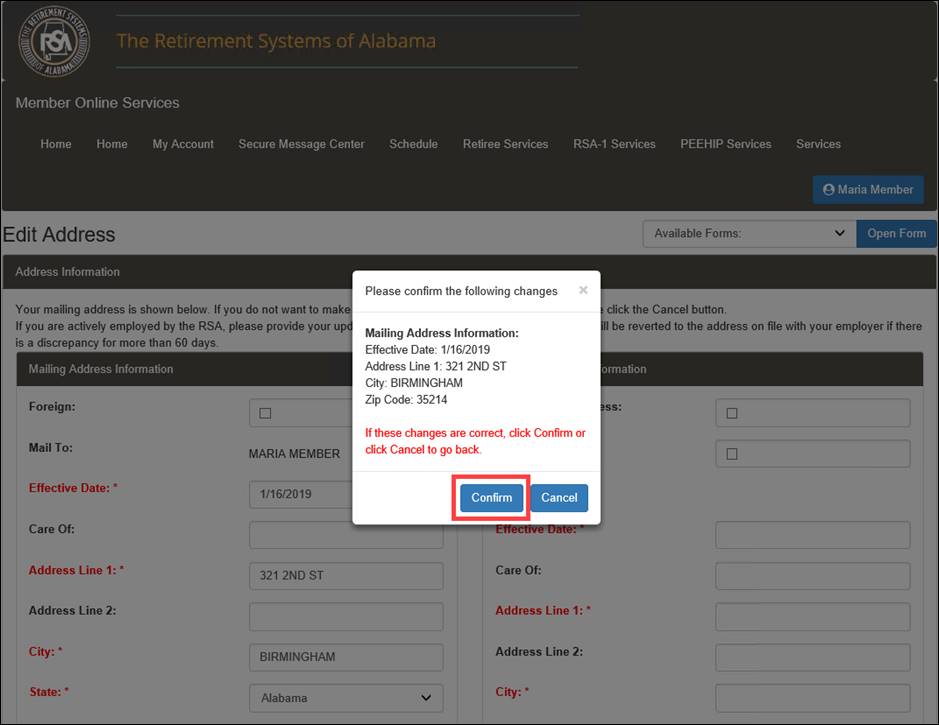
Step 4
-- The
pop-up window displays the change in mailing address. Click ![]() .
.
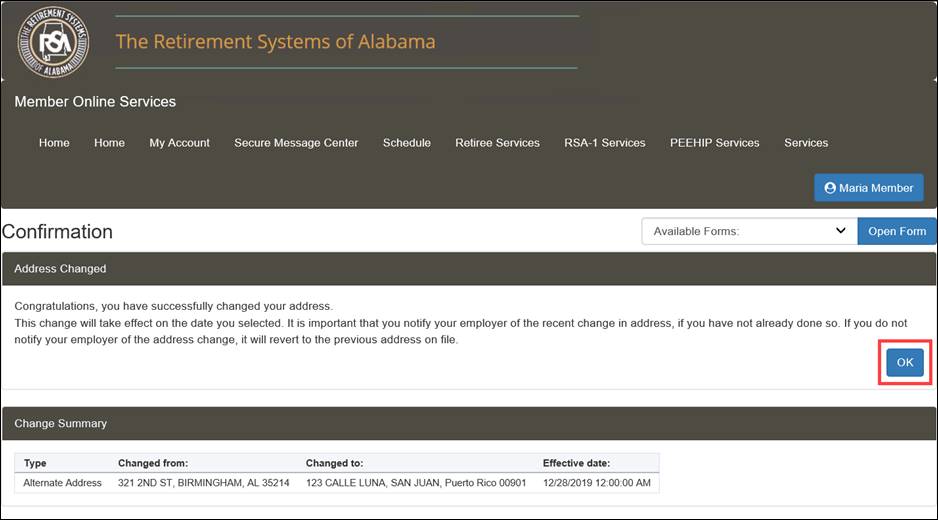
Step 5
-- The
Change Summary section shows the Changed from address, Changed
to address, and Effective date of the change. In the Mailing
Address Changed section, click ![]() .
.
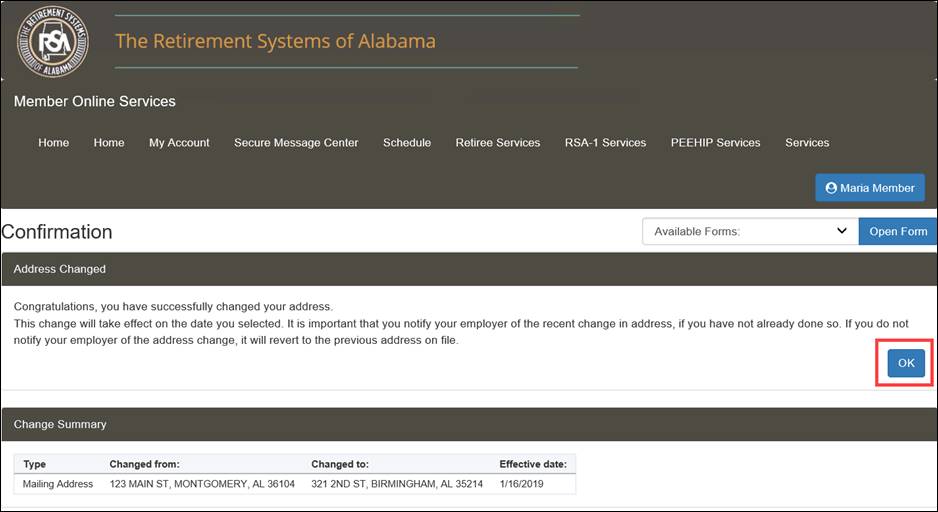
Note: An email is generated to notify the member of the change.

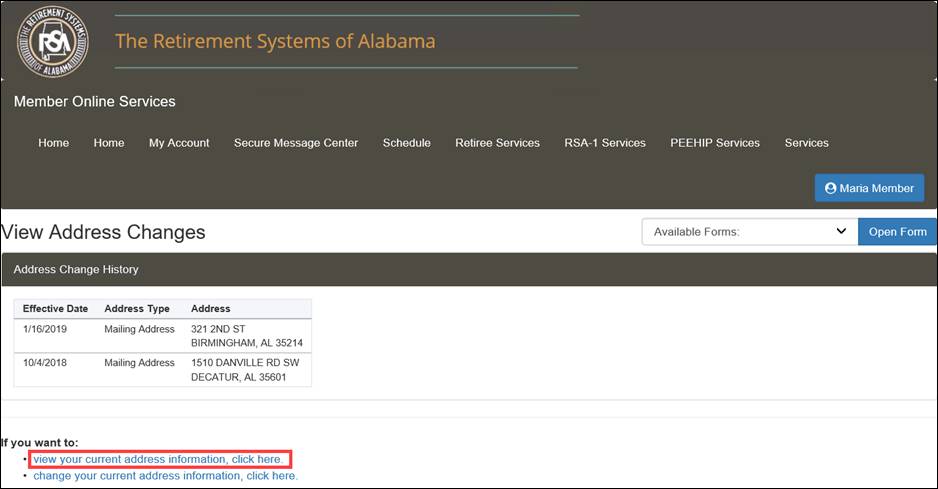
Step 6 -- The View Address Changes screen displays. Click the link called, view your current address information, click here to return to the Contact Information screen.
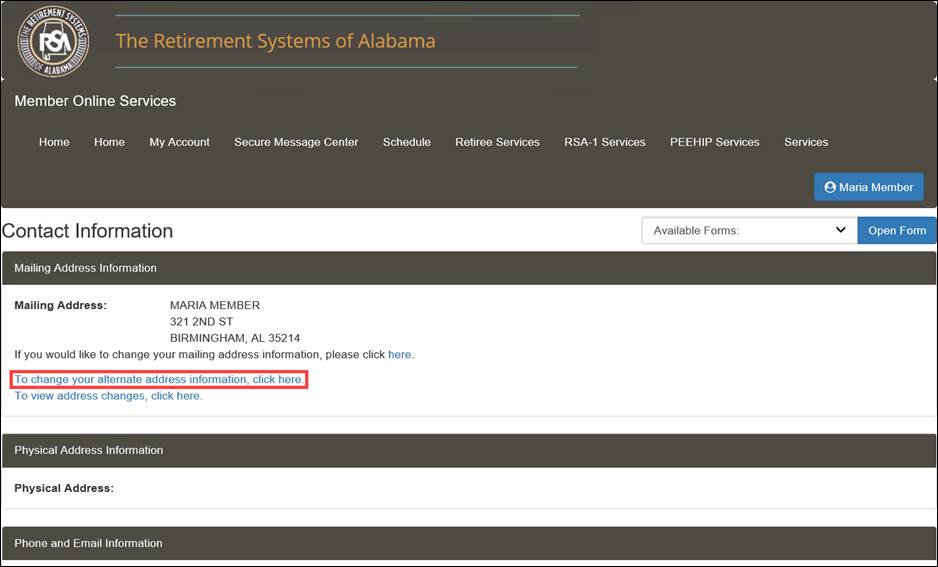
5.1.3 Adding an Alternate Address
An alternate address is a secondary mailing address that can be used temporarily. For example, if you often live at a different residence for several months per year, an alternate address should be on record with the RSA. Follow the directions in the section called Navigating to the Contact Information Screen, then follow the steps below to provide an alternate address. You must enter all required information on each screen. If you do not enter required information, you will not be able to successfully add an alternate address.
Step 1 -- Click the link called, To change your alternate address information, click here.
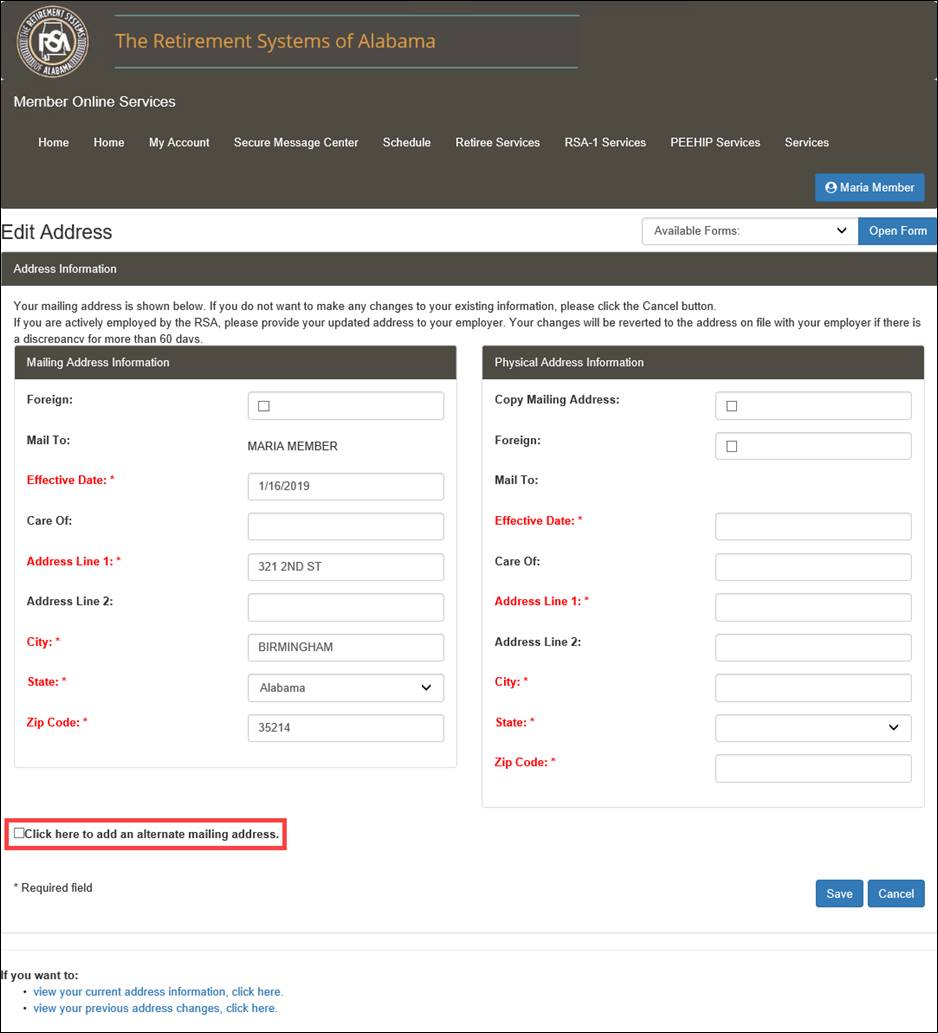
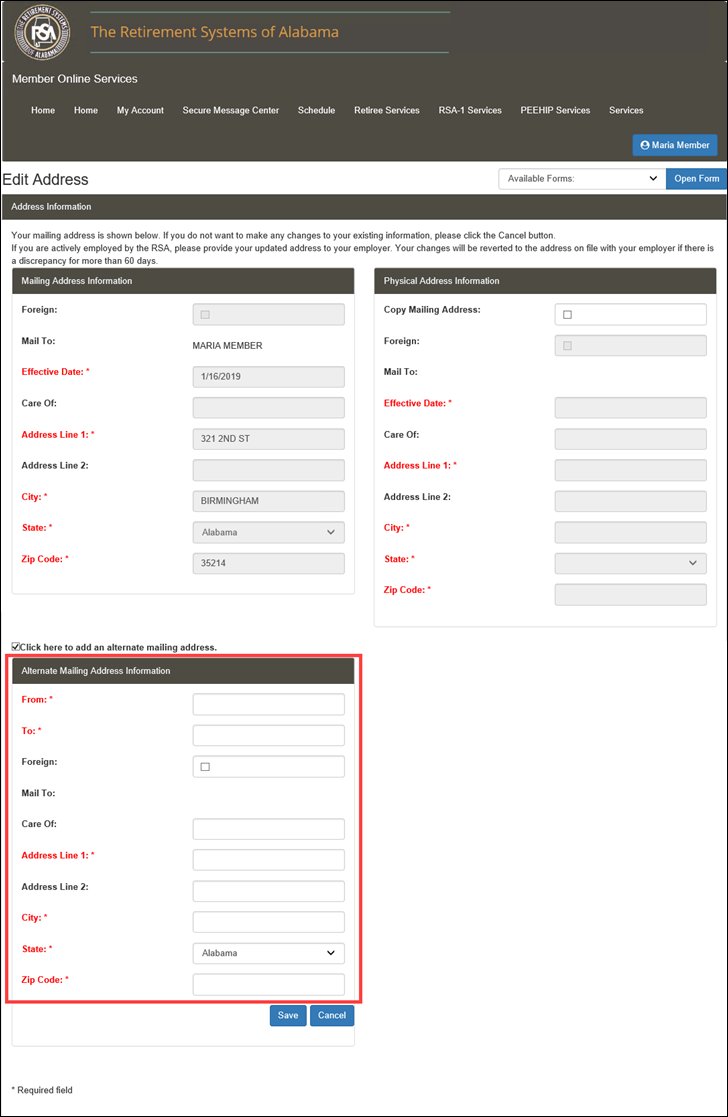
Step 2 -- Select the checkbox called, Click here to add an alternate mailing address.
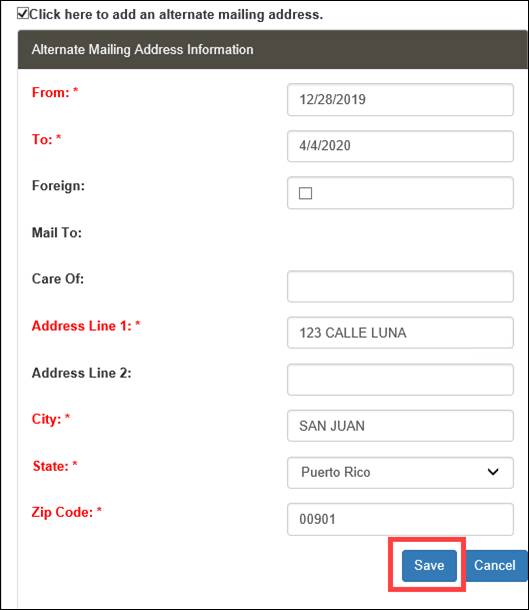
Step 3 -- Enter your alternate address in the Alternate Mailing Address Information section.
Step 4
-- Click
![]() .
.
Step 5
-- Click
![]() to
view your pending address changes.
to
view your pending address changes.
Note: an email is generated informing the member of the change.

Step 6 -- The View Address Changes screen displays. Click the link called, view your current address information, click here to return to the Contact Information screen.
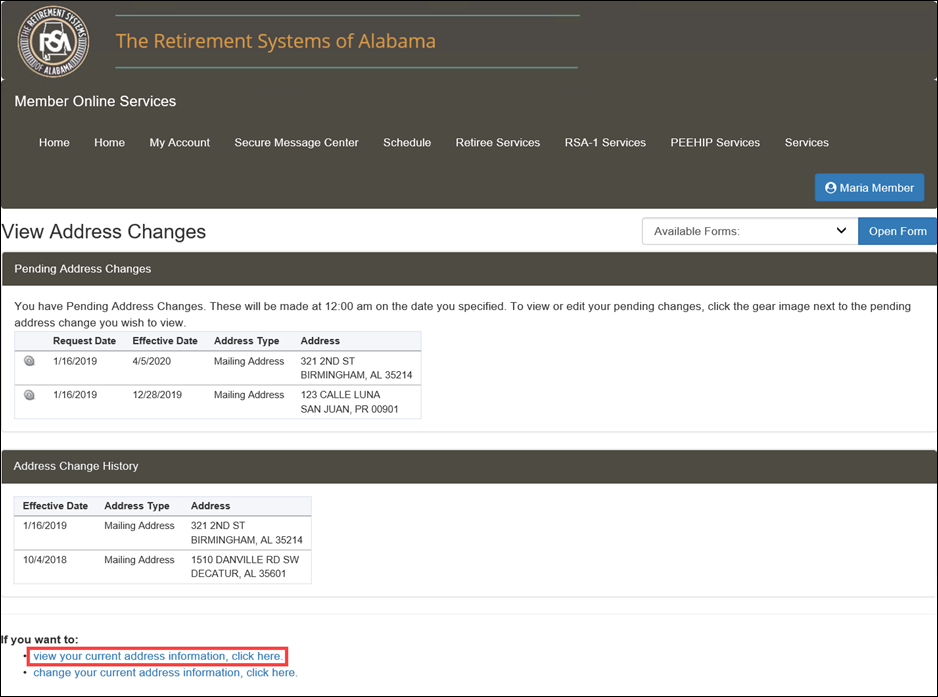
You can view and edit your address changes using the Contact Information screen. This screen shows previous address changes as well as future address changes. You can only edit future dated addresses. Follow the directions in the section called Navigating to the Contact Information Screen, then follow the steps below to view the address changes.
Step 1 -- Click the link called, To view address changes, click here.
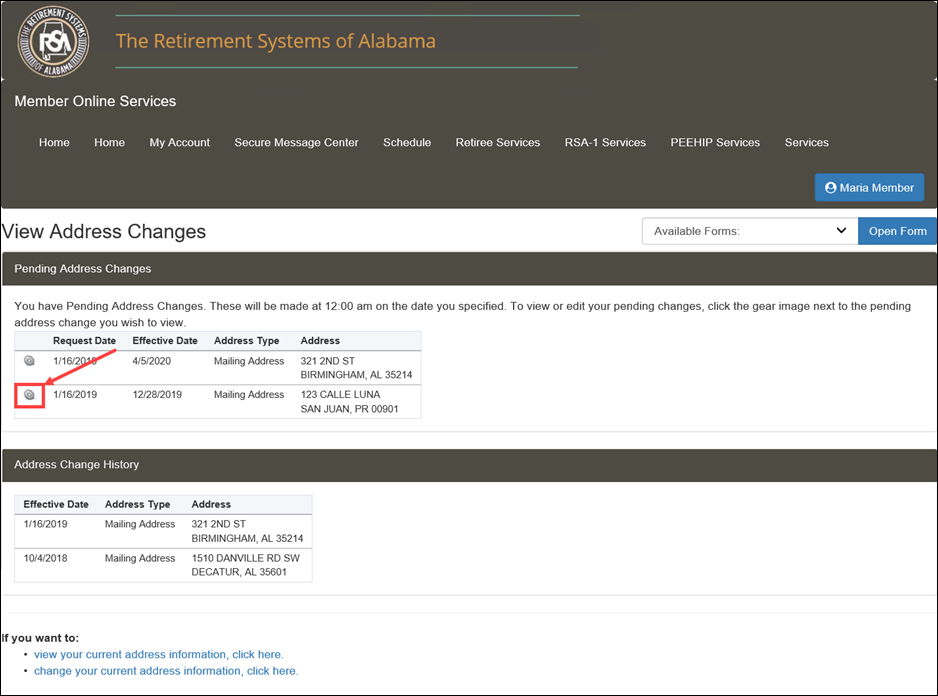
Step 2
-- The
screen that appears displays your pending address changes and address
change history. Click ![]() to make any edits.
to make any edits.
Step 3
-- The
Edit Address screen displays. You can make changes, then click
![]() or
click
or
click ![]() ,
which returns you to the Contact Information screen.
,
which returns you to the Contact Information screen.

5.1.5 Changing Your Phone Number/Email Address
Follow the directions in the section called Navigating to the Contact Information Screen, then follow the steps below to change your contact information. You must enter all required information on each screen. If you do not enter the required information, you will not be able to successfully change your contact information.
Step 1 -- In the Phone and Email Information section, click the blue link at the end of the sentence that reads: If you would like to change your contact information please click here.
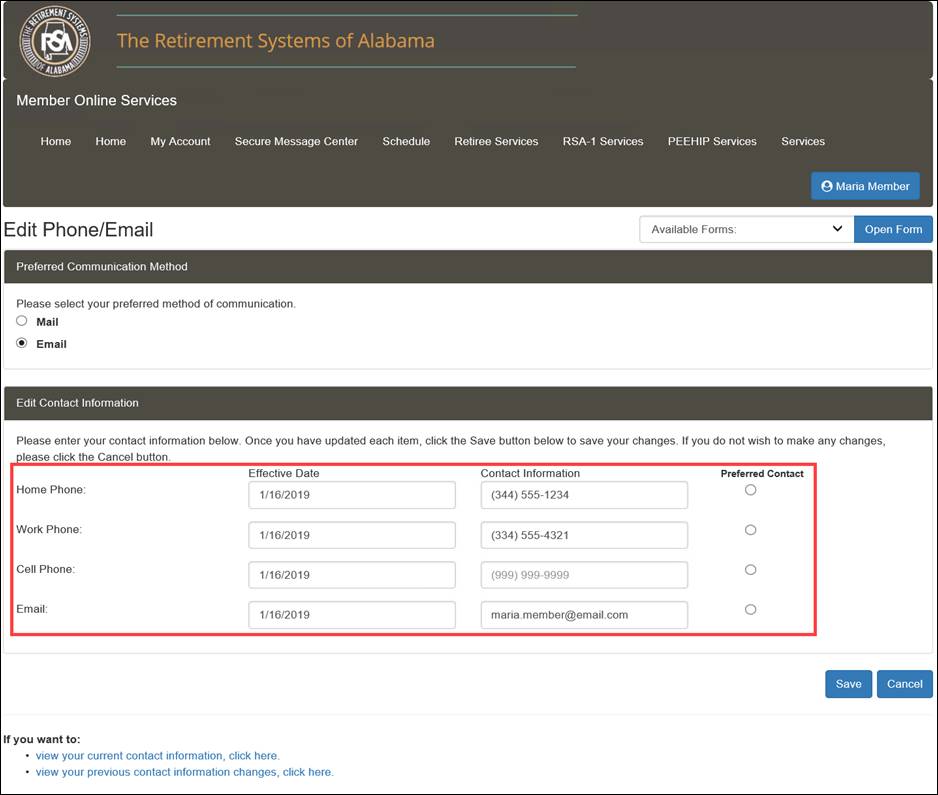
Step 2 -- Update your phone number and email information. Enter an effective date. The effective date of the change will automatically default to the current date.
Note: You can also change your Preferred Communication Method. If you choose Email for your preferred method of communication, you will receive all correspondence via email, except your 1099R which is required by federal law to be mailed to your home address.
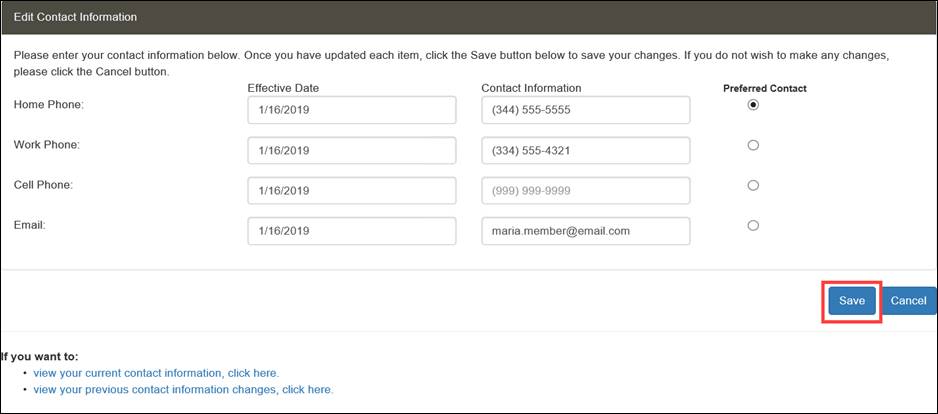
Step 3
-- Click
![]() .
.
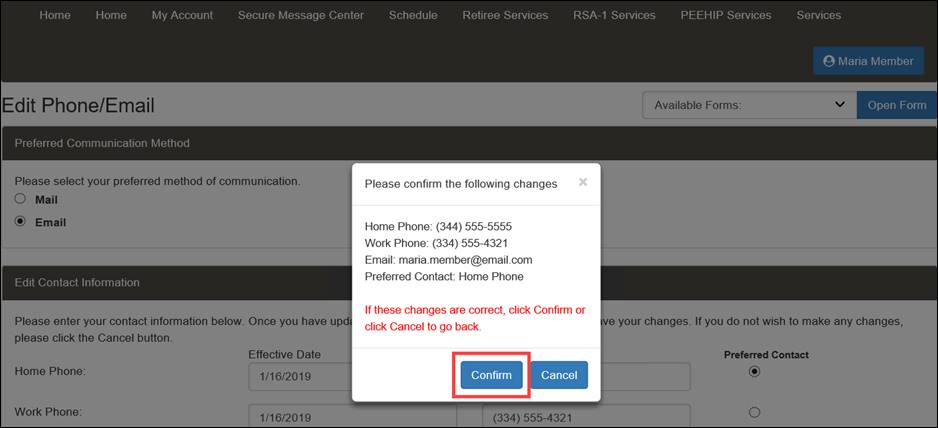
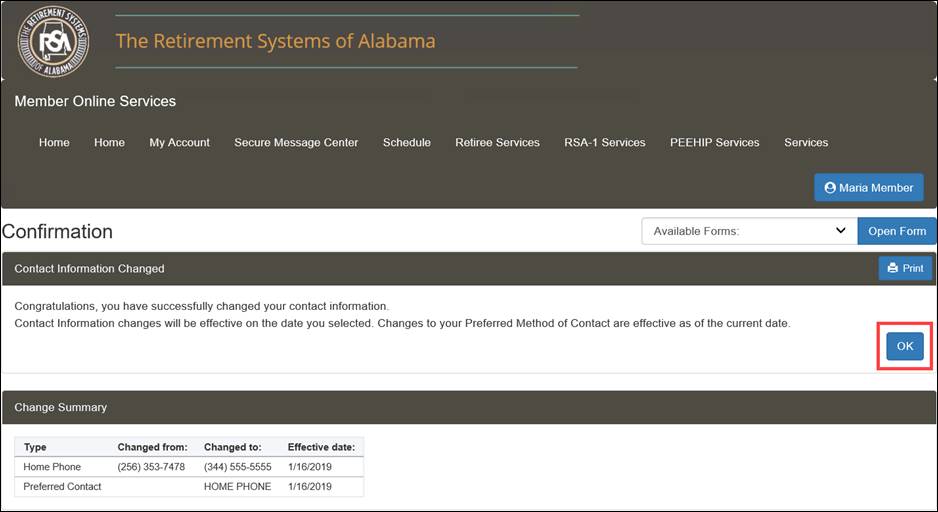
Step 4
-- The
screen that appears confirms the change to your contact information. Click
![]() . An
email correspondence (COR0059: Notification of Change email) is sent to
the member.
. An
email correspondence (COR0059: Notification of Change email) is sent to
the member.
Step 5
-- Click
![]() .
.
Note: An email is generated informing the member of the change.

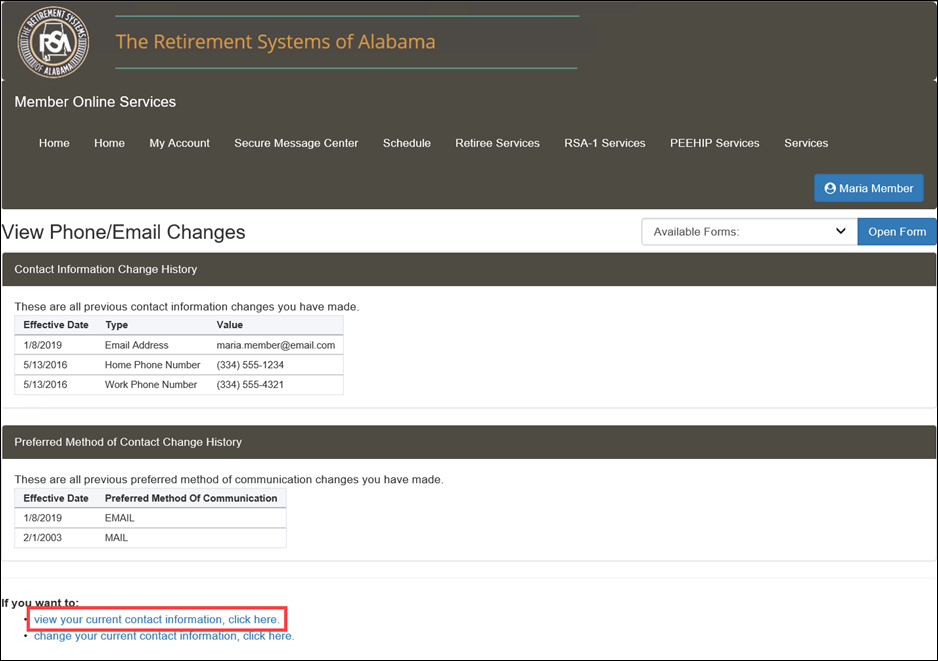
The View Phone/Email Changes screen displays.
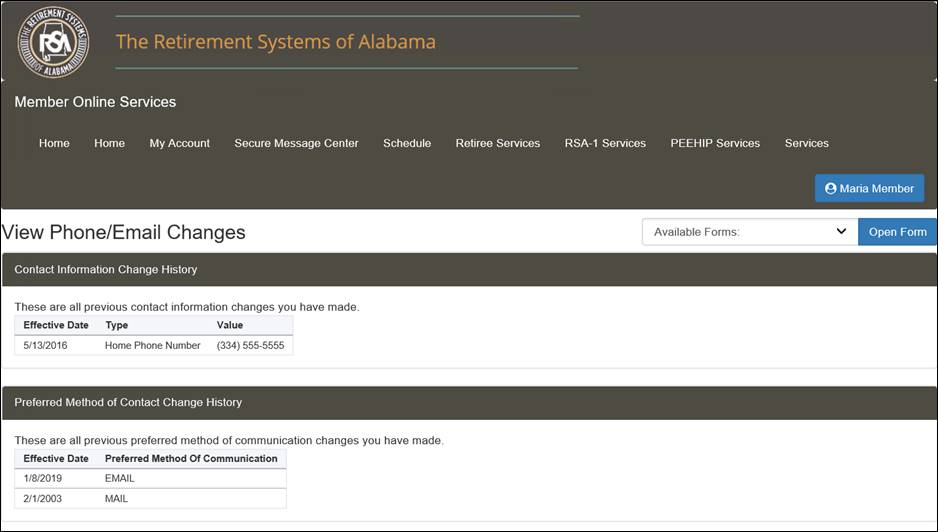
5.1.6 Viewing Previous Email Address/Phone Number Changes
You can view previous changes to your email or phone number using the Contact Information screen. Follow the directions in the section called Navigating to the Contact Information Screen, then follow the steps below to view your previous email or phone number information.
Step 1 -- Click the link called, view your previous phone or email information, click here.
Step 2 -- A history of contact information changes displays. Click the link called, view your current contact information, click here to return to the Contact Information screen.
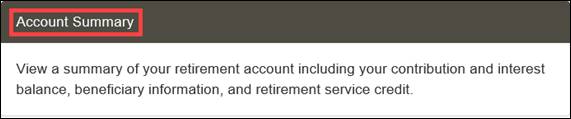
From the Account Summary screen, you can view your membership information, retirement plan summary information, beneficiary information, service summary information, service purchase information, payments made, and payments due.
5.2.1 Navigating to the Account Summary Screen
The following steps describe how to navigate to the Account Summary screen. You must be logged into the MOS website to follow the steps in the sections that follow.
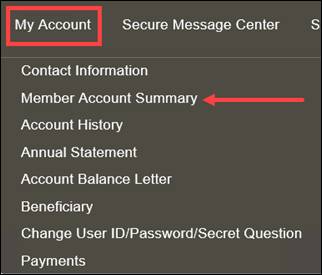
Step 1
-- Navigate
to the Member Account Summary screen by clicking either ![]() or the following
menu option from the menu bar:
or the following
menu option from the menu bar:
My Account > Member Account Summary
|
|
The Account Summary screen displays.
Note: If the member has more than one plan with the RSA, all the plans will be displayed under the Plan Selection section. The Member will need to select the checkbox to view that plan’s information.
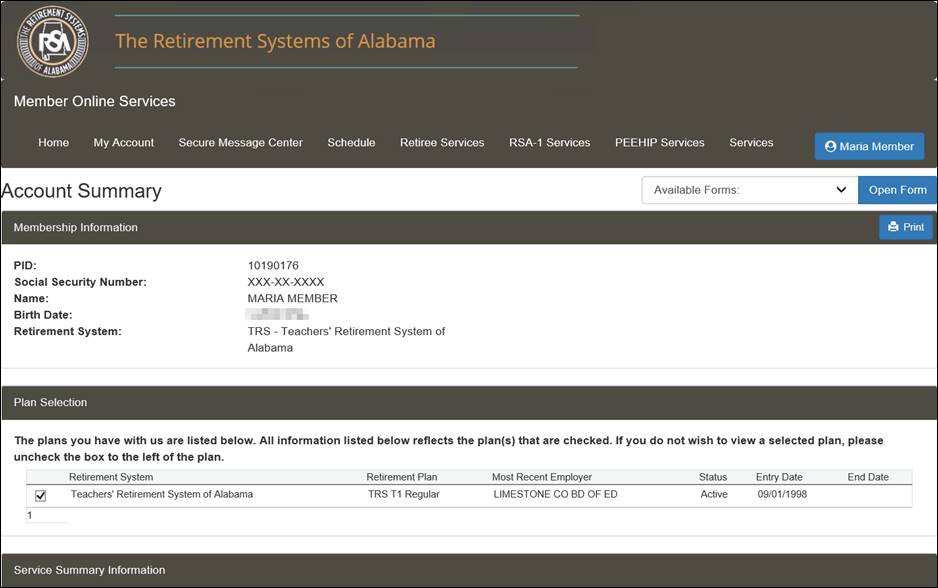
The Membership Information section shows basic information regarding the account including your PID, Social Security Number, Name, Birth Date, and Retirement System.

The Plan Selection section shows all the memberships and retirement plans of the member ordered by Entry Date.

The Service Summary Information section displays the plan and the service credit that the member has accrued for the specific benefit payment plan.

The Retirement Plan Summary Information section displays the current retirement plan information. This includes the breakdown of contributions and interest for each plan in which the member contributed.

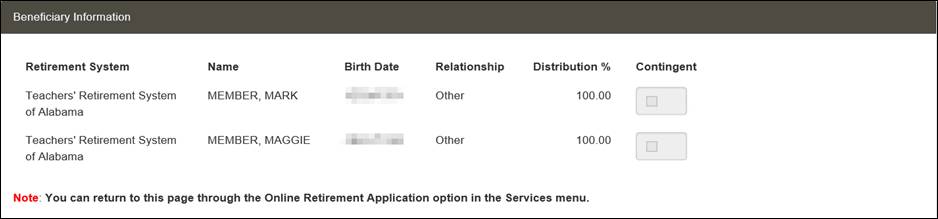
The Beneficiary Information section displays the current beneficiary elections on record with the RSA.
The Service Purchase Information section displays the service purchase requests that a member has a calculated cost for and are ready to be paid by the member.

The Payments Due section shows payments currently or historically owed by the member to the RSA.

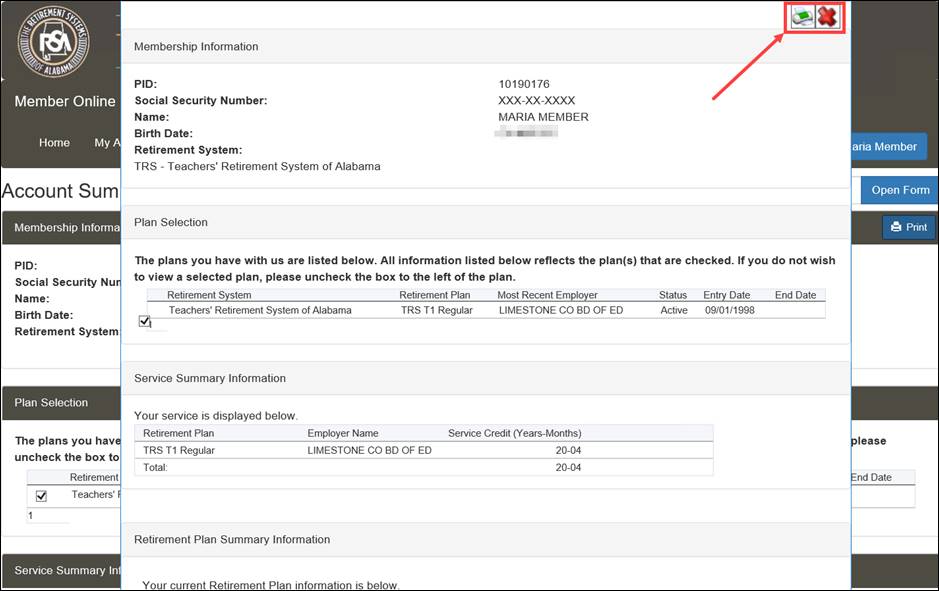
5.2.2 Printing Account Summary Information
The following steps describe how to print the information displayed on the Account Summary screen. The member will first log in to the MOS website to follow the steps in the sections that follow.
Step 1 -- Follow the steps from Section 5.2.1, Navigating to the Account Summary Screen.
Step 2
-- Click
![]() .
.

Step 3
-- The
Account Summary print preview pop-up window displays. Click ![]() to print the screen
or
to print the screen
or ![]() to
cancel the print request.
to
cancel the print request.
5.3 Account History – Service and Contribution Summary
The Account History screen allows active members to view details regarding service and contributions by retirement plan. From this screen active members can access a historical summary of service, salary, and contributions by plan year.
5.3.1 Navigating to the Account History Screen
The following steps describe how to navigate to the Account History screen. The active member will first log in to the MOS website to follow the steps in the sections that follow.
Step 1 -- Navigate to the Account History screen by clicking the following menu option from the menu bar:
My Account > Account History
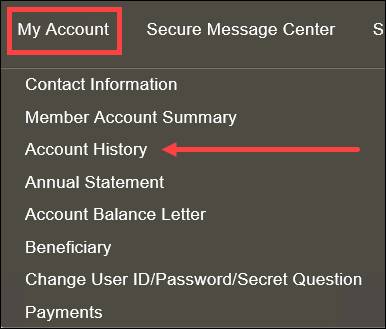
The Account History screen displays.
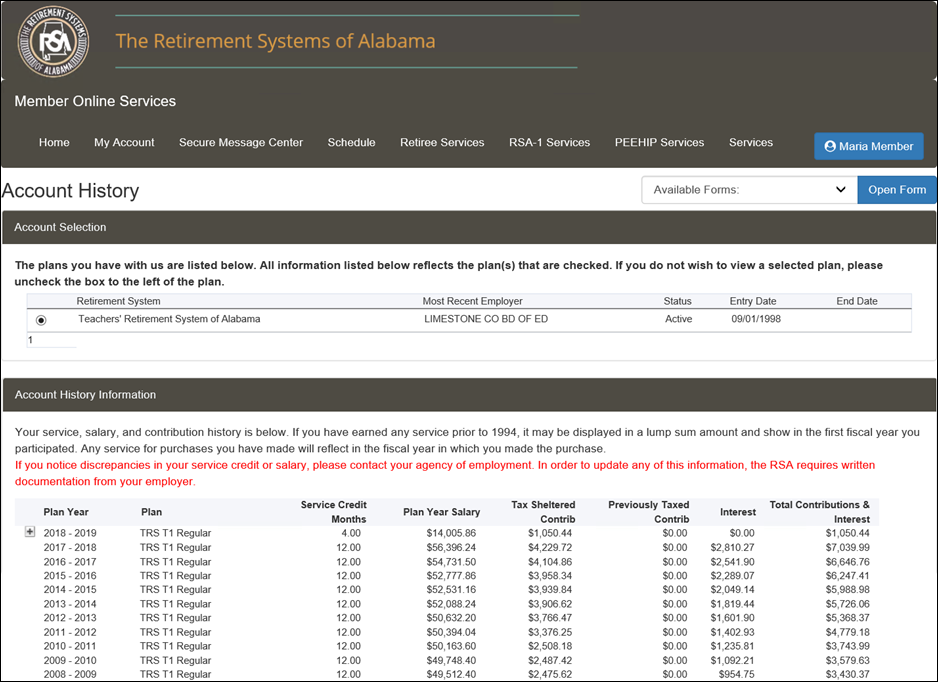
The Account Selection section displays the retirement plans in which you have membership. Select the Retirement Plan(s) that apply.
Note: If you have multiple memberships, all plans will be displayed on the Account Summary Screen.

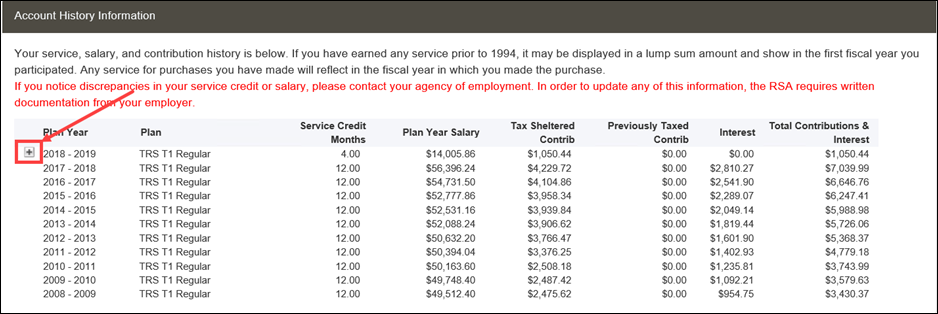
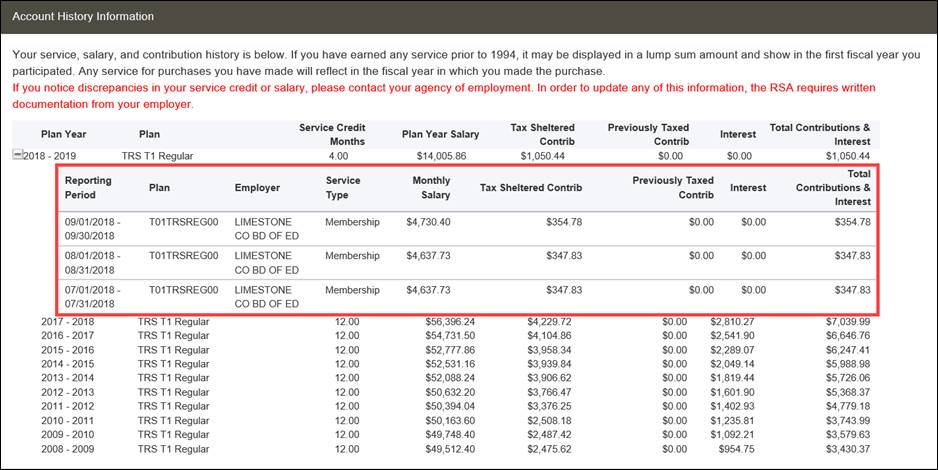
The Account History Information section displays
a plan year breakdown of the service, salary, and contributions reported
to the RSA. To view the monthly breakdown of the current plan year, click
![]() .
.
The monthly breakdown of the selected fiscal year displays.
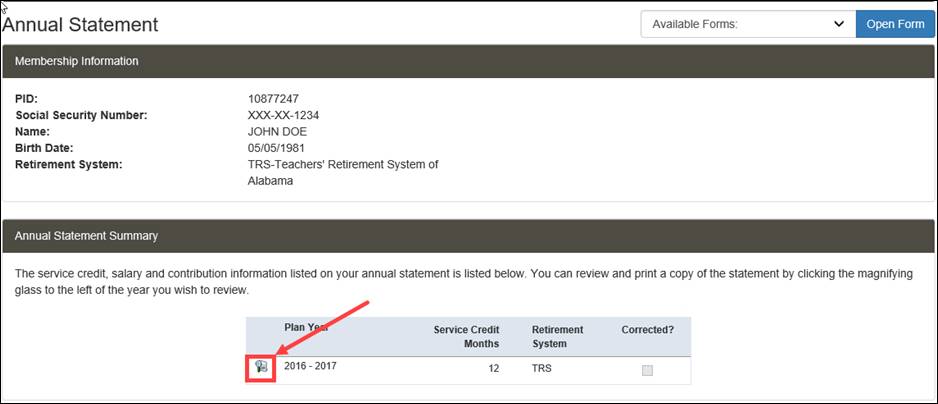
The Annual Statement screen allows active members to view and print annual statements generated in the system. The annual statement provides users with a snapshot of the retirement account as of the end of the previous plan year. The annual statement will generate as a PDF document.
If the member belongs to more than one retirement system, the retirement system for the most recently active membership should display in the Membership Information table.
5.4.1 Navigating to the Annual Statement Screen
The following steps describe how to navigate to the Annual Statement screen. The active member will first log in to the MOS website to follow the steps in the sections that follow.
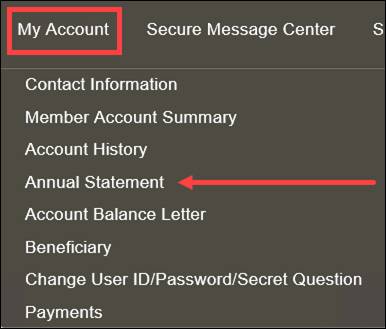
Step 1 -- Navigate to the Annual Statement screen by clicking the following menu option from the menu bar:
My Account > Annual Statement
Step 2
-- The
Annual Statement screen displays. To view an annual statement,
click ![]() next
to the appropriate plan year Annual Statement.
next
to the appropriate plan year Annual Statement.
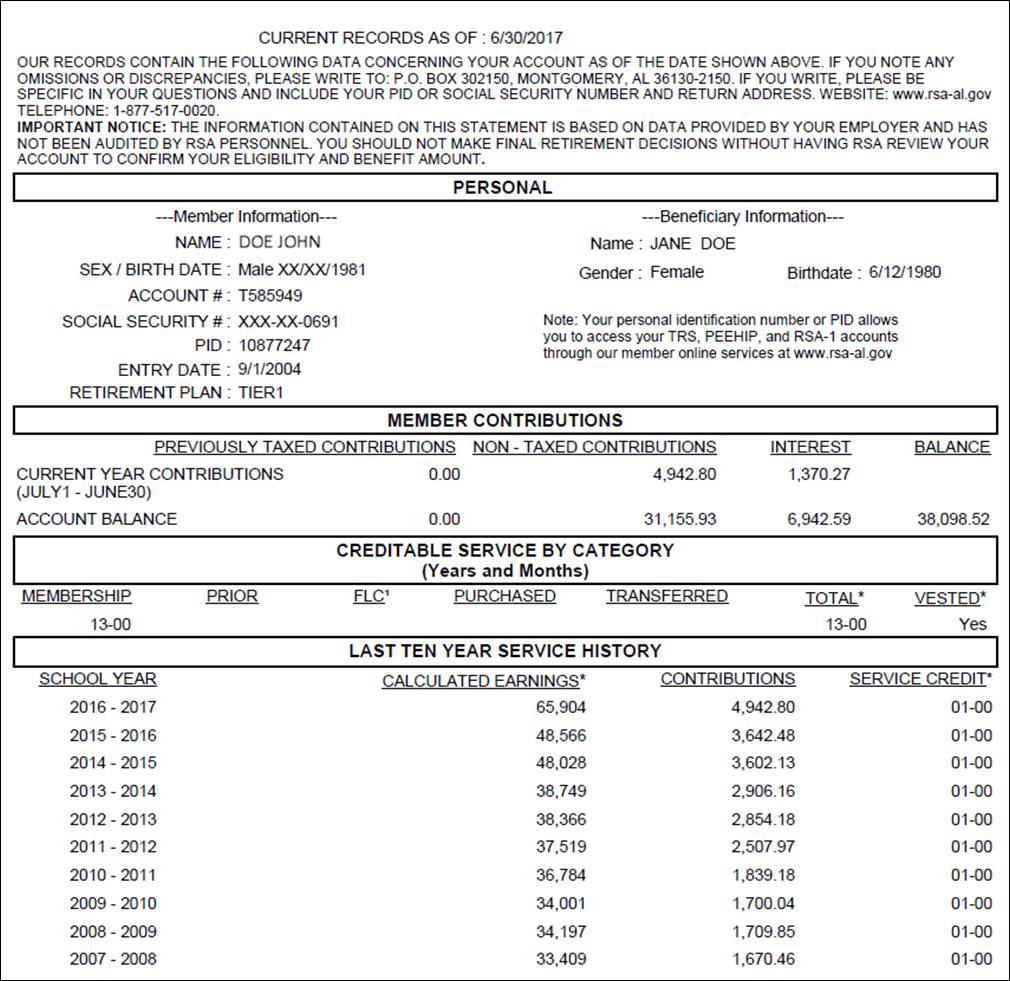
Step 3
-- Click
![]() to
display the statement.
to
display the statement.
![]()
The PDF document displays. The Annual Statement document is broken down into the following sections: Personal, Member Contributions, Creditable Service By Category, and Last Ten Year Service History.
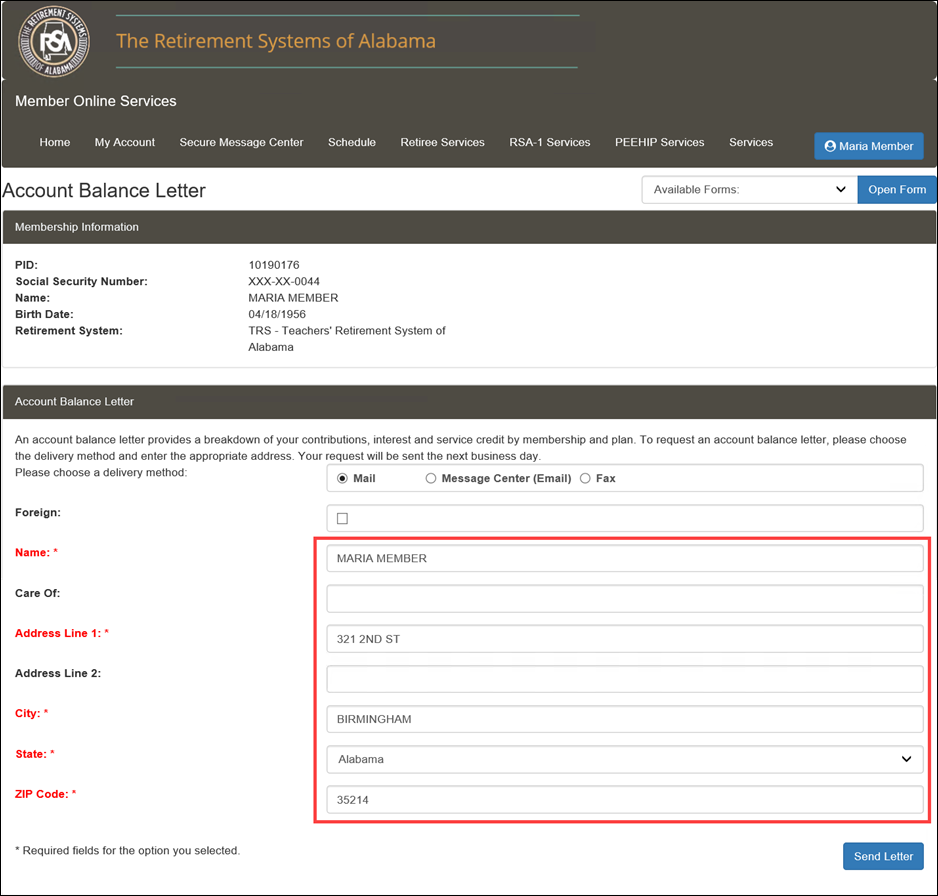
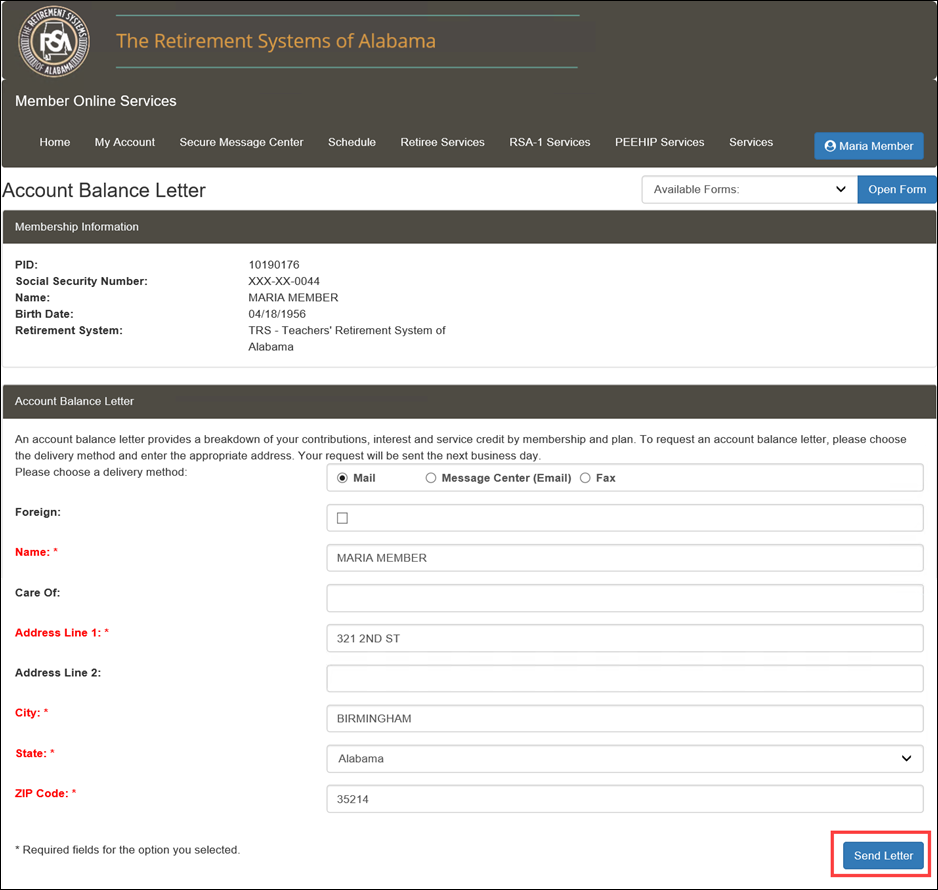
The Account Balance Letter screen allows active members to request a letter containing information about their account, including total service, contribution, and interest.
5.5.1 Navigating to the Account Balance Letter Screen
The following steps describe how to navigate to the Account Balance Letter screen. The active member will first log in to the MOS website to follow the steps in the sections that follow.
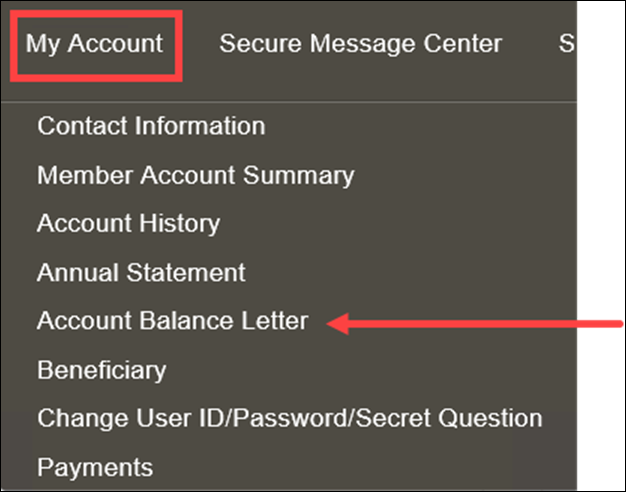
Step 1 -- Navigate to the Account Balance Letter screen by clicking the following menu option from the menu bar:
My Account > Account Balance Letter
Step 2 -- The Account Balance Letter screen displays. Select the Mail, Message Center (Email), or Fax radio button for the desired delivery method of the letter. In this example we will choose to have the letter mailed.

Step 3 -- Confirm the mailing address that displays on the screen. This is the address where the letter will be sent.
Note: For a foreign address, select the Foreign indicator and then fill out the necessary information.
Note: The information on record is prepopulated into the fields on the screen. The mailing address and email can be updated if necessary.
Step 4
-- Click
![]() .
.
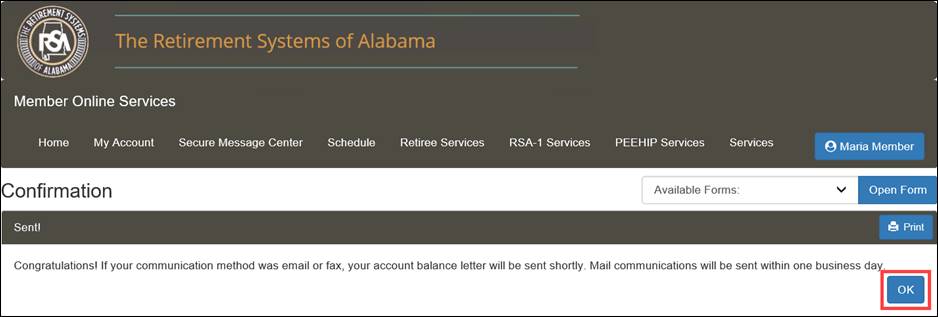
Step 5
-- The
Confirmation message displays. Click ![]() to
return to the Home screen.
to
return to the Home screen.
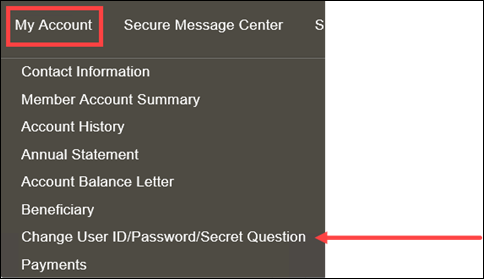
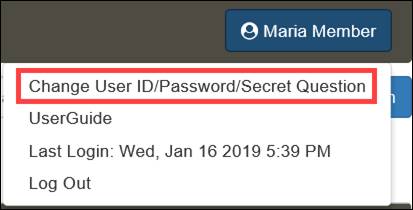
5.6 Change User ID/Password/Secret Question
If you want to change your User ID, Password, or Secret Questions, you can do so by clicking the blue button with your name on it (or using the navigation menu). You must enter all required information on each screen. If you do not enter the required information, you will not be able to successfully change your User ID, Password, or Secret Questions.
Step 1
-- Select
either Change User ID/Password/Secret Question from the My Account
drop-down menu or click the blue button with your name on it (![]() ), then click the Change
User ID/Password/Secret Question link.
), then click the Change
User ID/Password/Secret Question link.
|
|
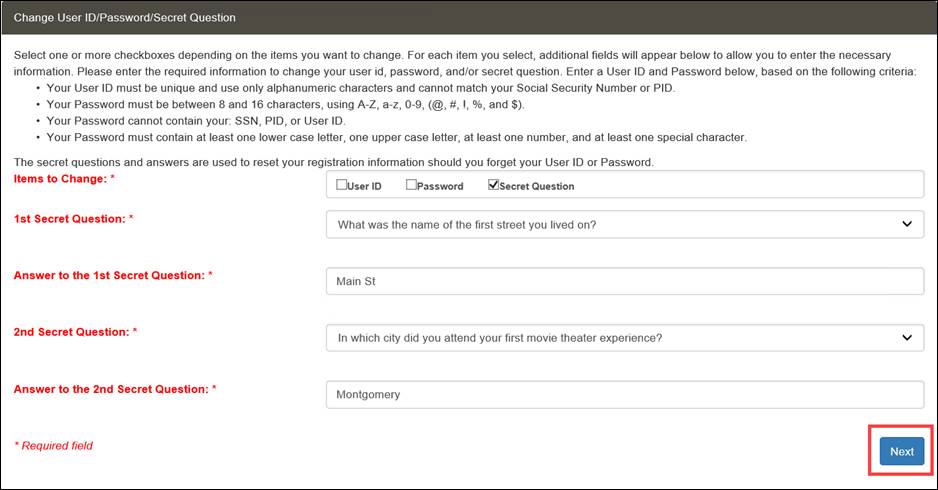
Step 2 -- Select the checkbox for the items you want to change. You can select multiple checkboxes to change more than one item.
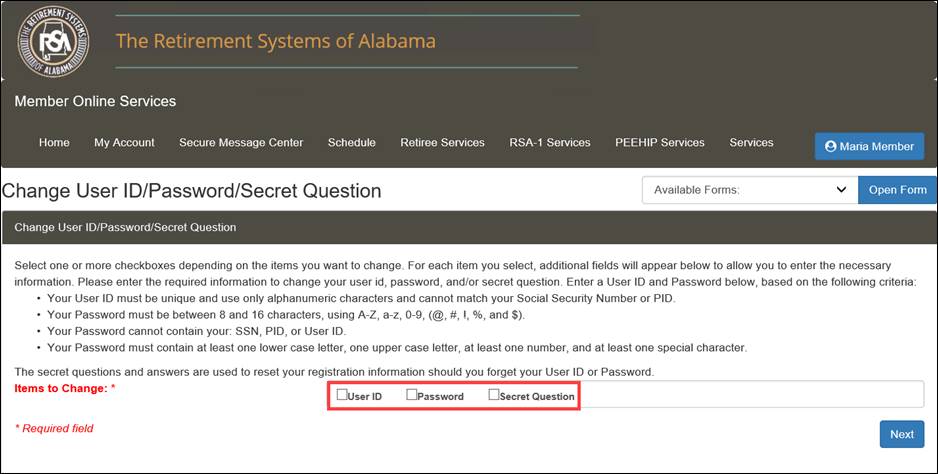
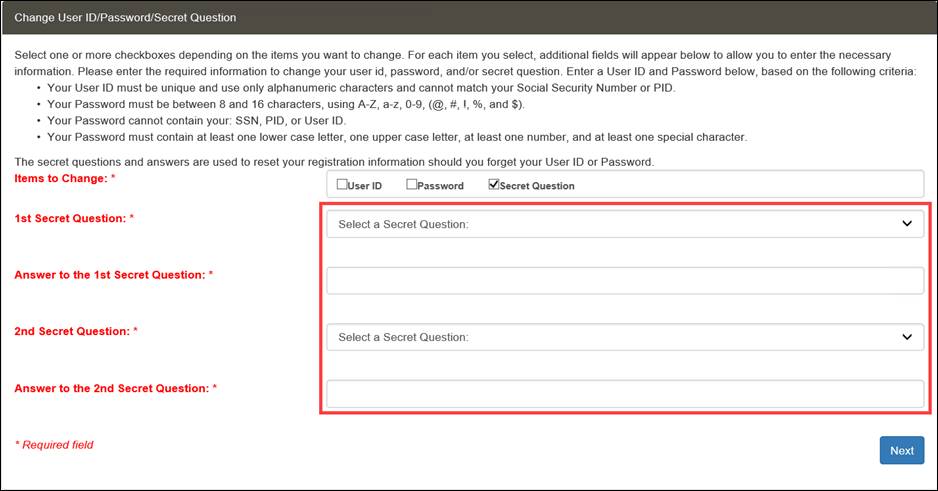
Step 3 -- Enter the required information. The required information changes based on the selection(s) made in the previous step.
· If you select the User ID checkbox, enter a new User ID
· If you select the Password checkbox, enter the old Password, new Password, and confirm the new Password
· If you select Secret Question checkbox, select a question from the drop-down menu for your first and second question, then enter an answer to each
Step 4
-- Click
![]() .
.
Step 5
-- The
screen that appears confirms your changes. Click ![]() to
return to the Home screen.
to
return to the Home screen.
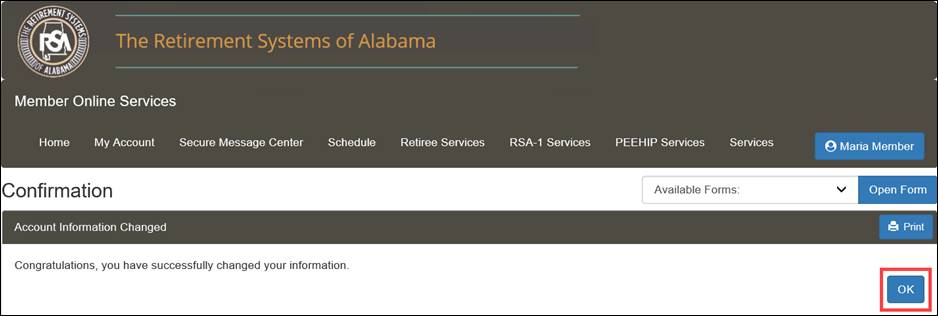
Note: An email is sent to the member to confirm the change.

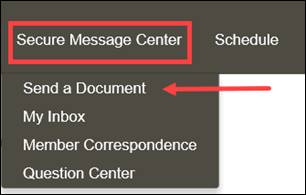
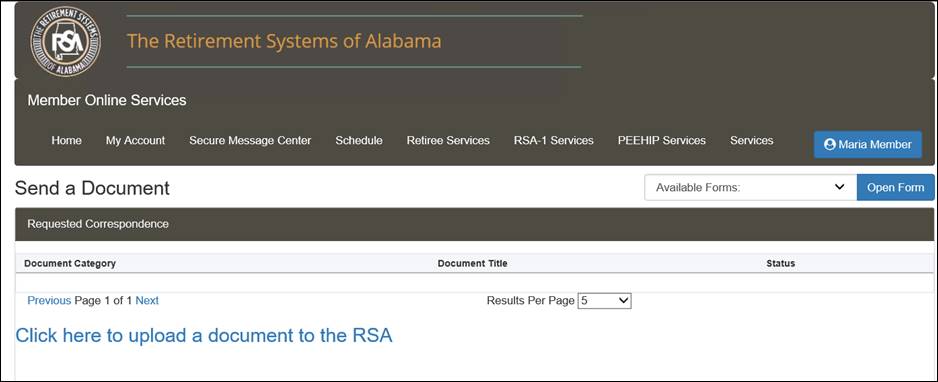
The Send a Document screen allows members to view a list of documents requested from the by the RSA and upload documents to ECM.
6.1.1 Navigating to the Send a Document Screen
The following steps describe how to navigate to the Send a Document screen and view requested documents. The active member will first log in to the MOS website to follow the steps in the sections that follow.
Step 1 -- Navigate to the Send a Document screen by clicking either ![]() or the following menu option from the menu bar:
or the following menu option from the menu bar:
Secure Message Center > Send a Document
|
|
The Send a Document screen displays.
6.1.2 Uploading a Document to ECM
Step 1 -- Follow the steps from Section 6.1.1, Navigating to the Send a Document Screen.
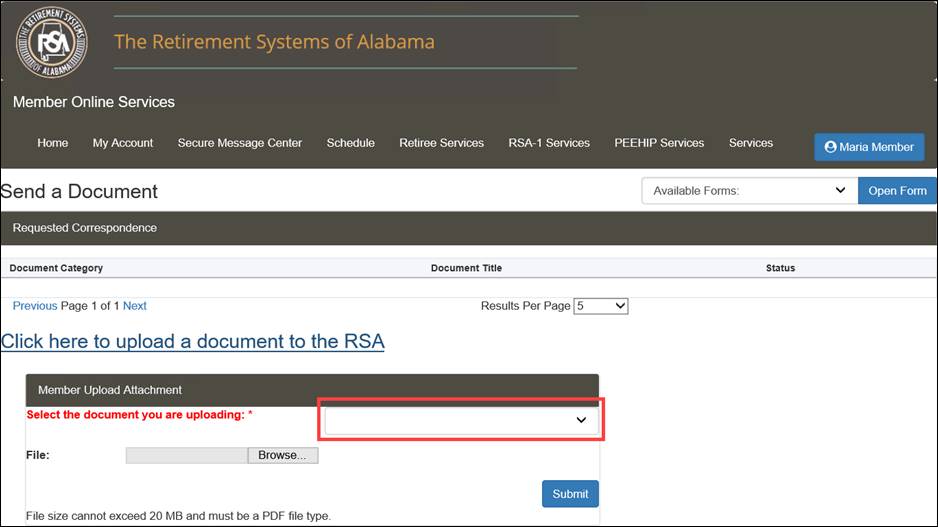
Step 2 -- Click the link called Click here to upload a document to the RSA.
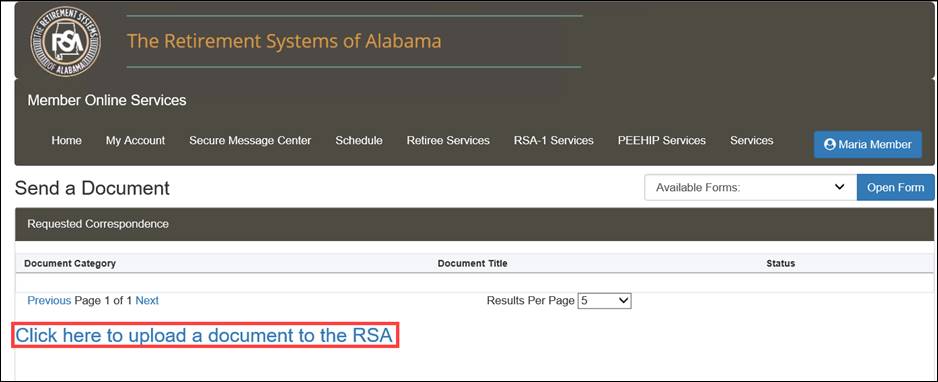
Step 3 -- The Member Upload Attachment section displays. Select a document from the list.
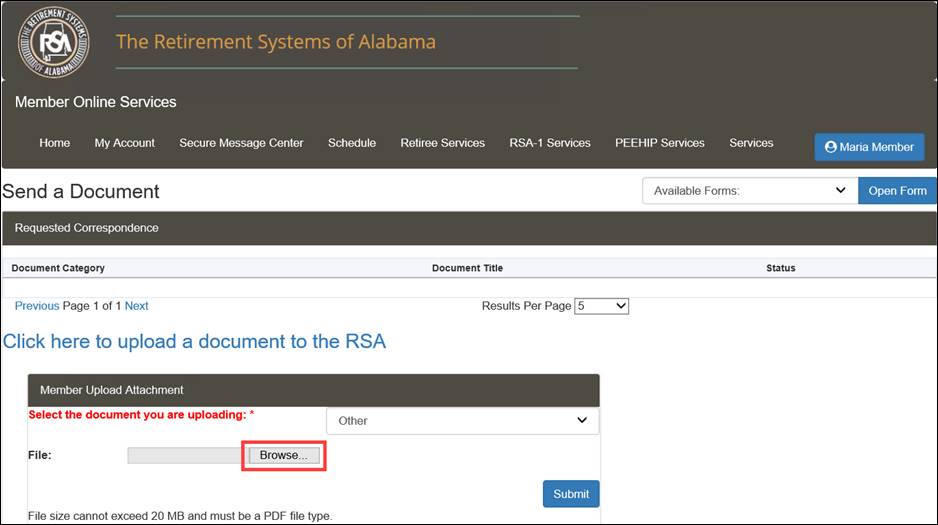
Step 4 -- Click ![]() from the File field.
from the File field.
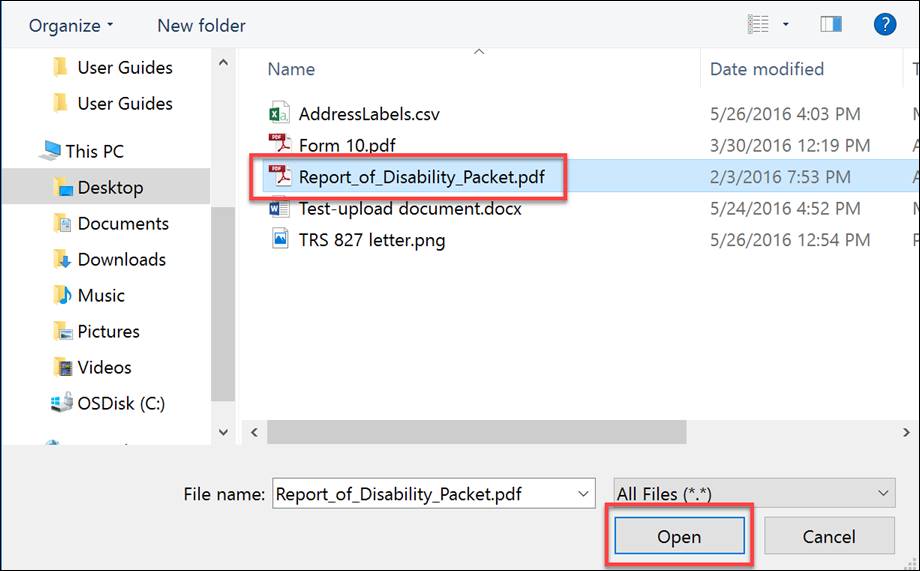
Step 5 -- Select a file on your computer. Then click ![]() .
.
Note: Only .PDF files may be uploaded.
Step 6 -- Click ![]() .
.
Note: The system uses the attributes of the uploaded document to classify and index the image in Library Manager and trigger a workflow in Work Manager if applicable.
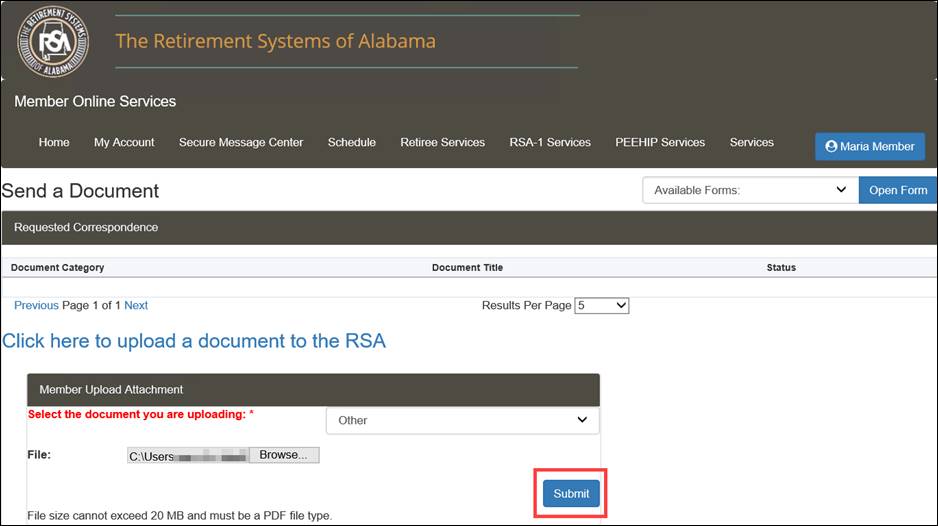
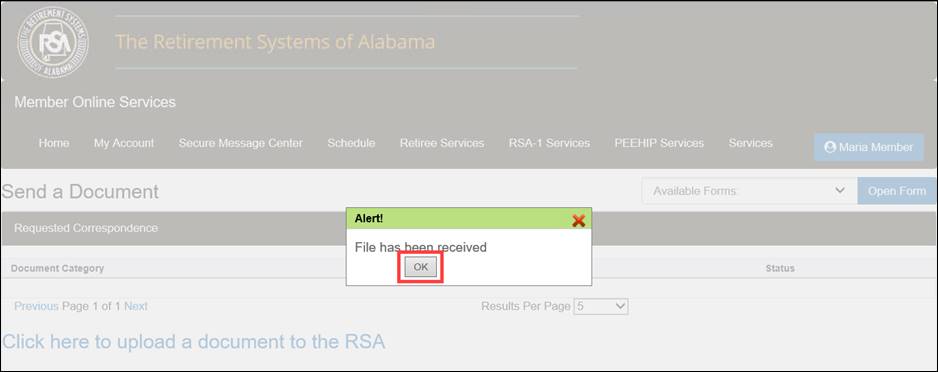
Step 7 -- An alert pop-up window displays. Click ![]() to confirm the file was received.
to confirm the file was received.
The Secure Message Center provides a mechanism for the RSA to communicate electronically and securely with the registered member in the Member Online Services Portal.
You must be logged into the MOS website to follow the steps below:
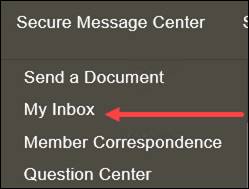
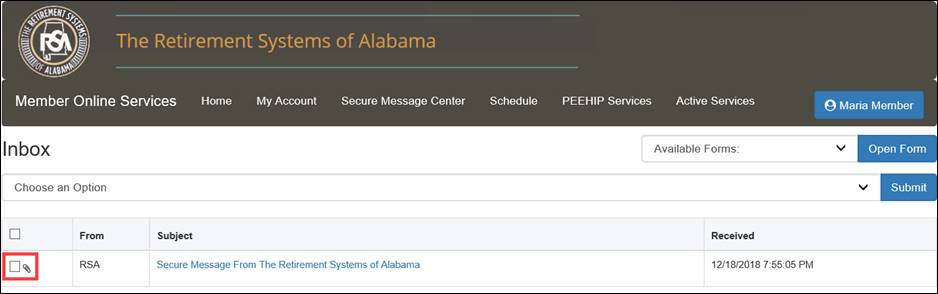
Step 1 -- From any screen, select My Inbox from the Secure Message Center drop-down menu.
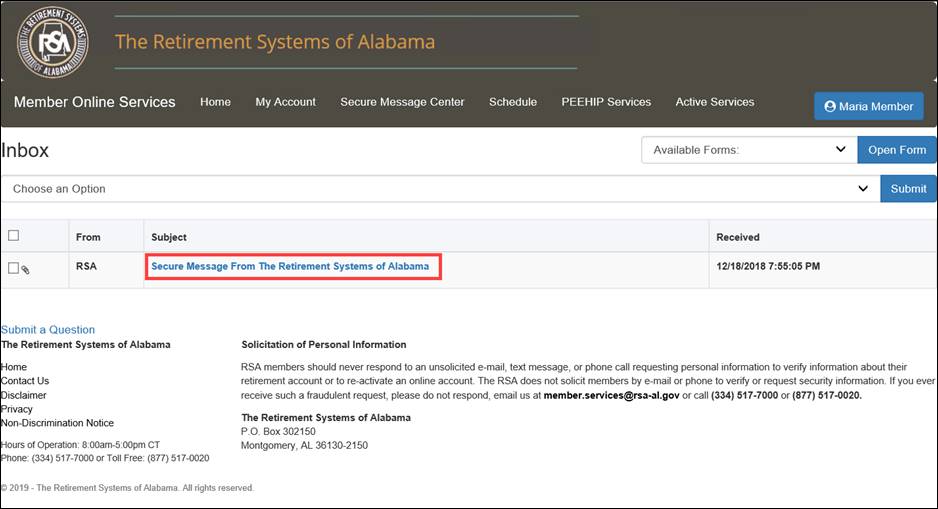
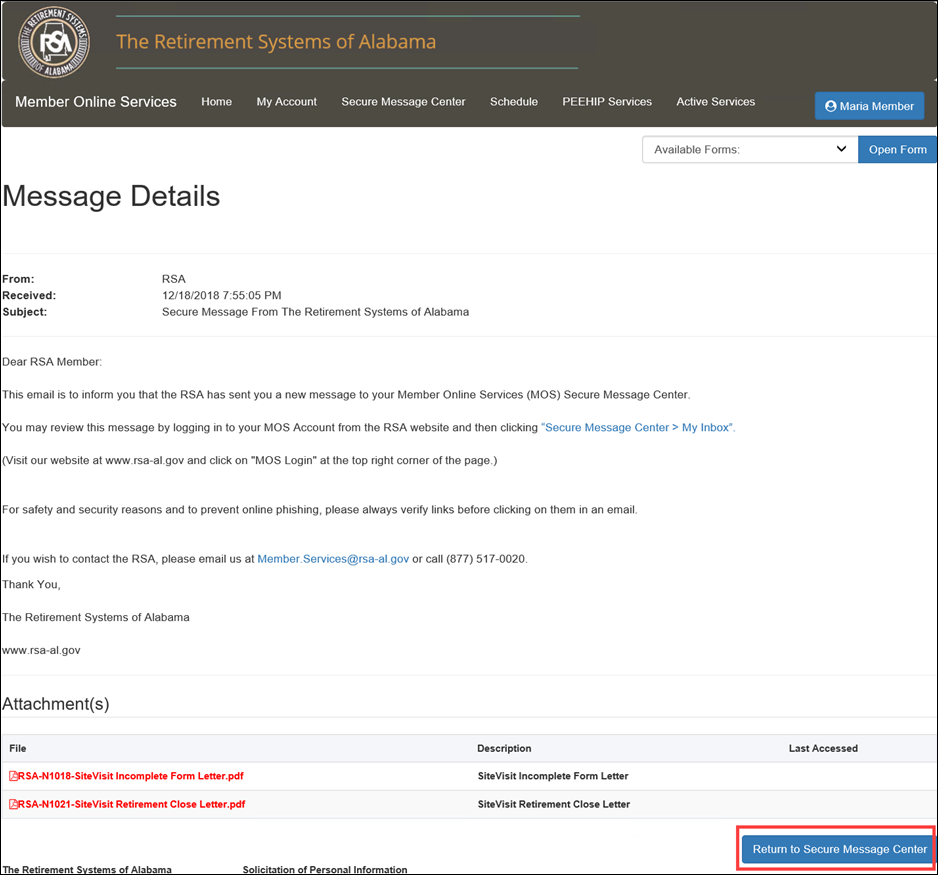
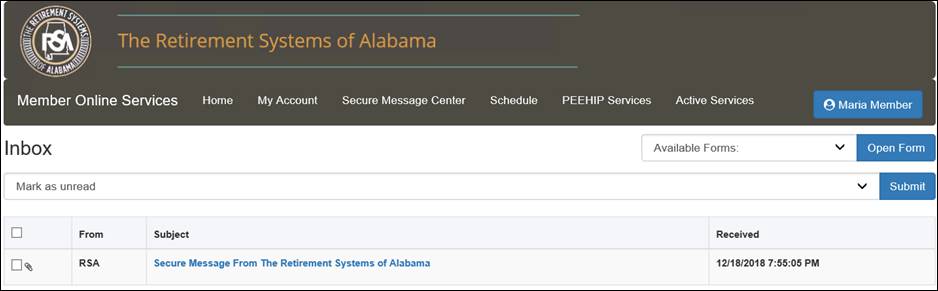
Step 2 -- The Inbox screen displays. Select a message to read by clicking on the link in the Subject column.
Step 3 -- The Message Details screen displays. If there is an attachment, you can view it by clicking on the link in the File column of the Attachment(s) section.
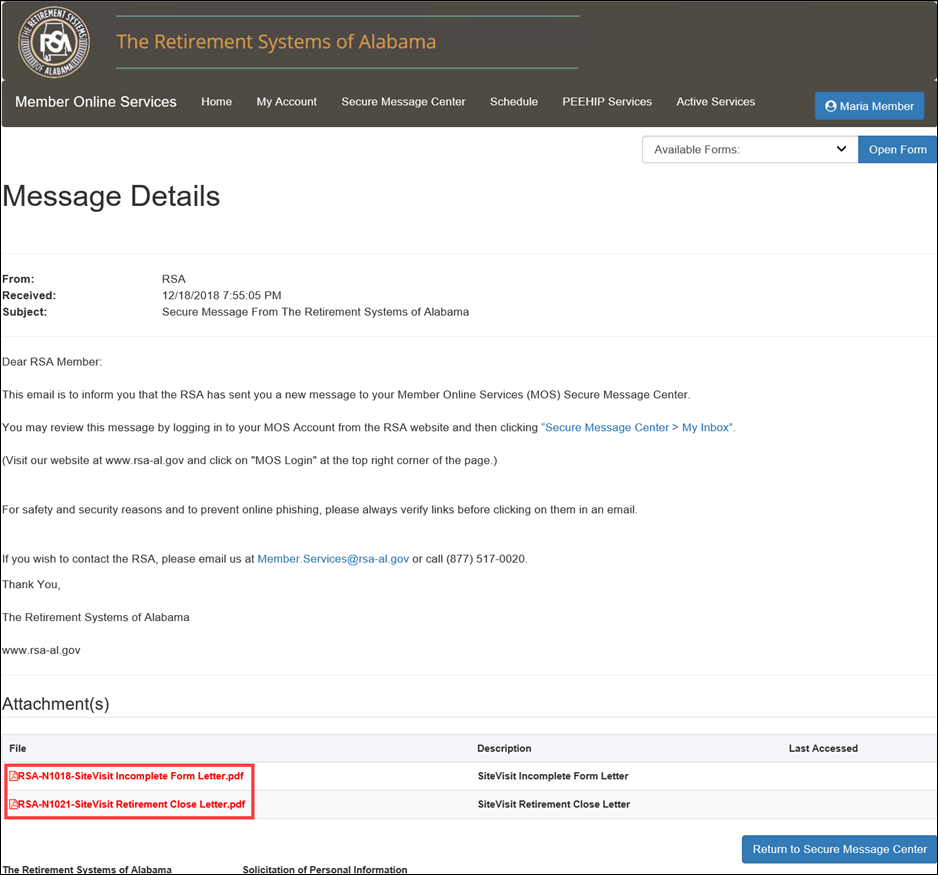
Step 4
-- Click
![]() to
return to your Inbox.
to
return to your Inbox.
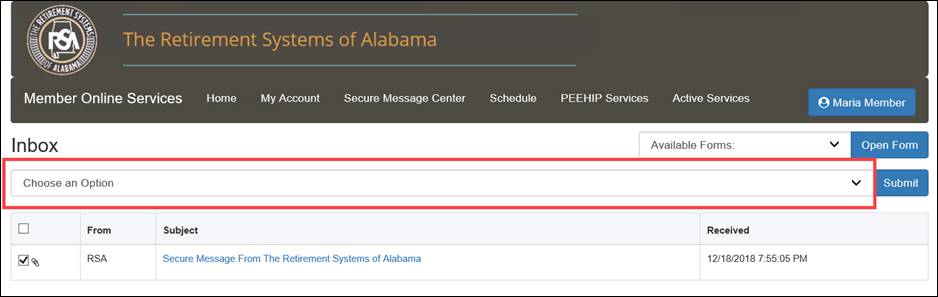
Step 5 -- Select a message by clicking the checkbox.
Note: If you select the box in the column header, it will select all messages.
Step 6 -- Click the Choose an Option drop-down menu to mark a message as Unread, Read, or Delete.
Step 7
-- Click
![]() .
.
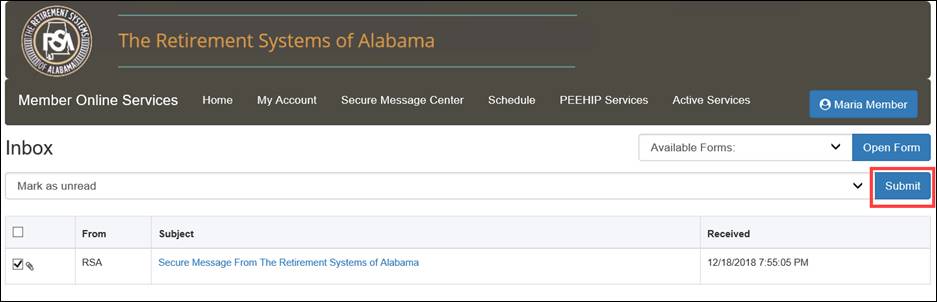
The email message is either removed from the display of your Inbox, marked as read, or marked as unread.
The Submit a Question functionality provides a mechanism for a Member to submit a question electronically and securely and gives the RSA the ability to view and respond to submitted questions.
You must be logged into the MOS website to follow the steps below:
Step 1 -- From any screen, select Question Center from the Secure Message Center drop-down menu.

Step 2 -- The Submit a Question screen displays.
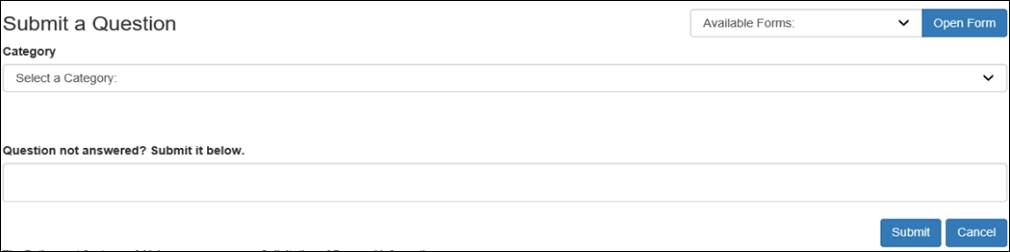
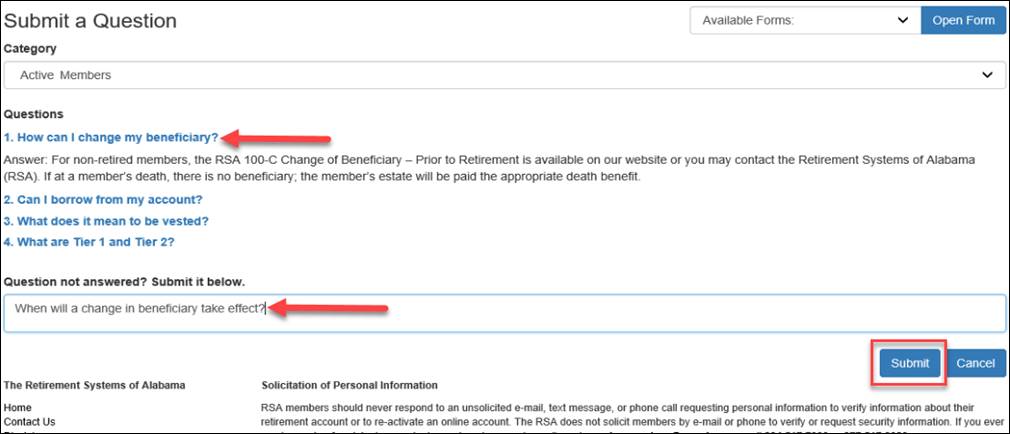
Step 3 -- The Submit a Question screen allows you to select a category for the question. Select a category from the Category drop-down menu. The list of questions associated with that category are displayed.

Step 4
-- Click
on the question to display an answer. If you need to continue because
your question is not answered, you can submit a freeform question by typing
in the Question not answered? Submit it below field. Then
click ![]() .
.
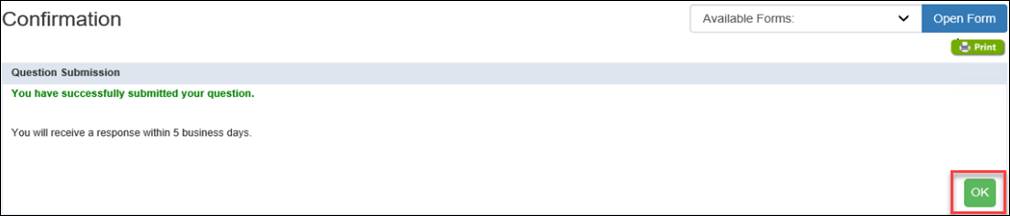
Step 5
-- You
will receive a confirmation message that the question was submitted. Click
![]() . A
representative from the RSA can then respond with an answer through a
communication using CRM. Follow the steps in the section titled, Secure
Message Center to view the response.
. A
representative from the RSA can then respond with an answer through a
communication using CRM. Follow the steps in the section titled, Secure
Message Center to view the response.
The Member Correspondence screen allows you to view a list of documents, such as verification of retirement benefit or change in beneficiary, that have been received by RSA. You can view a list of correspondence sent or received by the RSA one, three, six, nine, or all months ago.
6.4.1 Navigating to the Member Correspondence Screen
The following steps describe how to navigate to the Member Correspondence screen. You must be logged into the MOS website to follow the steps in the sections that follow.
Step 1 -- Navigate
to the Member Correspondence screen by clicking either ![]() or the following menu option from the menu bar:
or the following menu option from the menu bar:
Secure Message Center > Member Correspondence
|
|
The Member Correspondence screen displays.
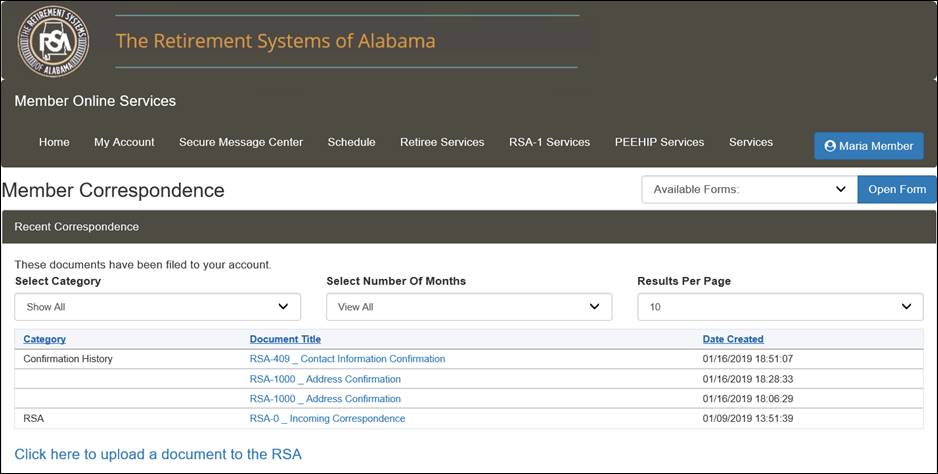
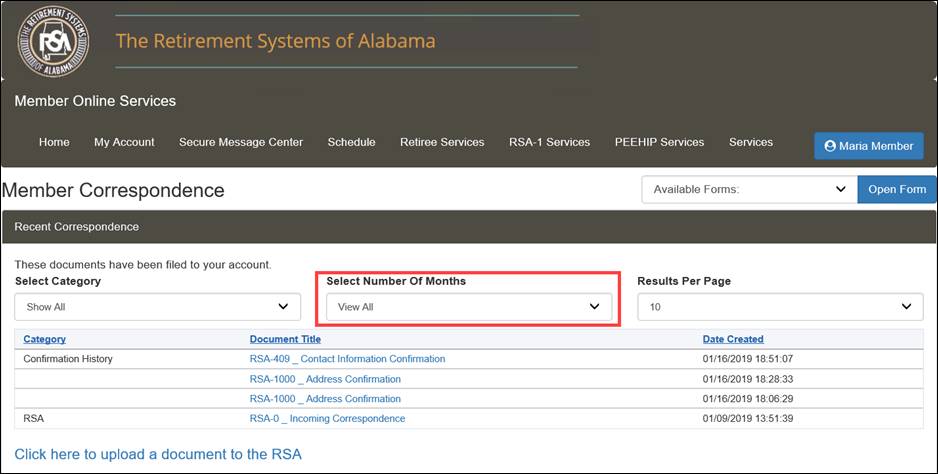
6.4.2 Viewing Available Information about Member Correspondence
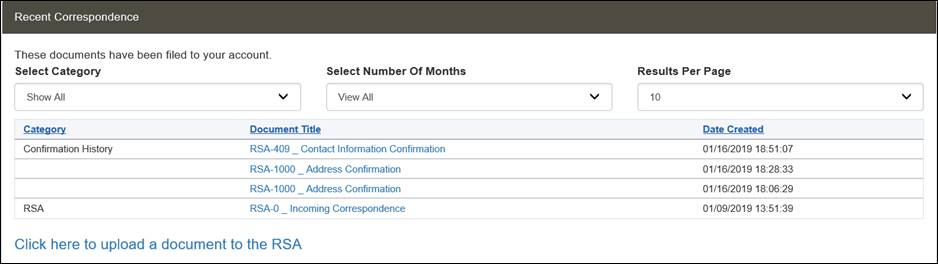
From the Member Correspondence screen, you can see a list of forms and correspondence that have been filed to your account based on the number of months you select from the drop-down.
The Recent Correspondence section displays any documents that the RSA has on record for you. Clicking the linked under the Document Title column will open a PDF image of the document for viewing.
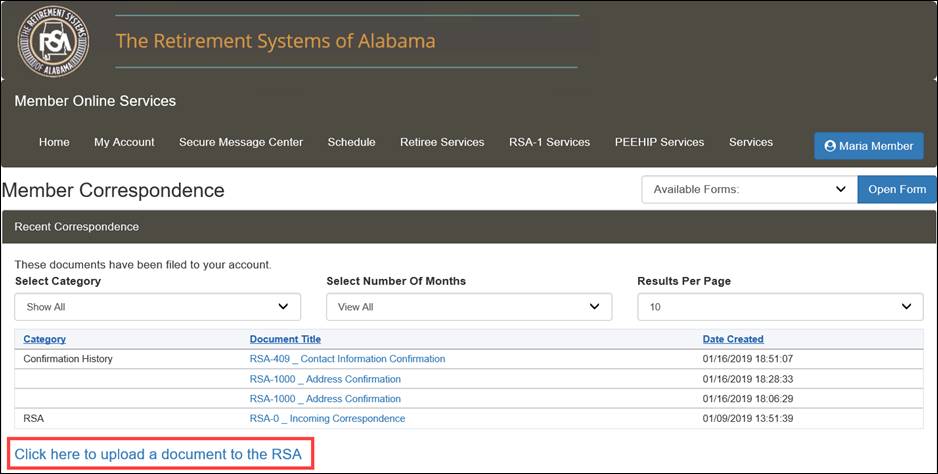
6.4.3 Uploading Documents to the RSA
Retirees can upload documents which need to be transmitted to the RSA. Only PDF files may be uploaded.
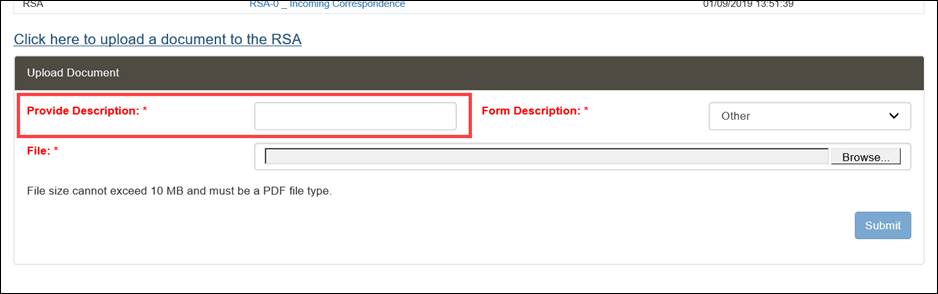
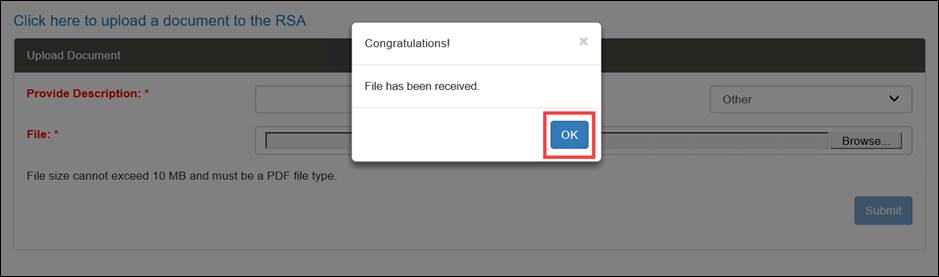
Step 1 -- After navigating to the Member Correspondence screen, click the link called, Click here to upload a document to the RSA.
Step 2 -- Enter a description for the document in the Provide Description field.
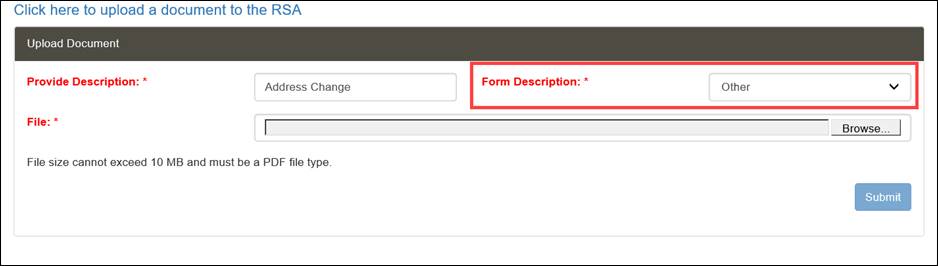
Step 3 -- Select a form type from the Form Description field. If you don’t know the type of form to pick, select Other.
Note: If you select Other, the document will be sent unindexed so that the RSA can index it as the correct document.
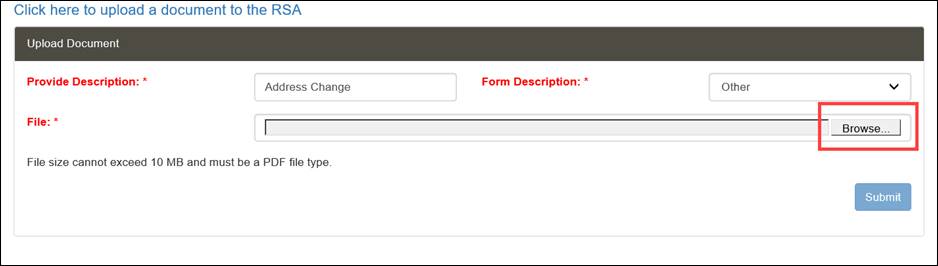
Step 4 -- In
the File field, select the document you want to upload by clicking ![]() .
.
Step 5 -- Select
a file to upload from your computer and click ![]() .
.

Step 6 -- Click
![]() .
.
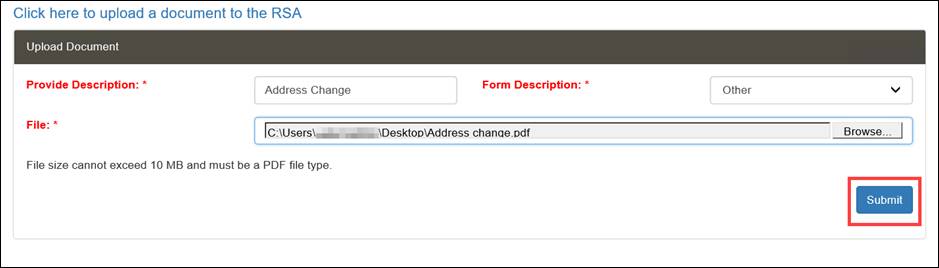
Step 7 -- The
document gets uploaded to the RSA FileNet repository. You will see a message that the file was received. Click ![]() .
.
The Benefit Estimate screen allows members to estimate a retirement or disability benefit, estimate a PEEHIP monthly premium, and allows non-members to use a quick calculator to estimate a retirement benefit.
7.1.1 Navigating to the Benefit Estimate Screen
The following steps describe how to navigate to the Benefit Estimate screen. The active member will first log in to the MOS website to follow the steps in the sections that follow.
Step 1
-- Navigate
to the Benefit Estimate screen by clicking either ![]() or the following
menu options from the menu bar:
or the following
menu options from the menu bar:
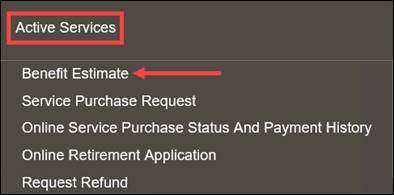
Services > Benefit Estimate.
|
|
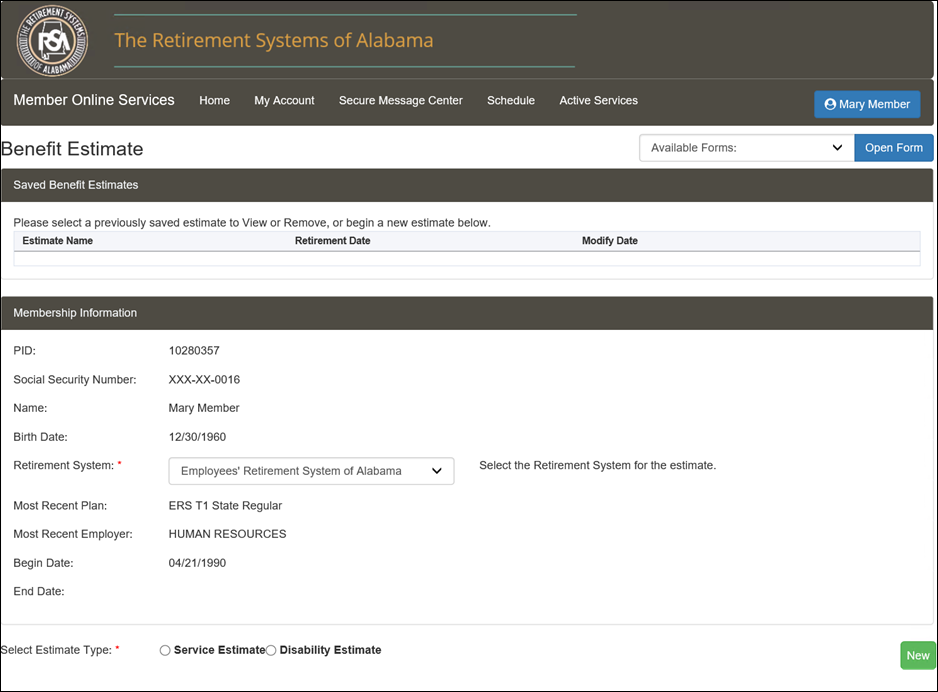
Step 2 -- The Benefit Estimate screen displays.
7.1.2 Requesting a Benefit Estimate
Step 1 -- Follow the steps from Section 7.1.1, Navigating to the Benefit Estimate Screen.
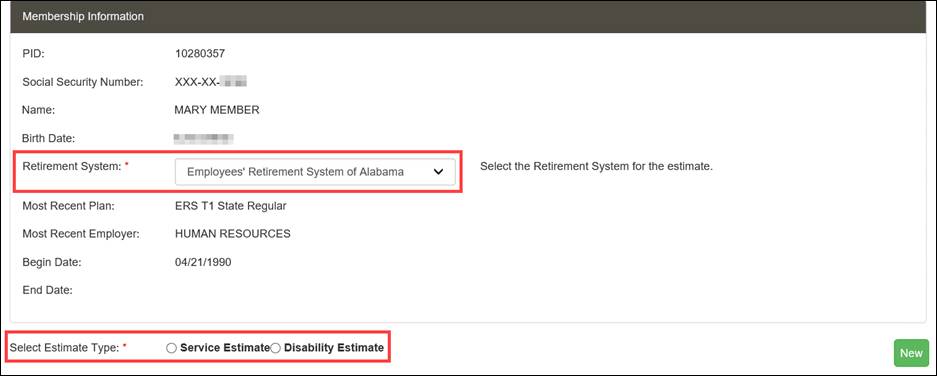
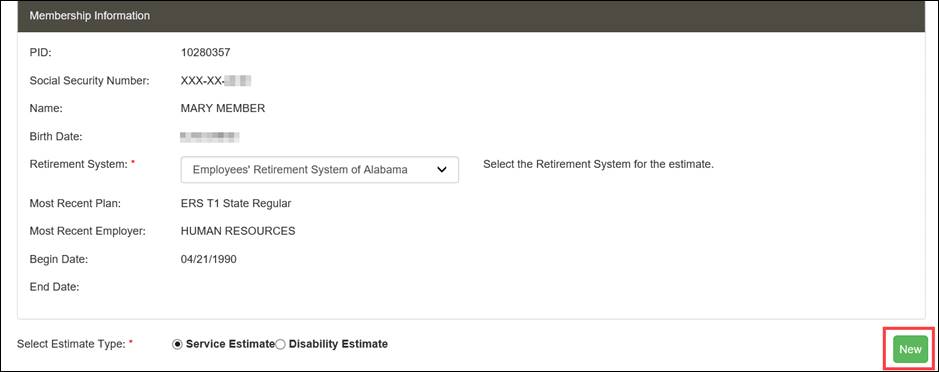
Step 2 -- Choose the Retirement System and select the type of estimate from the Select Estimate Type field.
Step 3
-- Then
click ![]() .
.
Step 4
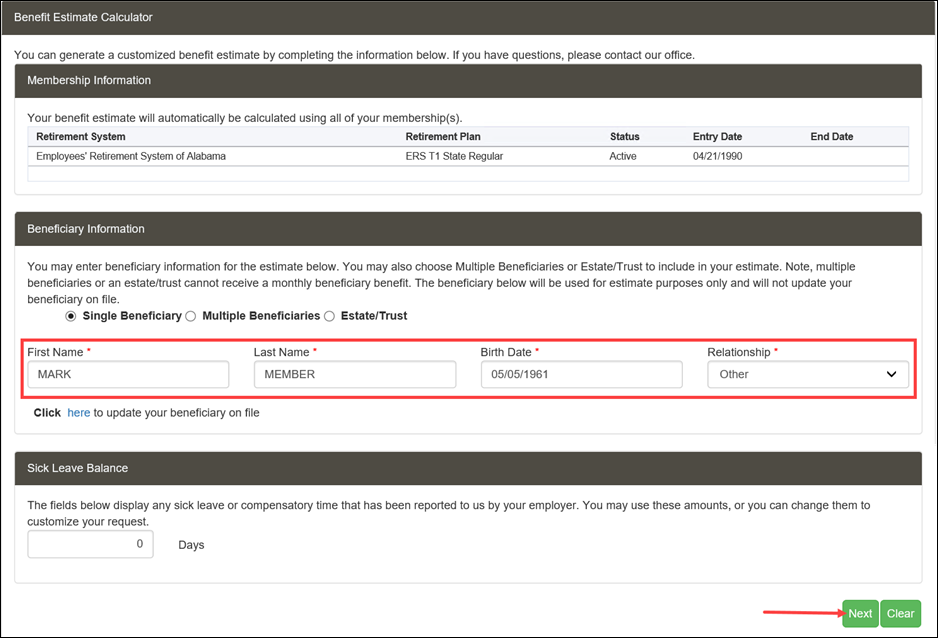
-- Scroll
down to the Benefit Estimate Calculator section. Verify or enter
a beneficiary in the Beneficiary
Information. Then click ![]() .
.
Note: A section called Sick Leave Balance appears if your employer allows sick leave to be credited toward your service.
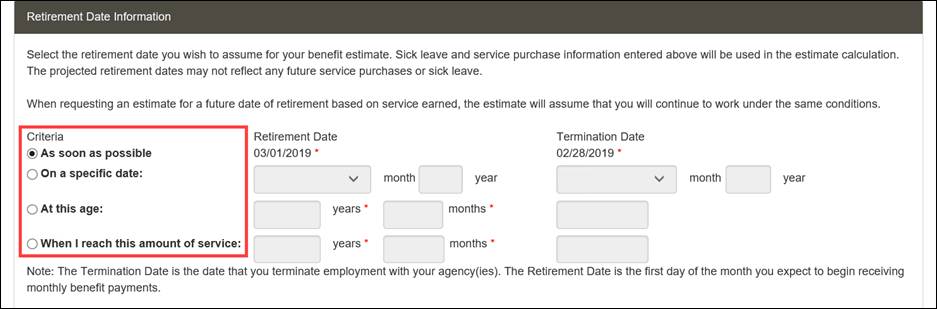
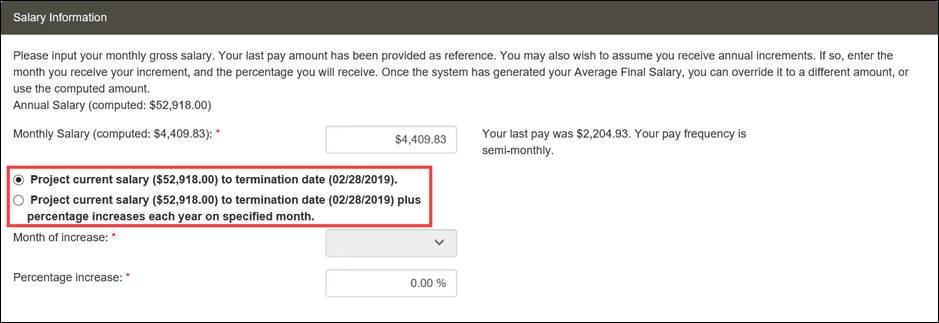
Step 5 -- Scroll down to the Retirement Date Information and Salary Information sections; select the appropriate options for the estimate.
Step 6
-- Click
![]() .
.
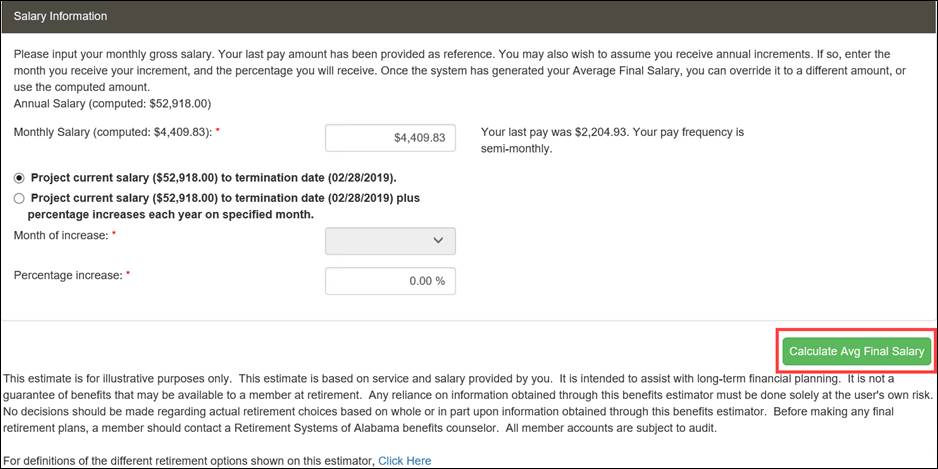
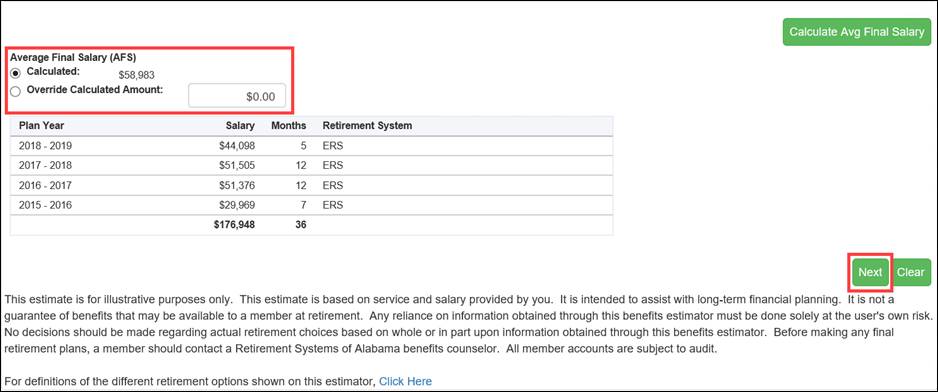
Step 7
-- The
AFS section displays. Verify or change the AFS as necessary. Click
![]() .
.
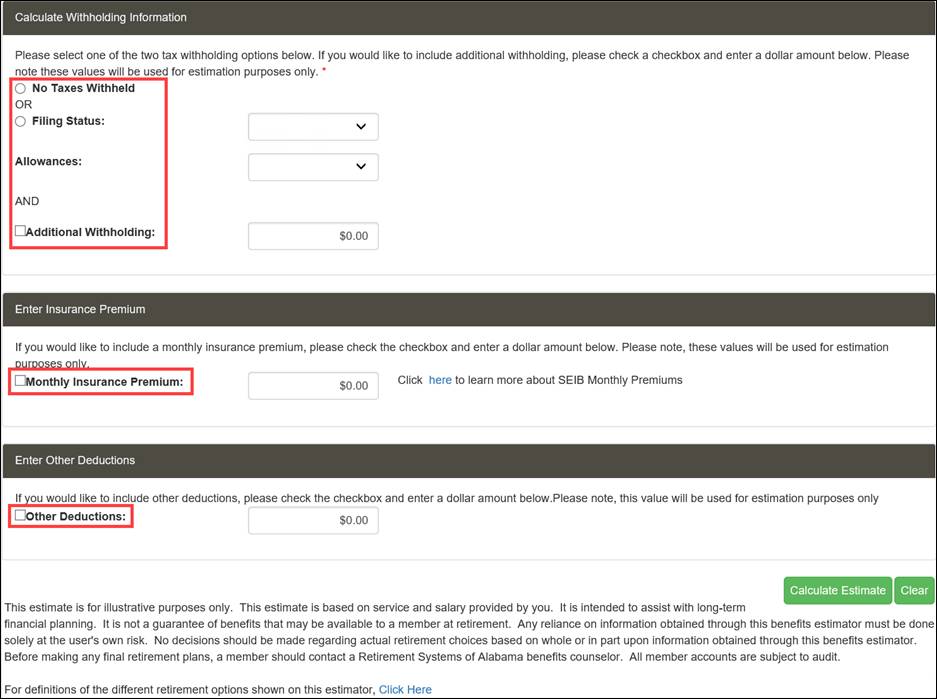
Step 8 -- The Calculate Withholding Information section displays. Enter withholding information and/or insurance or other deductions.
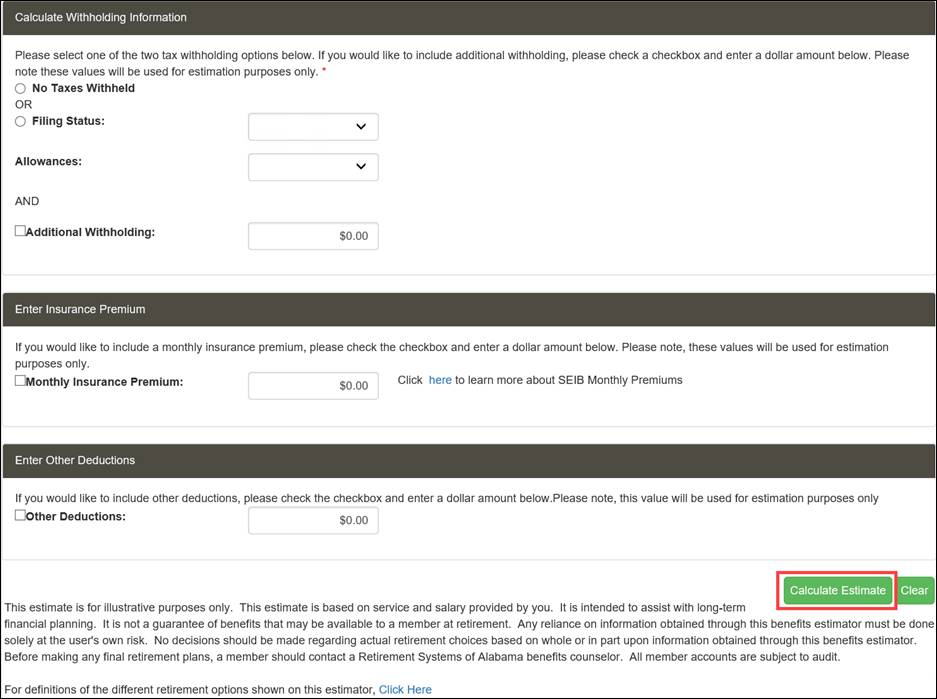
Step 9
-- Click
![]() .
.
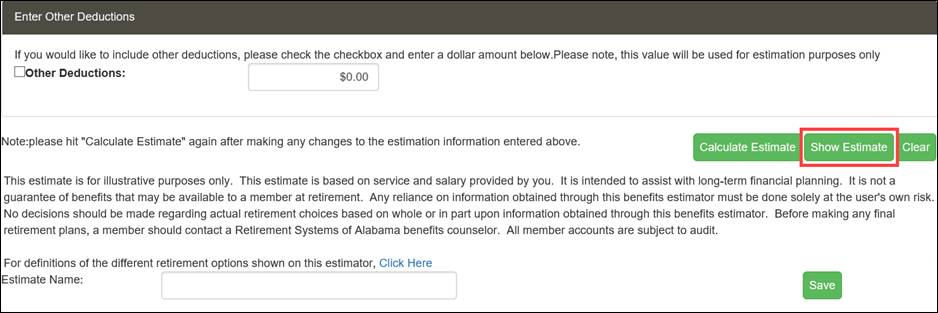
Step 10
-- To
view the benefit estimate results, click ![]() .
.
Note: If you wish to save the estimate, you
can enter a name in the Estimate Name field,
then click ![]() .
.
Step 11
-- Click
![]()
![]()
Step 12 -- The Benefit Estimate result letter and calculation messages are displayed.
Note: You can save and print estimates if needed.

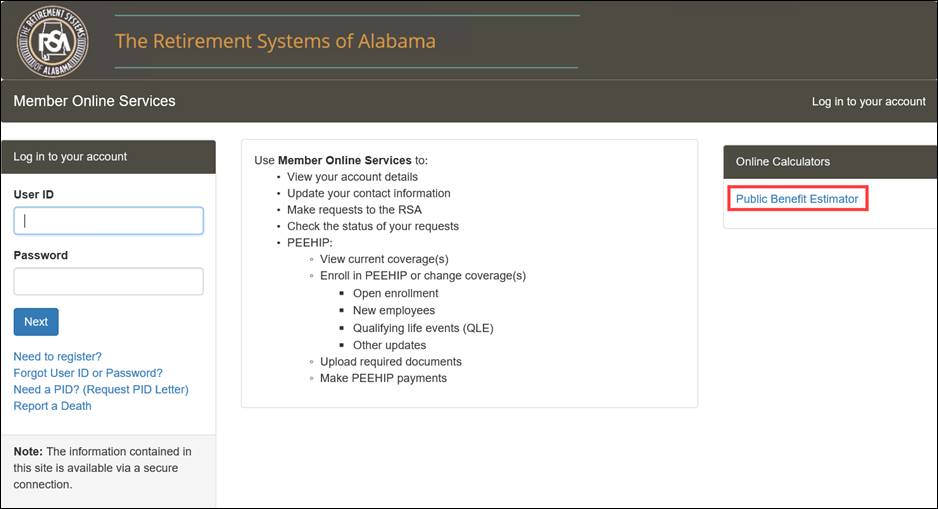
7.1.3 Non-Member Access to the Public Estimate Calculator
The following steps outline how a non-member can use the Public Benefit Estimator.
Step 1
-- Click
![]() from
the login page of the RSA website.
from
the login page of the RSA website.
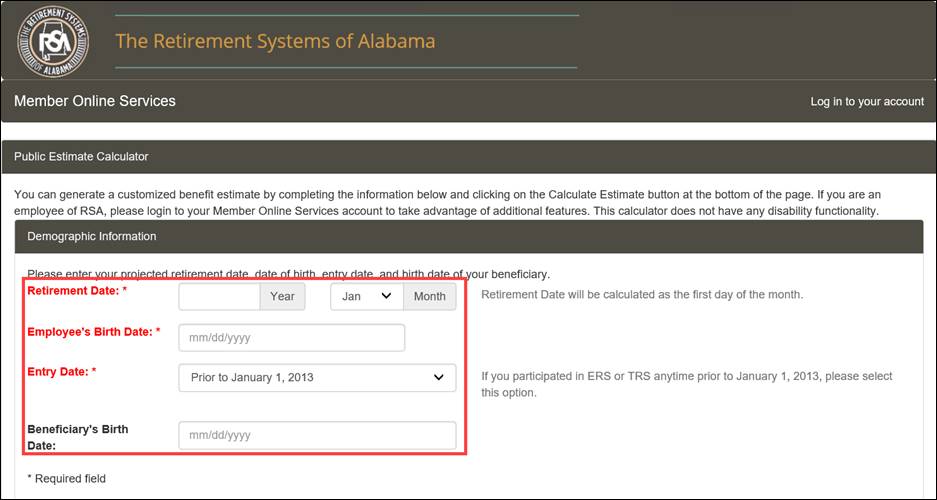
Step 2 -- Enter details in the Demographic Information section.
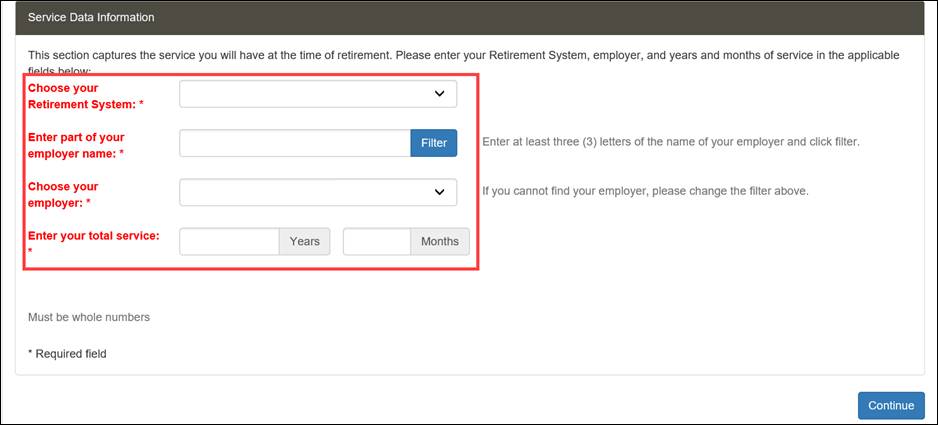
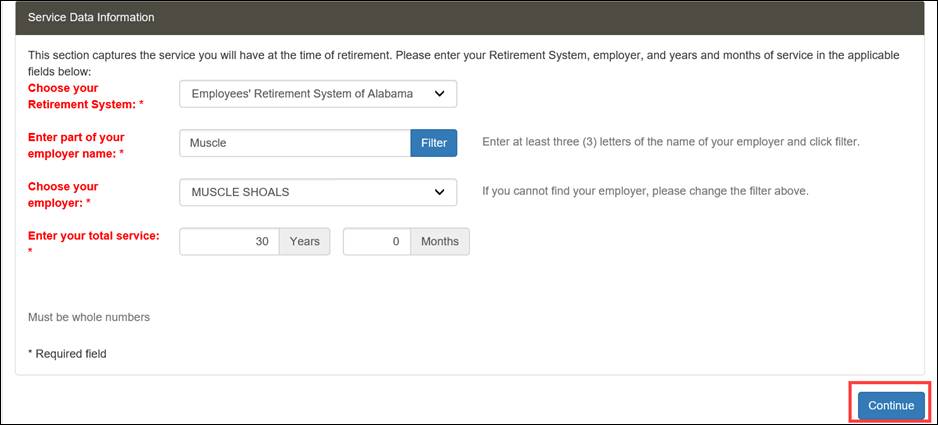
Step 3 -- Enter details in the Service Data Information section.
Step 4
-- Click
![]() .
.
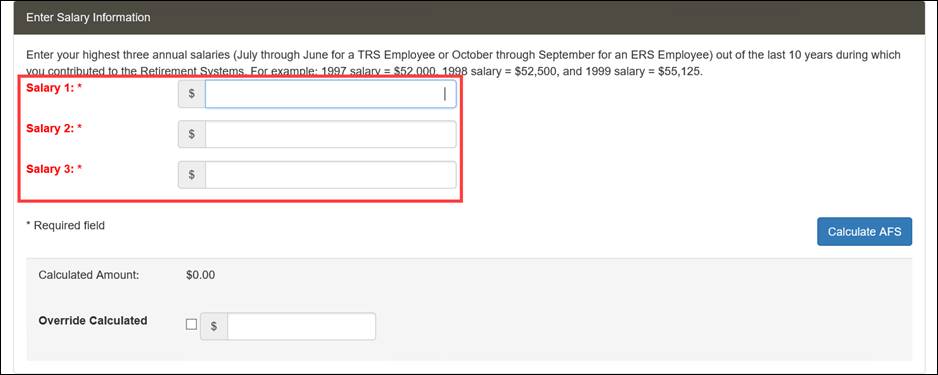
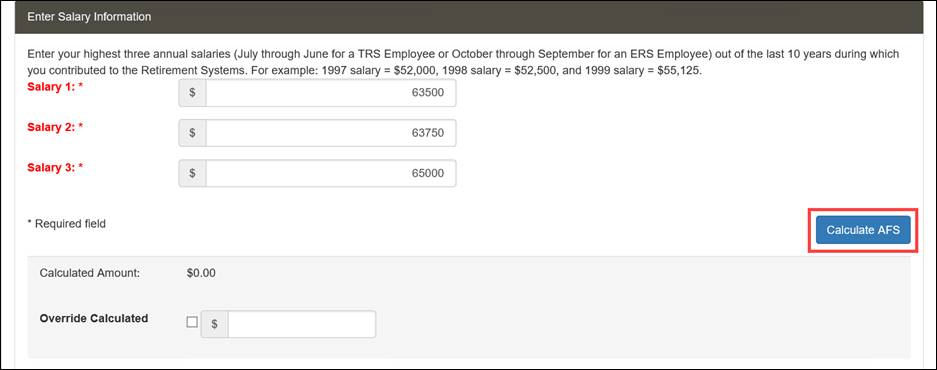
Step 5 -- The Enter Salary Information section displays. Enter salary details.
Step 6
-- Click
![]() .
.
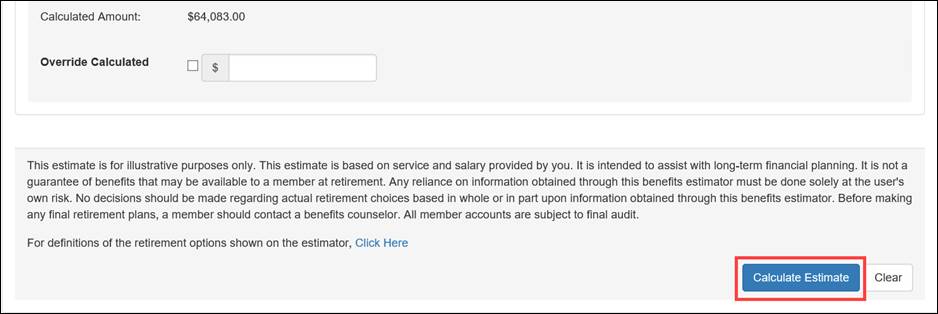
Step 7
-- Your
average final salary is calculated. Click ![]() .
.
Note: The Calculated Amount may be overridden by selecting the Override Calculated checkbox and entering a new amount in the field.
Step 8
-- Click
![]() .
.
![]()
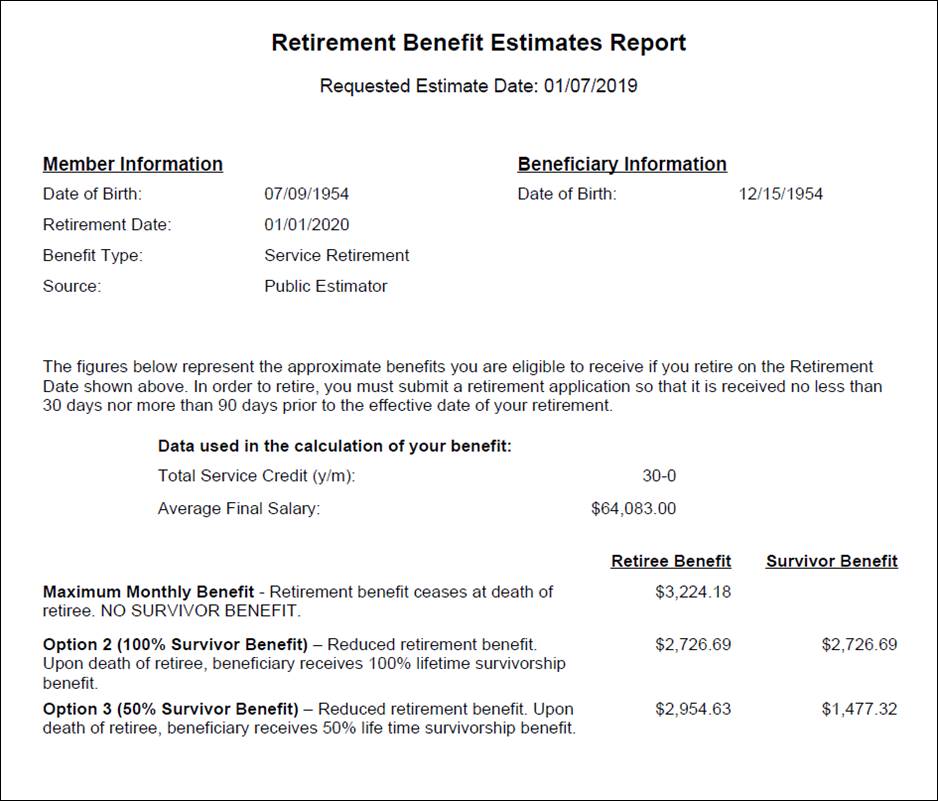
Step 9 -- A PDF document opens with your benefit estimate results.
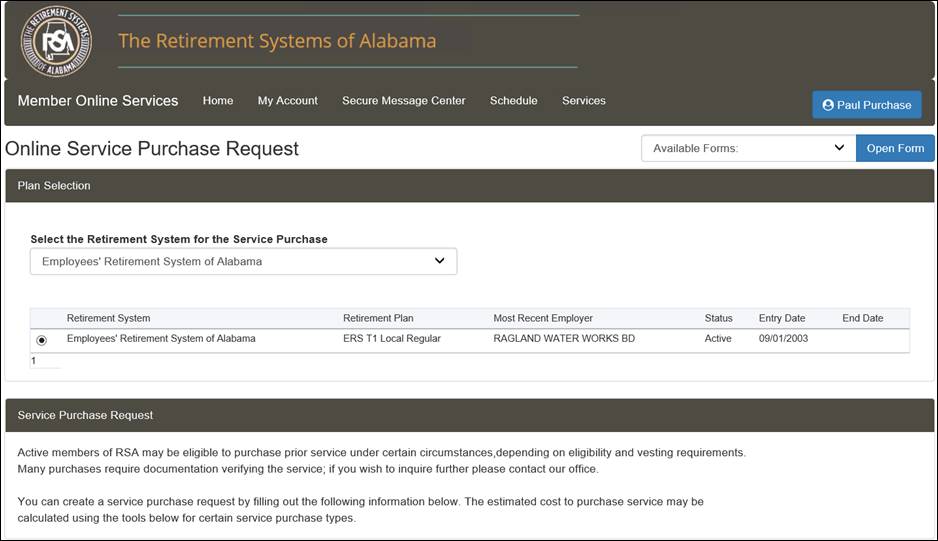
The Online Service Purchase Request screen allows active members to request a service purchase calculation and calculate a service purchase cost for some service purchases. Service purchase requests may only be applied for if the active member is eligible. The type of service purchase request will determine the specific fields that display on each screen during the process.
7.2.1 Navigating to the Service Purchase Request Screen
The following steps describe how to navigate to the Online Service Purchase Request screen and request a calculation. The active member will first log in to the MOS website to follow the steps in the sections that follow.
Step 1
-- Navigate
to the Online Service Purchase Request screen by clicking
the following menu option from the menu bar:
Services > Service Purchase Request
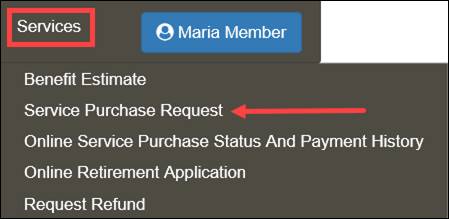
The Online Service Purchase Request screen displays.
Step 2 -- Scroll down to the Service Purchase Request section. Select the Service Purchase Type from the drop-down menu.
Note: You can submit multiple service purchase requests to the RSA if the purchase period dates do not overlap. Also, two service purchases of the same type cannot be open at the same time.
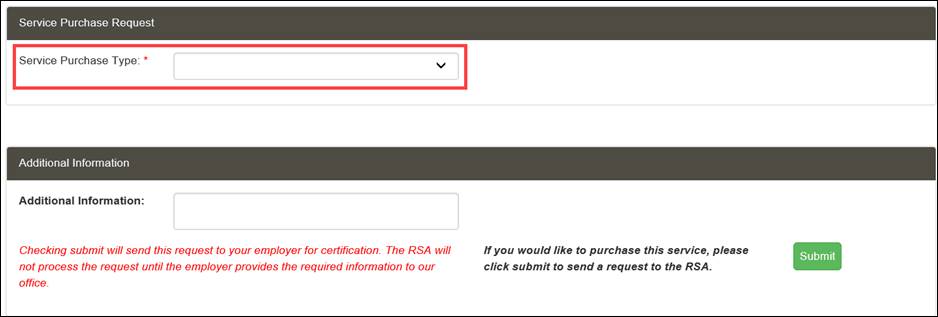
Step 3 -- Fields display according to the Service Purchase Type that is selected. Answer the questions in all required fields.
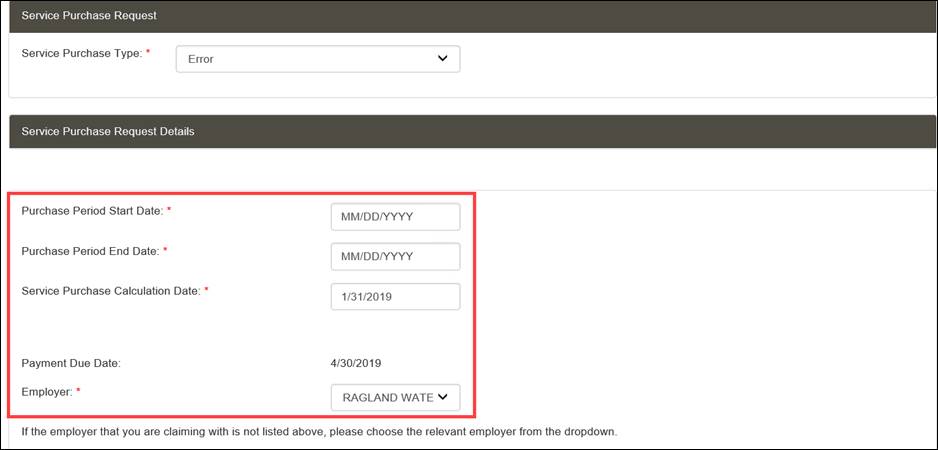
Step 4
-- Click
![]() .
.

Step 5
-- A
success message for the submission displays. Click ![]() .
.
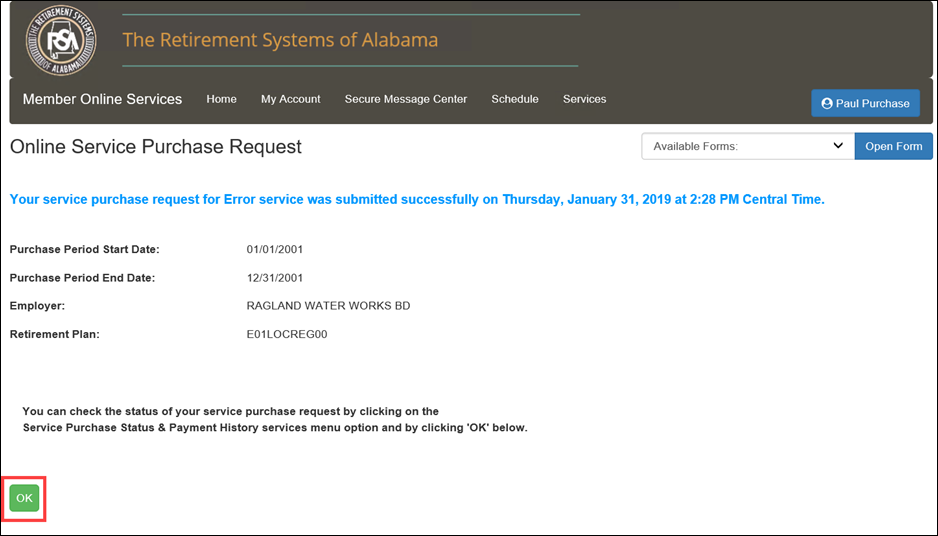
Step 6 -- The Online Service Purchase Status And Payment History screen displays with a summary of your request.
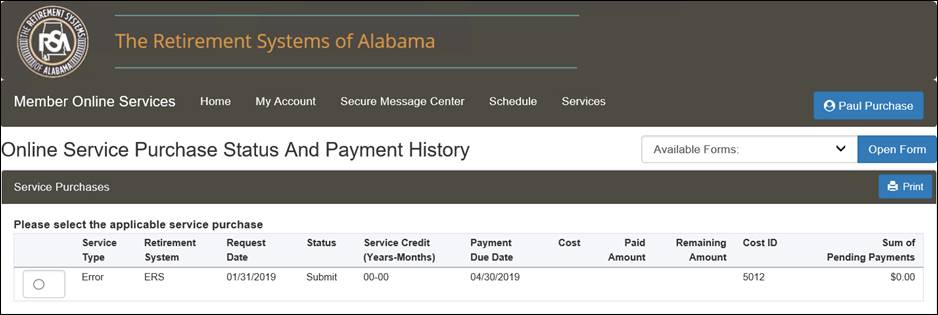
7.3 Online Service Purchase Status and Payment History
The Online Service Purchase Status and Payment History screen allows active members to check the status of an online service purchase request and view the history of prior and pending payments.
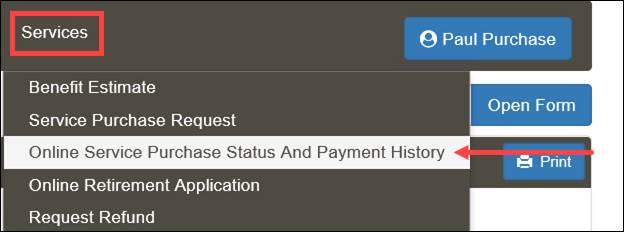
7.3.1 Navigating to the Online Service Purchase Status and Payment History Screen
The following steps describe how to navigate to the Online Service Purchase Status and Payment History screen. The active member will first log in to the MOS website to follow the steps in the sections that follow.
Step 1
-- Navigate
to the Online Service Purchase Status and Payment History screen
by clicking the following menu option from the menu bar:
Services > Online Service Purchase Status and Payment History
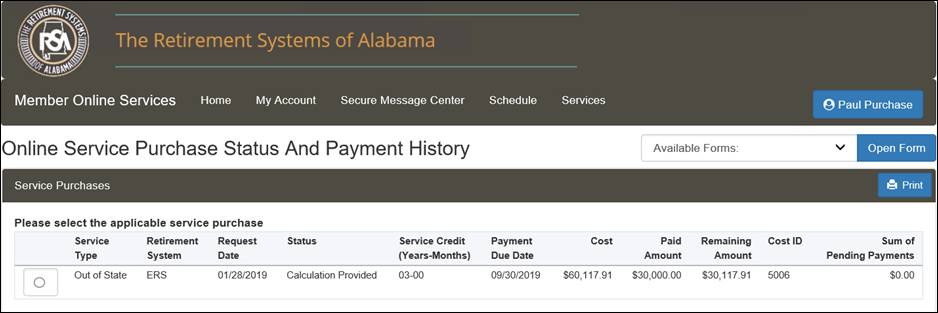
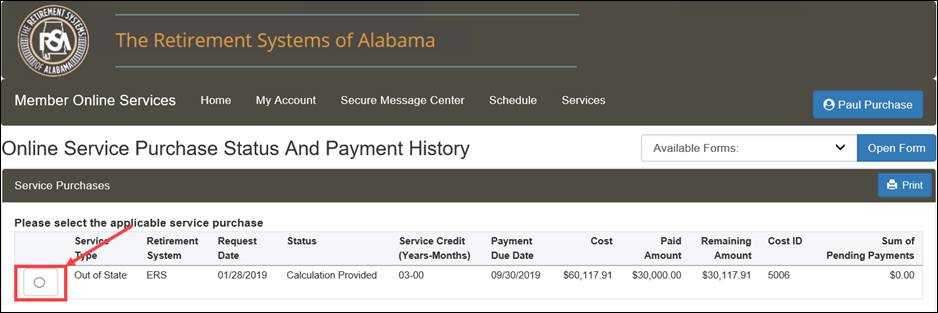
The Online Service Purchase Status and Payment History screen displays. The member can view information regarding the service purchase status and the payment history.
Note: To print the content on the screen, click Print and a printable pop-up version of the screen appears.
7.3.2 Online Service Purchase Payment
The Online Service Purchase Payment screen allows members to make payments on approved service purchases.
The following steps describe how to make an online payment through setting up a lump sum payment.
Step 2 -- Follow the steps from Section 7.3.1, Navigating to the Online Service Purchase Status and Payment History Screen.
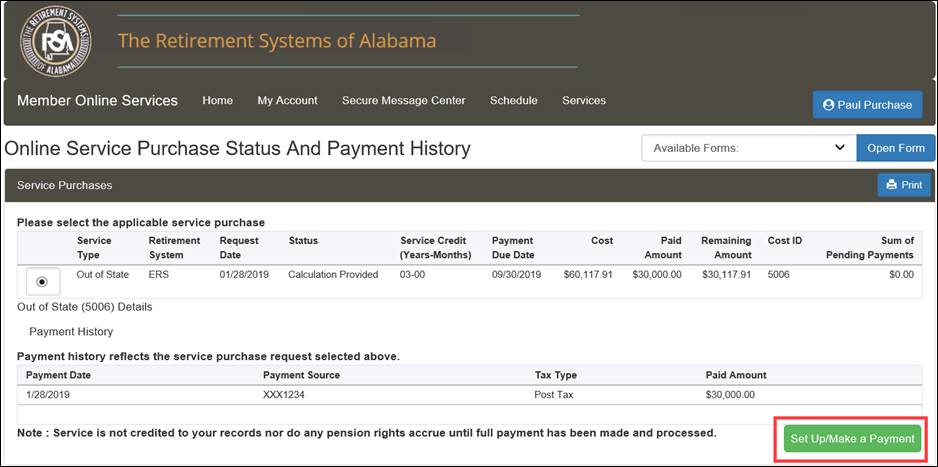
Step 3 -- Select a service purchase from the table.
Step 4
-- Click
![]() .
.
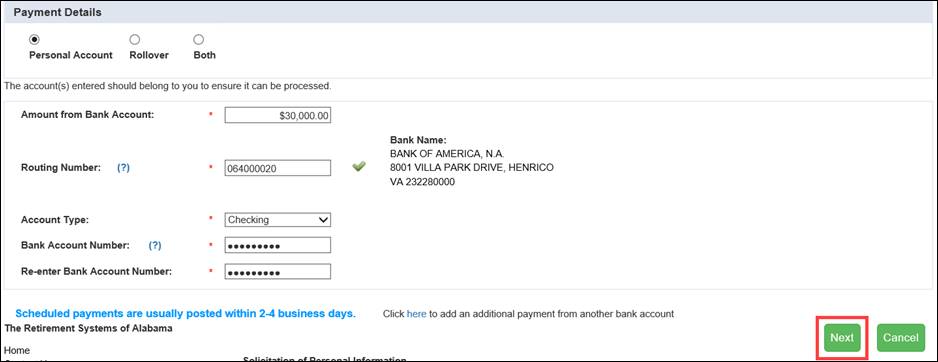
Step 5 -- The Setup Payment screen displays. From the Payment Details section, select the Personal Account radio button.
Note: When submitting Rollover, select the Rollover radio button and enter rollover details
Note: When submitting Rollover and Personal Account, select the Both radio button and enter payment details and rollover details.
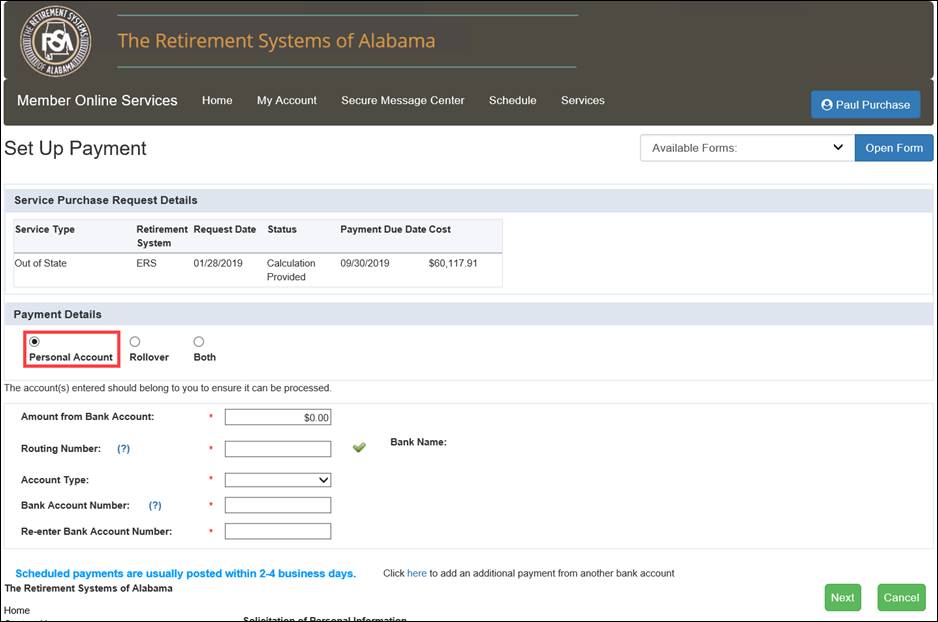
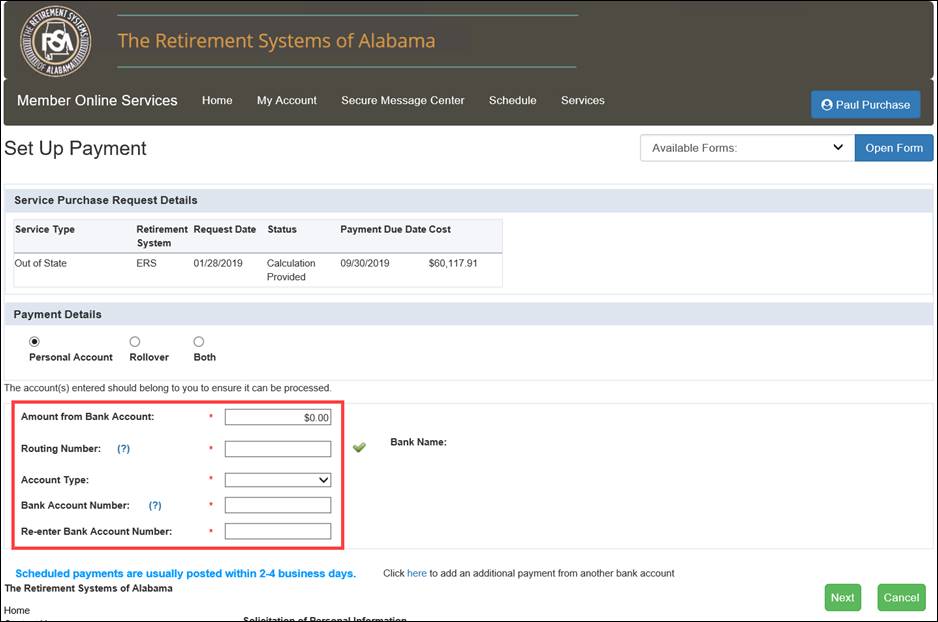
Step 6 -- Enter information into the Payment Details section.
Note: Select ![]() to the right
of the Routing Number field to retrieve the name of the bank from
which the service purchase funds are being paid.
to the right
of the Routing Number field to retrieve the name of the bank from
which the service purchase funds are being paid.
Step 7
-- Click
![]() .
.
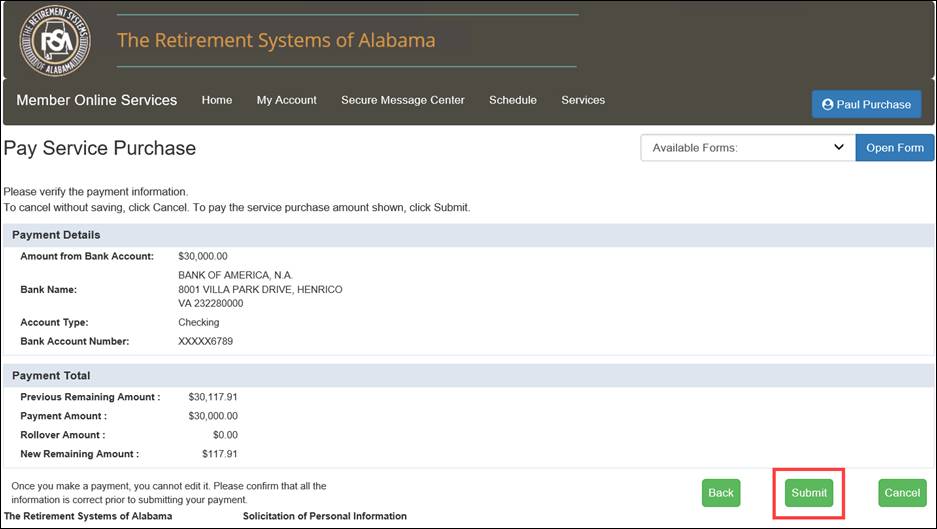
Step 8
-- The
Pay Service Purchase screen displays. Review the payment details
and click ![]() .
.
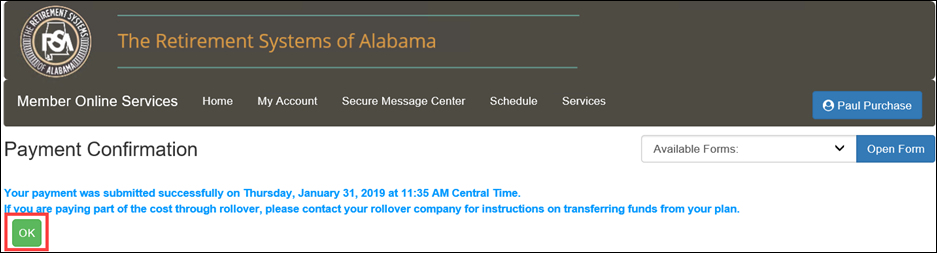
Step 9
-- The
Payment Confirmation screen displays. Click ![]() .
.
Note: An email notification is sent to the active member with the details of the request for the Lump Sum Total Payment.
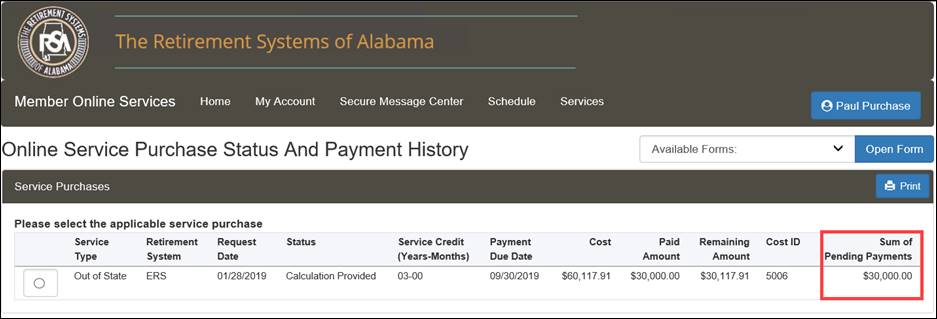
You are directed back to the Online Service Purchase Status and Payment History screen. From here, you can see the Sum of Pending Payments.
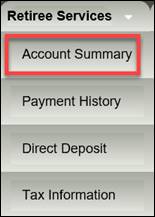
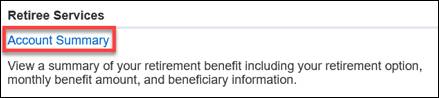
From the Account Summary screen, you can view your benefit account information, monthly benefit information, beneficiary information, direct deposit information, IRS tax withholding information, and deduction information.
The following steps describe how to navigate to the Account Summary screen. You must be logged into the MOS website to follow the steps in the sections that follow.
Step 1 -- On the Home screen, either select Account Summary from the My Account drop-down menu or click the Account Summary link.
|
|
Step 2 -- The Account Summary screen displays. You are able to view specific information regarding benefits that you are receiving. You are also able to change and update your tax withholdings and direct deposit information.
Note: If you have more than one benefit account with the RSA, all of the benefit accounts will be displayed under the Benefit Account Information section.
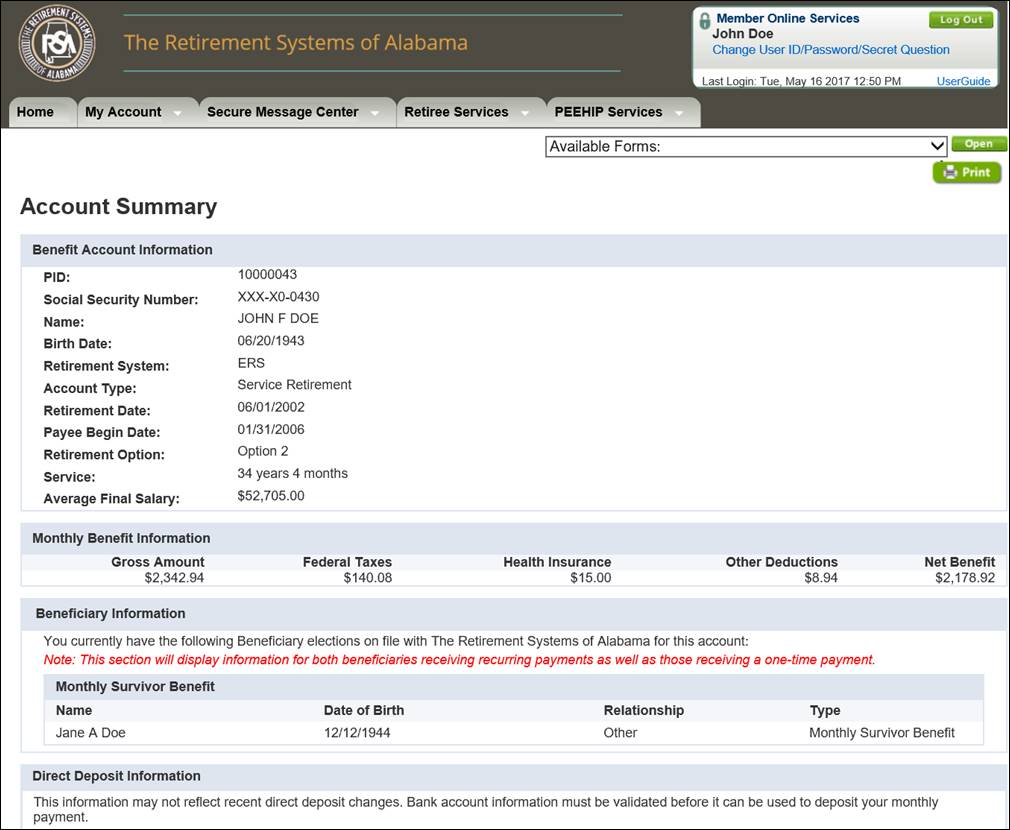
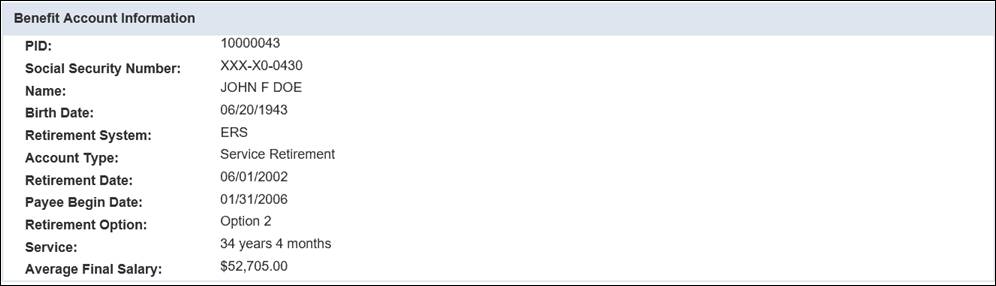
The Benefit Account Information section
shows basic information regarding the benefit being received including
your PID, the retirement system from which the benefit is paid, the type
of account, the account effective date, your retirement option, total
years of service, and average final salary.
The Monthly Benefit Information section shows the gross and net amount of the benefit, along with the amounts that are being deducted. If changes are made to any of the deductions (by RSA), the net amount of the benefit received would be recalculated and display the correct amounts in real-time.
![]()
The Beneficiary Information section displays all types of beneficiaries including monthly benefit beneficiaries as well as one-time payment beneficiaries.

If you have elected to have your benefit direct deposited, the Direct Deposit Information section shows those details.

The IRS Tax Withholding Information section shows the federal tax information for the benefit. You will be able to change your tax elections by clicking on the link, change your tax information click here.

If there are any other deductions being withheld from the benefit, they display in the Deduction Information section.

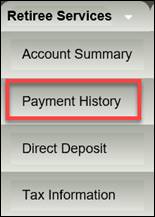
The Payment History screen shows information regarding the benefit that you are receiving. From this screen, you can view information on individual payments that you have received in the past, along with the amount of deductions and taxes that were withheld from the benefit.
The following steps describe how to navigate to the Payment History screen. You must be logged into the MOS website to follow the steps below.
Step 1 -- On the Home screen, either select Payment History from the My Account drop-down menu or click the Payment History link.
|
|
Step 2 -- The Payment History screen displays.
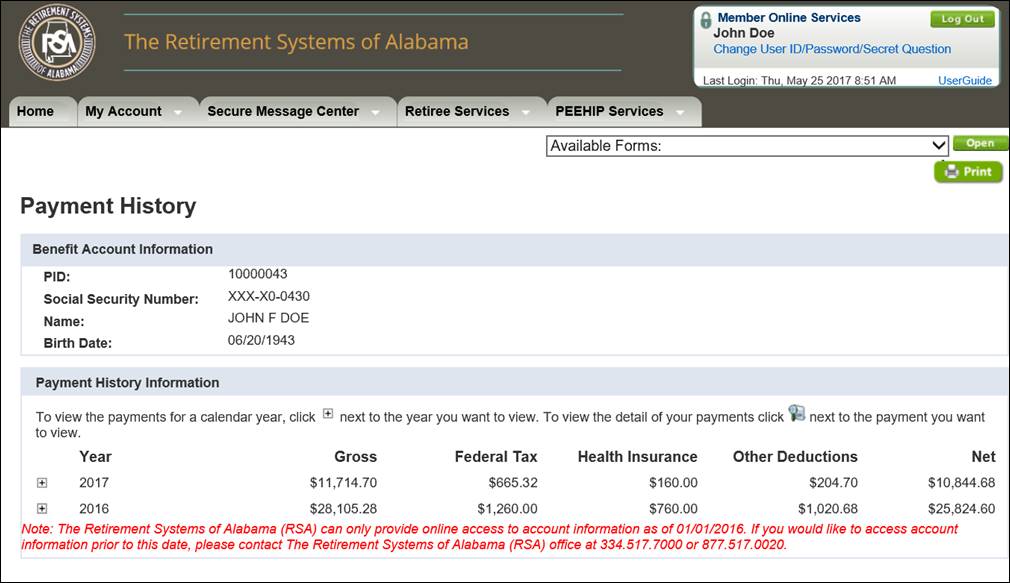
The Benefit Account Information section shows the basic information regarding the benefit being received. Here you see your PID, partial Social Security Number, name, and birth date.

The Payment History Information section
of this screen shows a summary of the benefits that you have received
broken down by year. To view individual payments received, click ![]() next to the year you would
like to view. This expands the year section to show all benefits that
were received during that year.
next to the year you would
like to view. This expands the year section to show all benefits that
were received during that year.
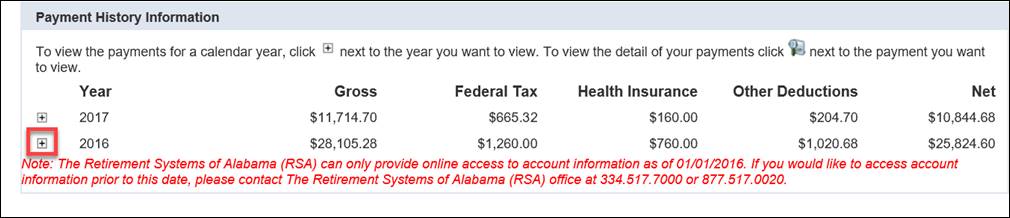
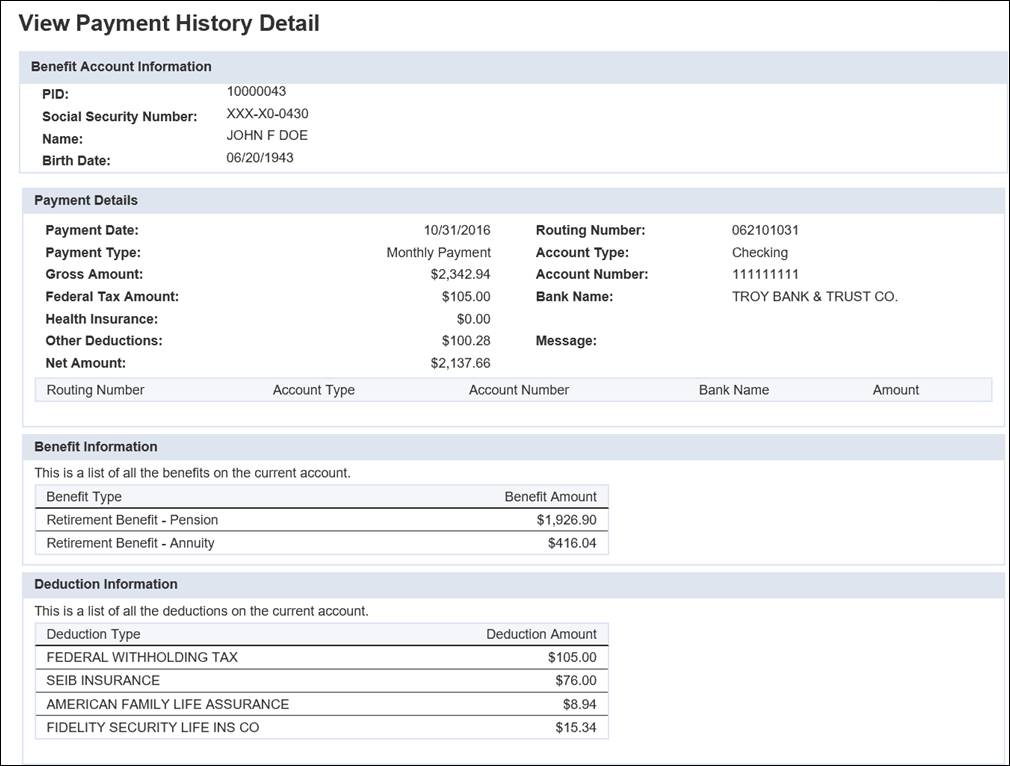
To view more specific information on an individual
payment that has been received, click ![]() next to the payment that
you would like to view.
next to the payment that
you would like to view.
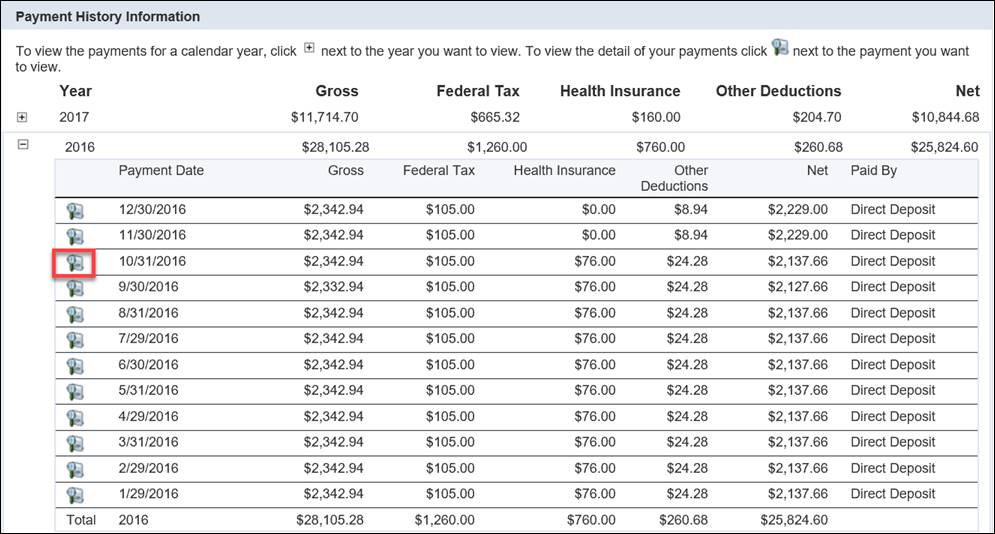
This displays another screen that shows you more detailed information on that benefit payment.
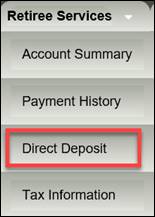
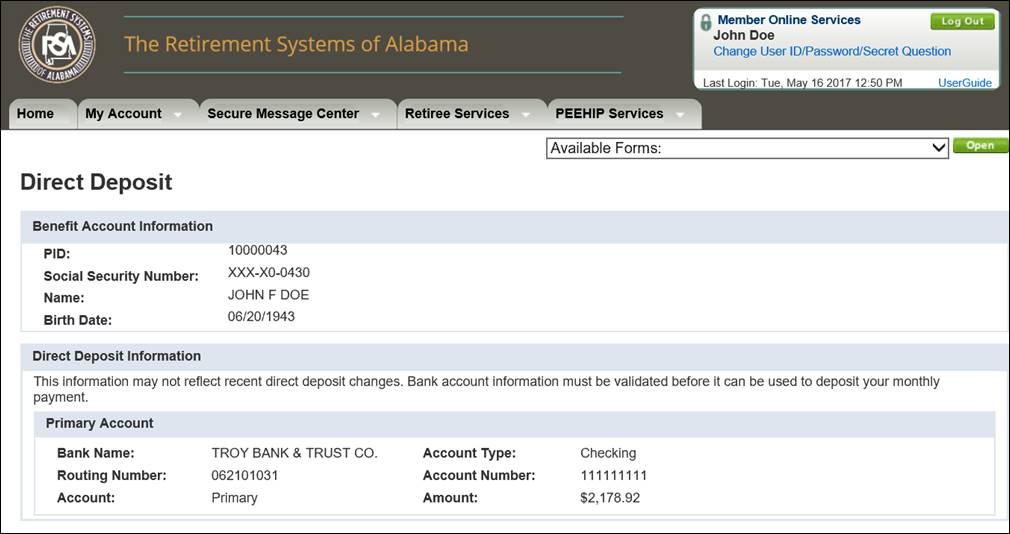
The Direct Deposit screen shows information such as account type, bank routing number, and bank account number of the bank that is currently on record with the RSA for the direct deposit of your benefit payment.
7.3.1 Navigating to the Direct Deposit Screen
The following steps describe how to navigate to the Direct Deposit screen. You must be logged into the MOS website to follow the steps in the sections that follow.
Step 1 -- On the Home screen, either select Direct Deposit from the My Account drop-down menu or click the Direct Deposit link.
|
|
Step 2 -- The Direct Deposit screen displays.
8.3.2 Viewing Your Direct Deposit Information
From the Direct Deposit screen, you can view the direct deposit information that is currently on record with the RSA for your benefit account(s).
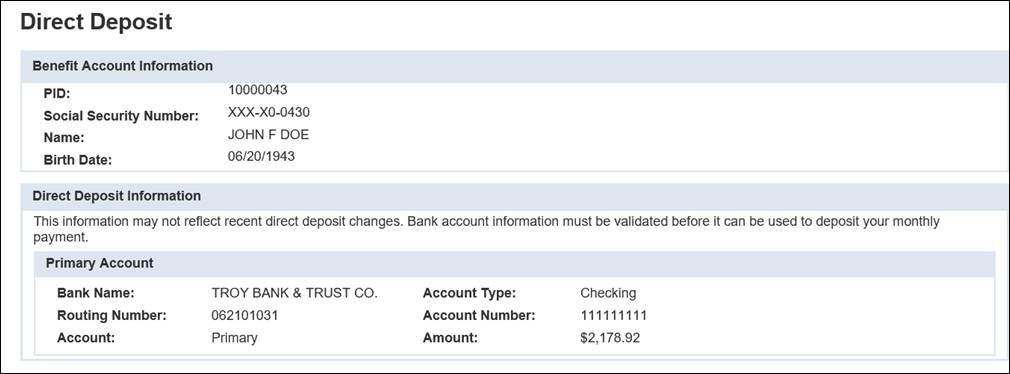
The Benefit Account Information section of the screen shows the basic information regarding the benefit being received, including your PID, partial Social Security Number, name, and birth date.

If you have elected to have your benefit direct deposited, the Direct Deposit Information section shows the information for the bank where the benefit is deposited.

The Tax Information screen summarizes the federal taxes currently withheld from your benefit. On this screen, you can estimate how different withholdings change your net benefit amount. You can view and change your tax withholdings from this screen.
8.4.1 Navigating to the Tax Information Screen
The following steps describe how to navigate to the Tax Information screen. You must be logged into the MOS website to follow the steps in the sections that follow.
Step 1 -- On the Home screen, either select Tax Information from the My Account drop-down menu or click the Tax Information link.
|
|
Step 2 -- The Tax Information screen displays.
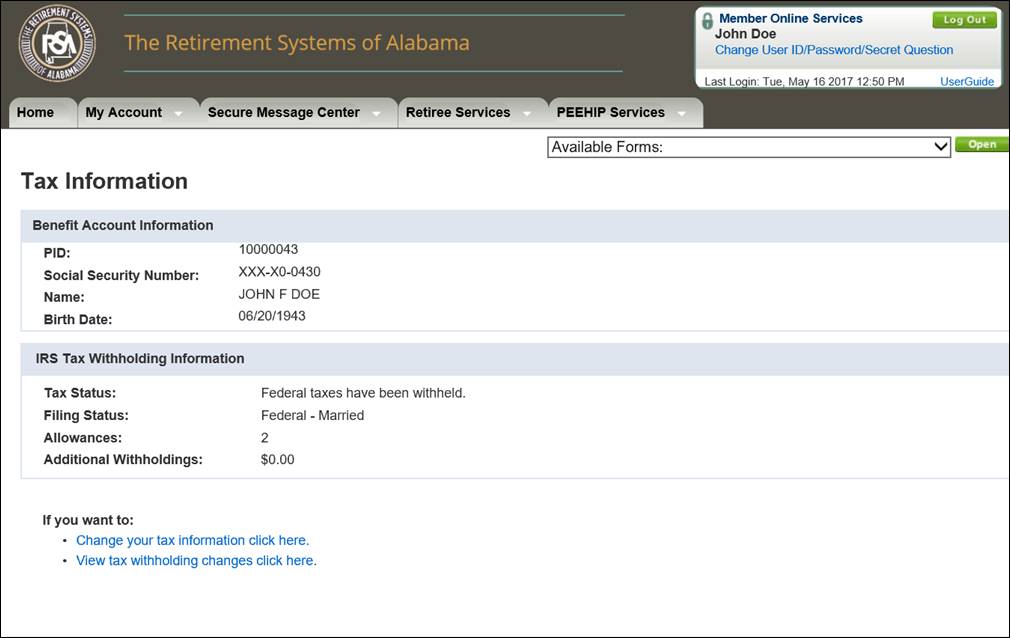
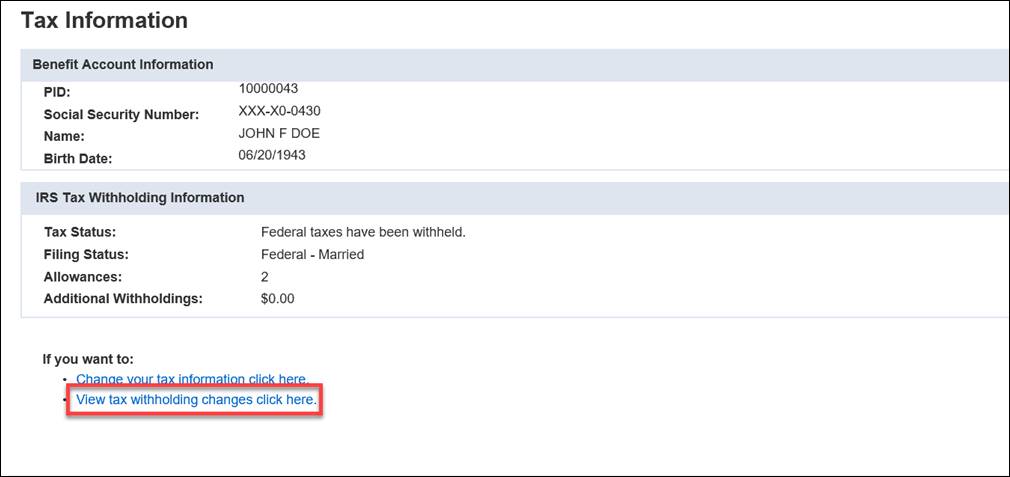
8.4.2 Viewing the Tax Information Screen
The Benefit Account Information section shows basic information regarding your benefit, including your PID, partial Social Security Number, name, and birth date.

The IRS Tax Withholding Information section shows your current IRS tax details.

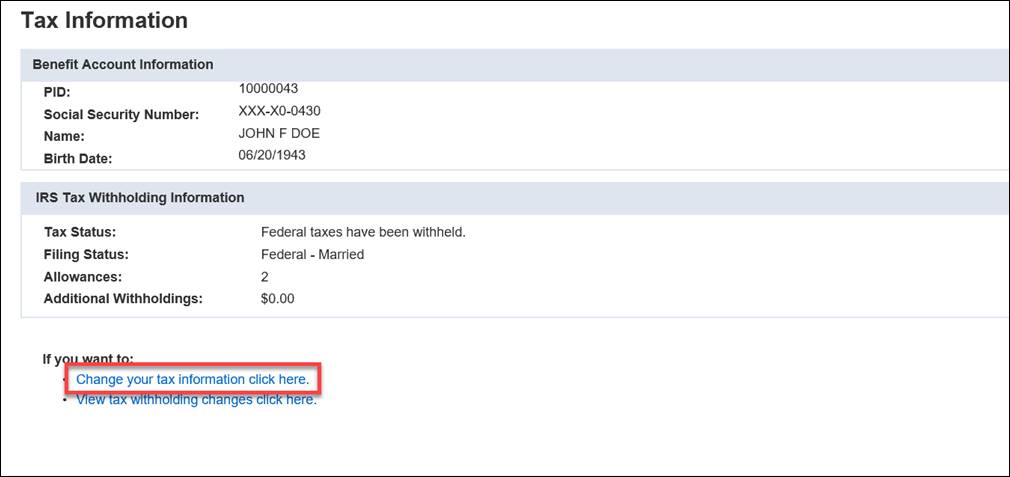
8.4.3 Changing Your Tax Withholdings
Using the Tax Information screen, you can change your tax withholdings. If you receive payments from multiple benefit accounts and wish to change the withholdings in each of them, you must do so individually.
Follow the directions in the section called Navigating to the Tax Information Screen, then follow the steps below to change your tax withholdings. You must enter all required information on each screen. If you do not enter the required information, you will not be able to successfully change your tax withholdings.
Step 1 -- Click the link called, Change your tax information click here.
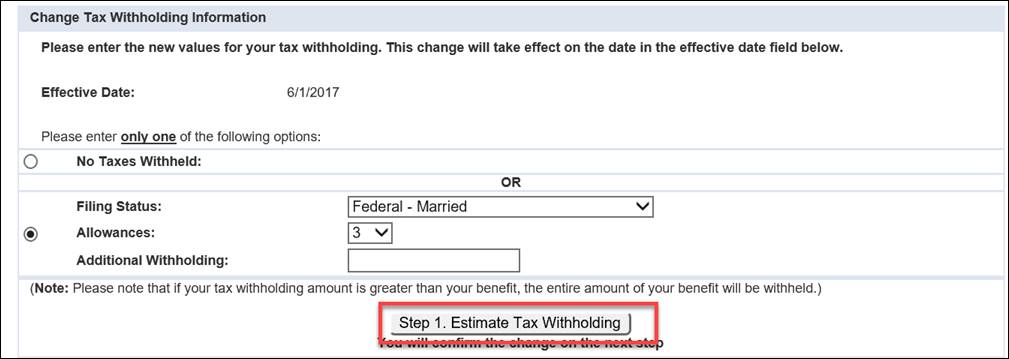
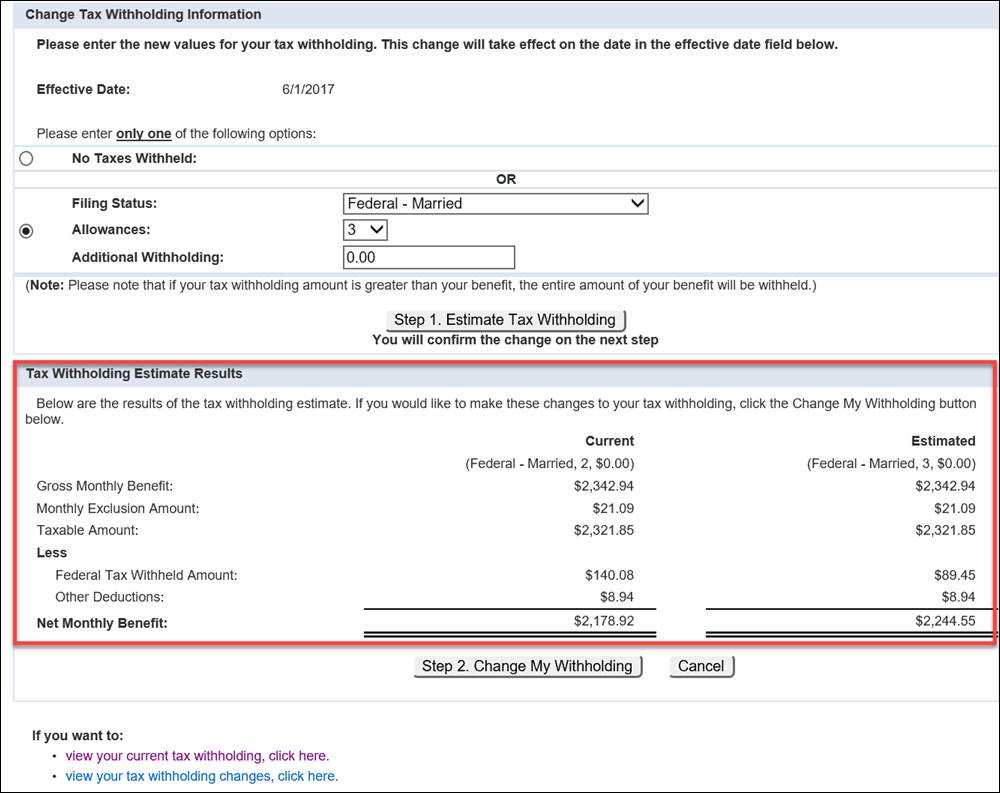
Step 2 -- Enter your new tax details, such as no taxes withheld, filing status (i.e., Federal – Married, Federal – Single, Married, but withhold at higher single rate), allowances, additional withholding, or percentage.
Note: You must select the radio button before entering information.
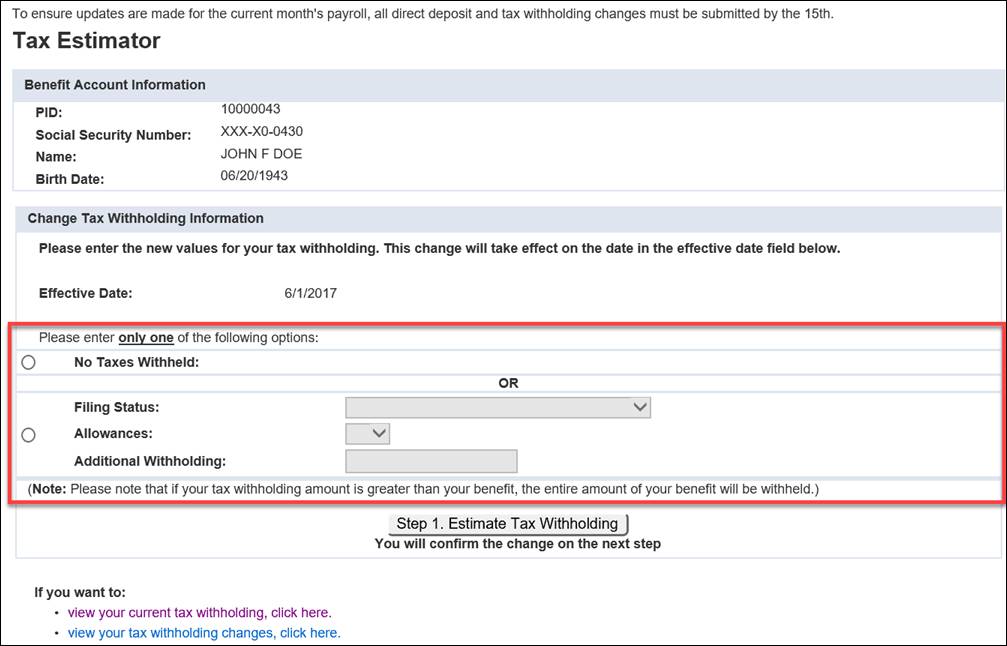
Step
3 -- Click
![]() to see how your
benefit payment will change based on your selection.
to see how your
benefit payment will change based on your selection.
Note: Your tax withholding information will not change when you click this button. You will confirm the change on the next screen.
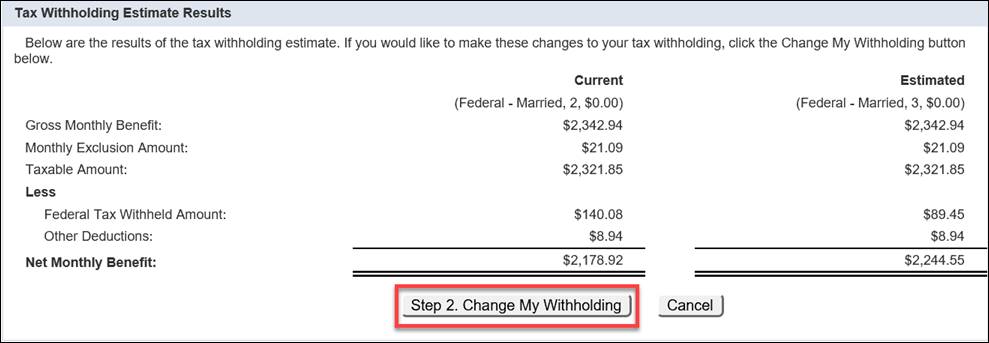
Step 4 -- Your tax withholding estimate results display. Compare the current and estimated withholdings and the effect the new withholdings have on your monthly benefit amount.
Step
5 -- To
accept the change to your tax withholdings based on the estimate, click
![]() . If you
do not want to change the tax withholdings as shown, click
. If you
do not want to change the tax withholdings as shown, click ![]() .
.
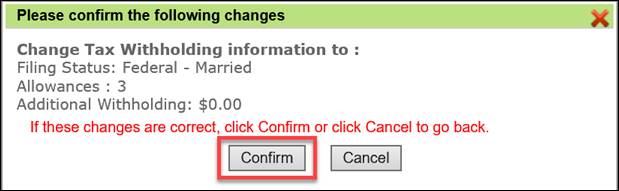
Step 6 -- The
screen that appears confirms the changes to your tax withholdings. Click
![]() .
.
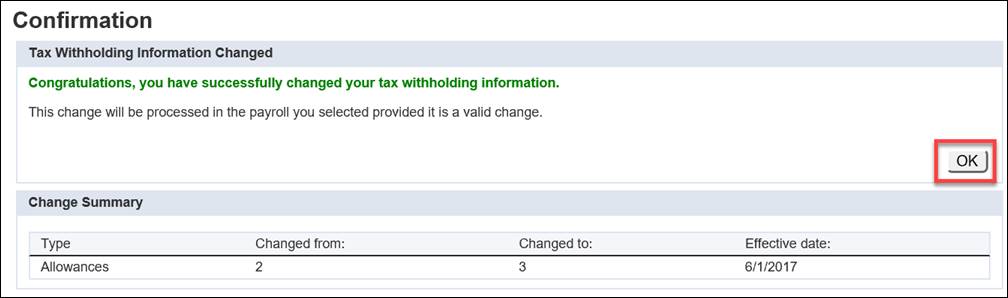
Step 7 -- A
Confirmation screen displays. Click ![]() to
return to the view your tax withholding changes page.
to
return to the view your tax withholding changes page.
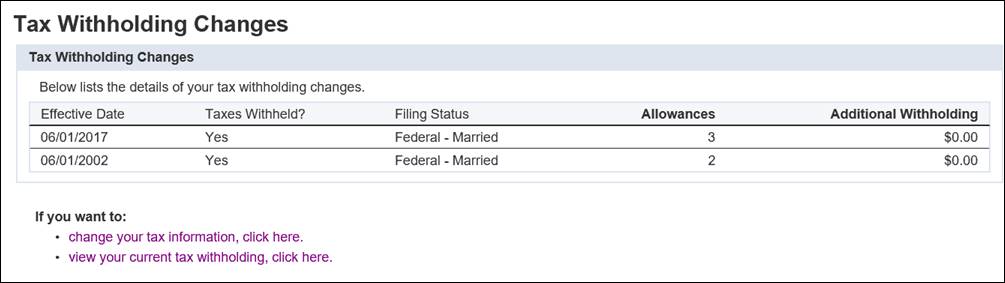
8.4.4 Viewing Tax Withholding Changes
Follow the directions in the section called Navigating to the Tax Information Screen, then follow the steps below to view your tax withholding changes.
Step 1 -- Click the link called, View tax withholding changes click here.
Step 2 -- The Tax Withholding Changes screen displays current withholding information.
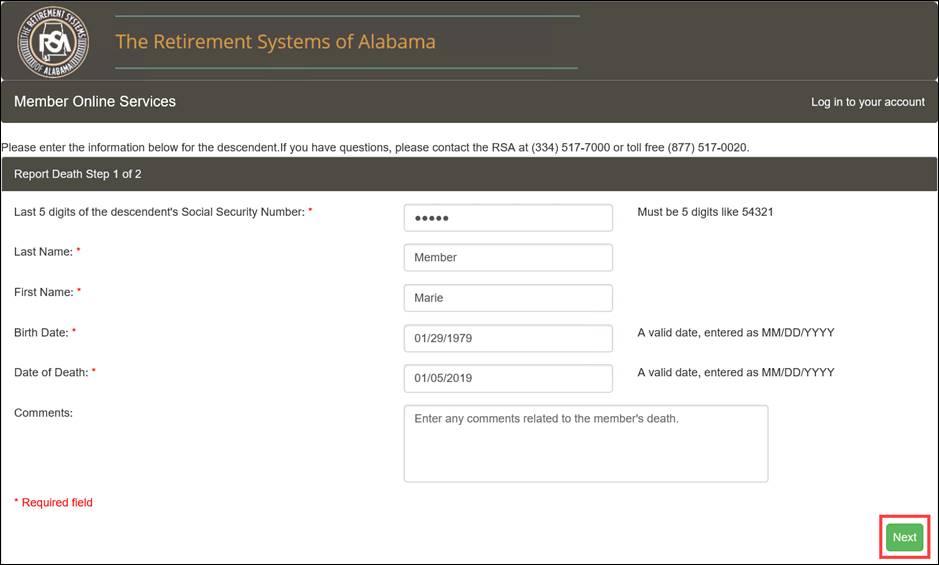
The Report Death screen allows a person to report a death of a member or payee. You must be able to answer specific questions to verify you are qualified to report the death.
Note: It is recommended that death of an active member be reported by the employer.
The following steps describe how to navigate to the Report Death screen and report a death.
Step 1 -- Navigate to the MOS login screen and click on the link called Report a Death.
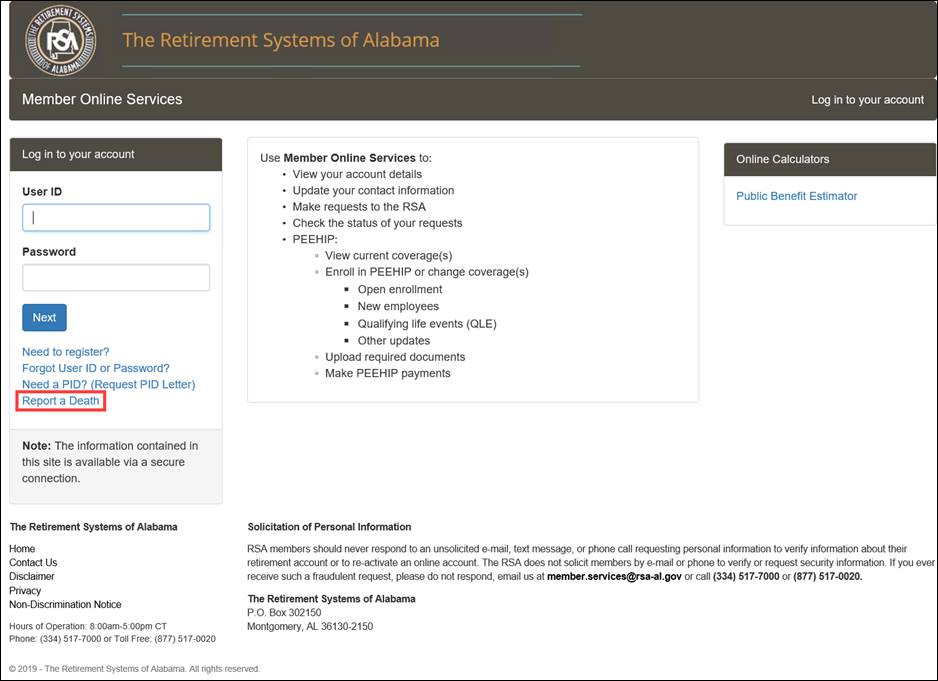
The Report Death screen displays.

Step 2 -- Enter the personal information of the deceased, including the death date.
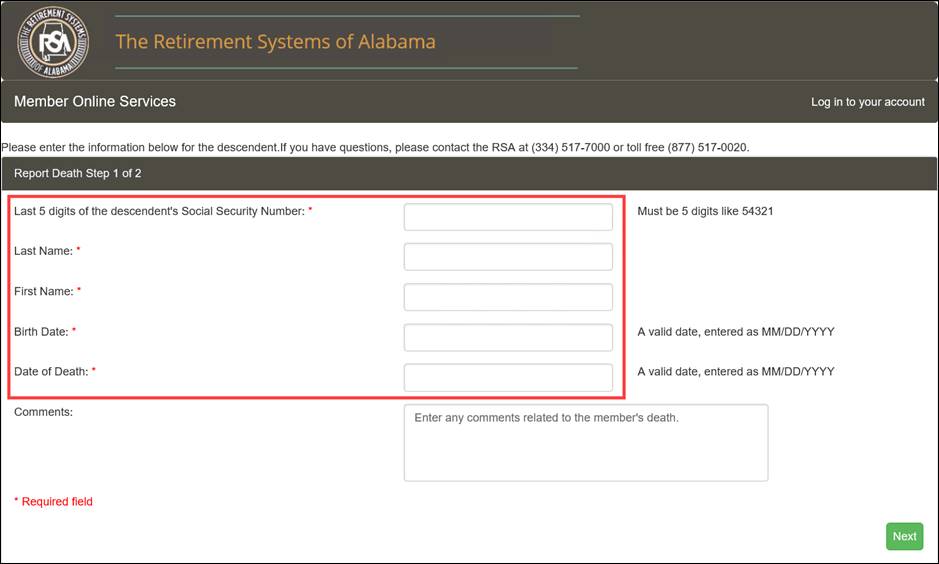
Step 3
-- Click
![]()
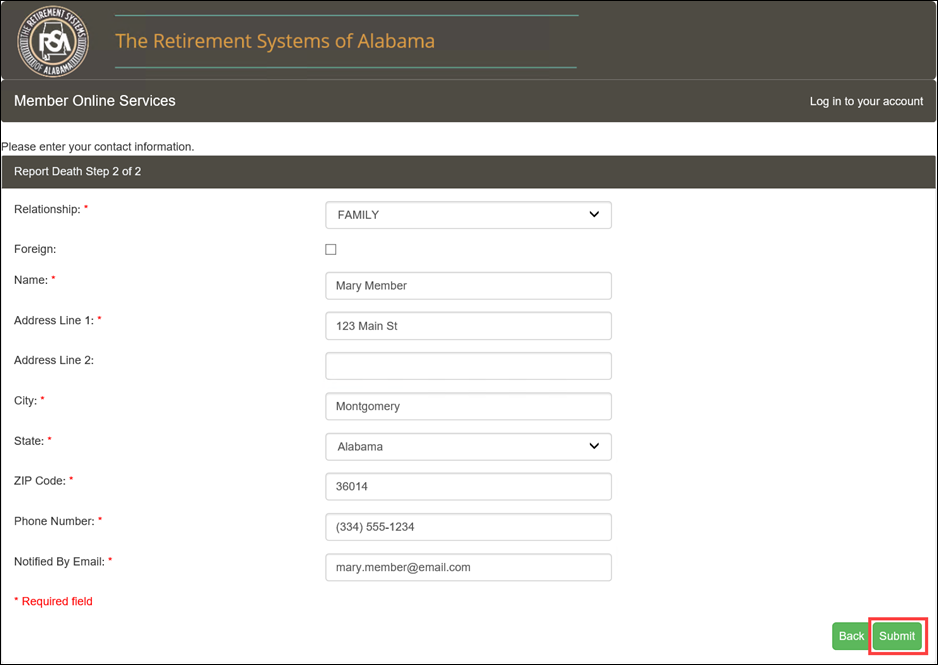
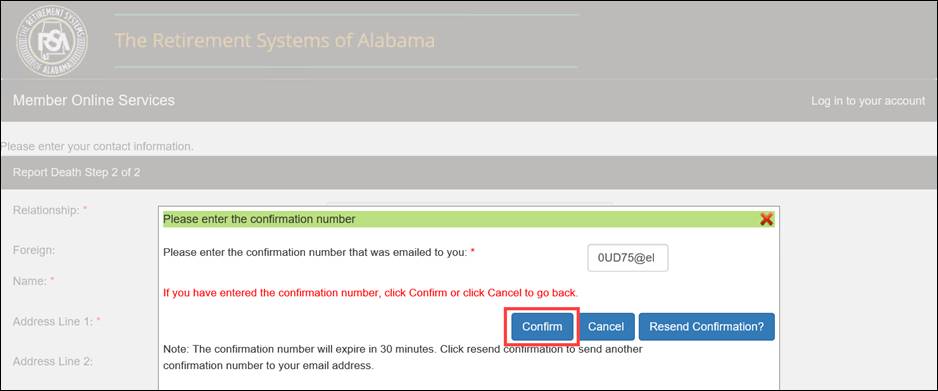
Step 4 -- The Report Death Step 2 of 2 section displays. Select the relationship to the deceased, then enter your name and contact information.
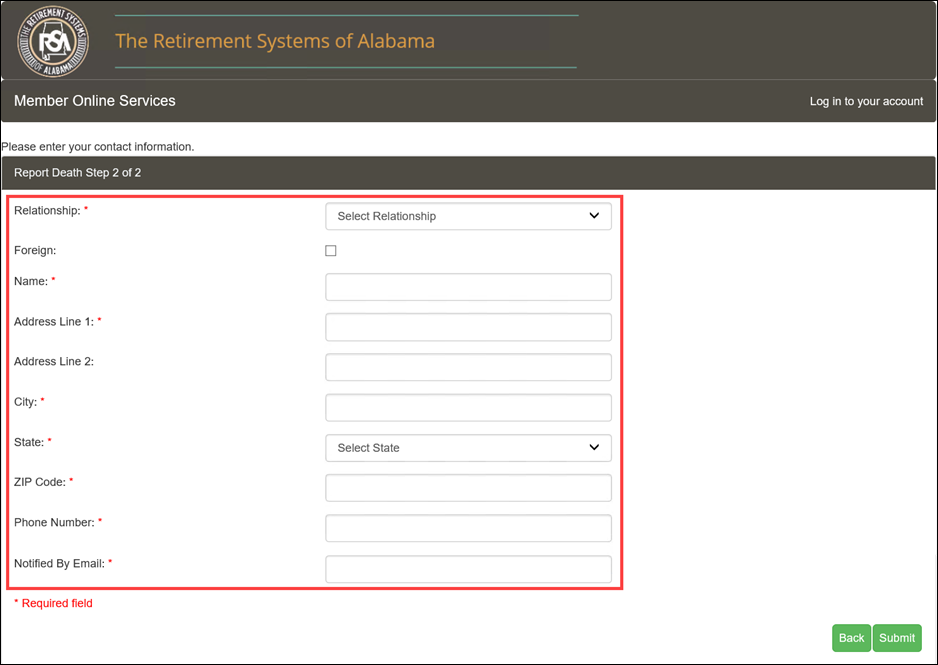
Step 5
-- Click
![]() .
.
Step 6 -- A confirmation window displays. A code is generated and sent to the email address entered in Step 5. Enter that code in the empty field.
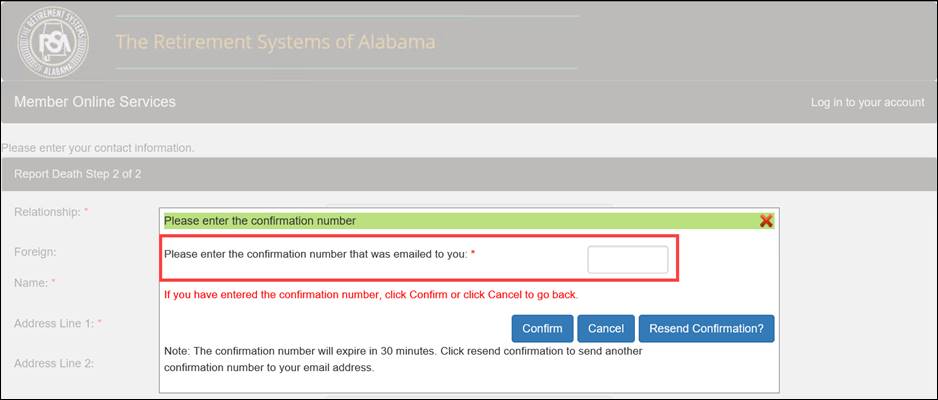
Step 7
-- Click
![]() .
.
Note: At this point, the options to cancel the death confirmation, or have the confirmation code resent are available. Click the respective button to perform either action.
Step 8
-- A
confirmation screen displays. Click ![]() .
Details about the reported death are logged in DPAS and a Death workflow
is generated for a Death Counselor to process.
.
Details about the reported death are logged in DPAS and a Death workflow
is generated for a Death Counselor to process.